Create a parts list
Learn how to use the Table command to create a parts list on a sheet in the Drawing workspace in Fusion.
Create a new parts list
On the toolbar, select Tables > Table
 or Tables > Parts List
  .
.The Table dialog displays.
In the Table dialog, select a table Type:
- Automatic: Automatically creates a parts list or bend table, based on the contents of the current sheet.
- Parts List: Creates a parts list based on an assembly, storyboard, component, or sheet metal component reference.
In the canvas, select a drawing view to associate with the parts list.
The empty parts list displays at the cursor.
In the dialog, select the Structure:
- First Level: Includes first level components only.
- All Levels: Includes all components in the assembly.
Click to place the parts list on the sheet.
The parts list displays on the sheet and is populated with information about the components in the assembly.
Edit a parts list
Double-click the parts list.
The Parts List dialog displays.
Adjust the Structure of the parts list:
- First Level
- All Levels
Adjust the Table Direction:
- Up: Places the header at the bottom and orders rows from bottom up.
- Down: Places the header at the top and orders rows from top down.
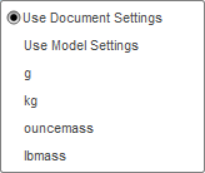
Adjust the way the Units are displayed in the parts list:
Mass: Select the units type.
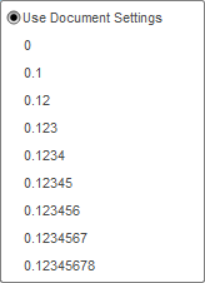
 .
.Mass Precision: Select the precision of the units.

Adjust the display and order of columns in the parts list:
- Check a column to include it.
- Uncheck a column to exclude it.
- Select a column, then click the Up arrow to move it up.
- Select a column, then click the Down arrow to move it down.
Click Close.
Tips
- Place a table on the bottom half of the sheet to flip the column labels to the bottom of the table. The numbered rows are ordered from bottom to top.
- Press the
Shiftkey to lock or unlock the table flipping feature. - In complex assemblies, set the Structure setting to All Levels to display all levels of components in the assembly.
- To change the properties of a component, open the design in the Design workspace. In the browser, right-click the component, select Properties, and edit the properties in the dialog.
- In the Browser, you can right-click an assembly, then click Table to create a parts list.
- Click to select the table, then drag the grey round grips to resize rows and columns.
- Select the table, then click and drag the blue arrow grip to break the table into multiple table sections, or to consolidate multiple sections into a single table section.
- The text size in a parts list matches the text height specified in Document Settings. When the text height is too large to fit in a parts list on a sheet, the text height may scale to a smaller size.
- Use the Balloon command to create additional balloons.