Create a taper and slope symbol
Create a taper and slope symbol in the Drawing workspace in Fusion.
Create a Taper and Slope symbol
Select Symbols > Taper and Slope
 .
.Select the edge of an object as the taper centerline or the slope baseline.
Select the taper or slope object.
Select the location of the start point.
Note: Specify a start point within the extents of the selected edge to create a leader extending straight from the edge. Or, select a start point beyond the extents of the edge to create a surface extension.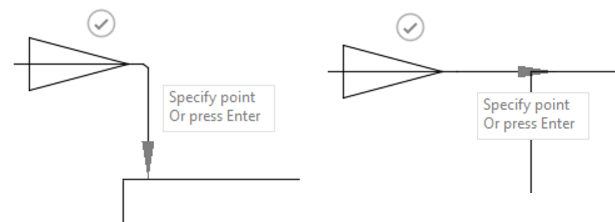
Do one of the following:
Click the check mark or press
Enterto place the taper and slope symbol.Click to create a bend line in the leader, then click the check mark or press
Enterto place the taper and slope.The Taper and Slope dialog displays. The correct symbol type is selected automatically and the dimension value is calculated.
(Optional) In the Taper and Slope dialog, click the More menu next to the Dimension value and change the ratio value to percentage value.
Select OK.
Edit a Taper and Slope symbol
Double-click an existing taper and slope symbol.
The Taper and Slope dialog displays.
Modify the identifier.
Click Close.
Move a Taper and Slope symbol
- Click an existing taper and slope symbol.
- Use the gray grips to move it.