Prepare an AutoCAD DWG title block
You can use a DWG file created in AutoCAD to create a custom title block in Fusion.
Before you do this, you need to ensure the geometry, text, attributes, and images in the DWG file are compatible, so that they will insert smoothly into the Drawing workspace in Fusion.
Model space vs. paper space
In AutoCAD, make sure the title block geometry, text, attributes, and images are all located in model space, not paper space.
WCS origin point
In AutoCAD, make sure the bottom right corner of your title block is located at the WCS origin point (0,0) in model space.
Attribute definitions
Although you can create attributes directly in the Title Block contextual environment, Fusion recognizes AutoCAD attributes, and converts them into Fusion attributes.
In AutoCAD, create attribute definitions in the DWG file.
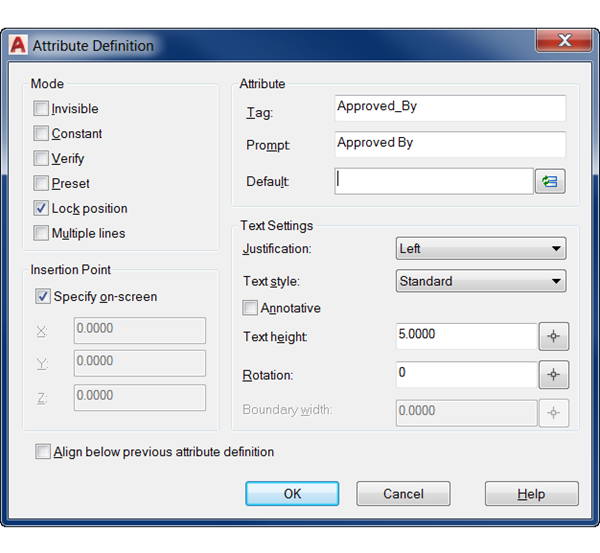
At the command line in AutoCAD, enter the ATTDEF command.
The Attribute Definition dialog displays.

Add a Tag.
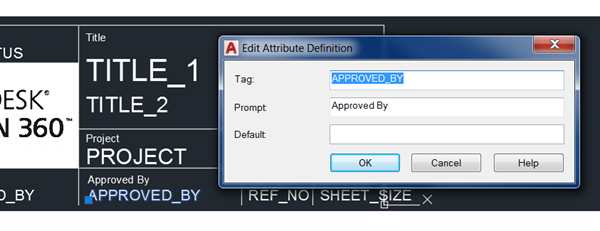
Tags identify the location of the text in the drawing and only display in AutoCAD.
Add a Prompt.
Prompts are the text that displays canvas in Fusion, to identify the attribute.
Add Default text (optional).
Default is the attribute value that displays by default.
Note: The Lock position setting locks the attribute in place so that you cannot move it in the canvas in Fusion. If you uncheck Lock position, you can use grips to move the attribute in the canvas.Place the Tag in the DWG.

Images
In AutoCAD, use the IMAGEATTACH command to include images in your title block.
Border
In AutoCAD, you can create border geometry to include in your Fusion drawing.
- Create geometry and text for the border.
- Set the border size in AutoCAD so that it matches the sheet size in the Fusion drawing.
DWG file name
When you save your DWG file, make sure the file name is unique, and doesn't match the name of any existing title blocks in your Fusion drawing.
Unsupported objects
In AutoCAD, remove any unsupported objects from the DWG file before you use it to create a new title block in Fusion.
The following AutoCAD objects are not supported, even if they are on layers that are frozen or turned off:
- Blocks (including nested blocks and block definitions)
- Fields
- Xrefs
- 3D geometry
- Custom objects (including AEC objects and proxy objects)
- Point clouds
- Geolocation objects
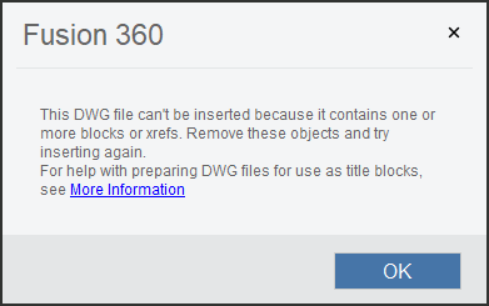
If your DWG file contains any blocks, nested blocks, block definitions, or xrefs, it won't insert. You'll see the following warning message:

Fusion removes any fields, 3D geometry, custom objects, and geoloction objects automatically.
Remove unsupported objects in AutoCAD
In AutoCAD, use the following methods to remove any unsupported objects.
- Use the WBLOCK command to create a block of your DWG and then save that block as a DWG file.
- Turn on and thaw all layers in the DWG file, and delete all unsupported objects from all layers in the DWG file.
- Navigate to the INSERT tab, and ensure there are no blocks or block definitions in the DWG file.
- Use the EXPLODE command to remove all blocks and nested blocks from the DWG file.
- Use the PURGE command to remove all block definitions from the DWG file.