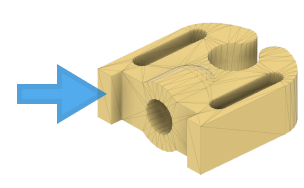
Insert a mesh body
Use the Insert Mesh tool to insert an STL, OBJ, or 3MF file as a mesh body into the active component in a design in Fusion.

In the Design workspace, on the Mesh tab, select Create > Insert Mesh
 .
.The Open dialog displays.
In the dialog, navigate to and select one or more
STL,OBJ, or3MFfiles.Click Open.
The Insert Mesh dialog displays, and a preview of the mesh body displays in the canvas.
In the dialog, select a Unit Type:
- Centimeter: One unit from the original file equals one centimeter.
- Millimeter
- Meter
- Inch
- Foot
Adjust the Position of the mesh body:
- Click Flip Up Direction to flip the direction of the
YandZaxes. - Click Center to center the mesh body on the origin of the active component.
- Click Move To Ground to rest the bottom of the mesh body on the ground plane of the active component.
- In the canvas, drag the distance, planar, or rotation manipulator handles.
- Enter specific Numerical Values for
X,Y, andZDistance and Angle values. - Click Reset to rest the default position values for the mesh body.
- Click Flip Up Direction to flip the direction of the
Click OK.
The file is inserted as a mesh body into the active component and displays in the canvas and the Browser. A Mesh Base Feature displays in the Timeline.

Tips
- Press
Shift+Fto display Mesh Face Groups on mesh bodies. - All of the faces on the mesh body are combined into a single face group. Use Generate Face Groups to generate and refine face groups on the mesh body. Face groups help you control downstream modifications and achieve better results when using Convert Mesh.
- If you insert an
OBJor3MFfile with existing color and texture information, they will display on the mesh body in the canvas. PressShift+Fto hide Mesh Face Groups and display colors and textures instead.- If colors and textures don't display, open the Preferences dialog, then in the Material section, uncheck Apply a different appearance.
- Select multiple files to insert them at the same time. If you select two or more different file types, use Scale Mesh or Move/Copy to adjust their size and position after you insert them.