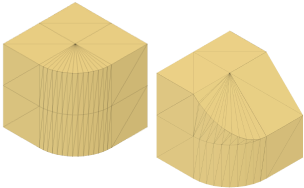
Trim or split a mesh body with a plane
Use the Plane Cut tool to trim or split a mesh body with a plane in Fusion.

In the Design workspace, on the Mesh tab, select Modify > Plane Cut
 .
.The Plane Cut dialog displays.
In the canvas, select a mesh body.
Select a plane or planar face to use as the Cut Plane.
Adjust the location and orientation of the plane:
- In the canvas, drag the distance, planar, or rotation manipulator handles to move the plane.
- In the dialog, specify
X,Y, andZDistance and Angle values.
In the dialog, select the cut Type:
- Trim: Splits mesh faces along the cut plane, then removes one side of the mesh body.
- Click the Flip icon to flip the side of the mesh body that is removed.
- Split Body: Splits mesh faces along the cut plane, then separates the mesh body into two mesh bodies.
- Split Faces: Splits mesh faces along the cut plane and maintains a single mesh body.
- Trim: Splits mesh faces along the cut plane, then removes one side of the mesh body.
For the Trim or Split Body cut types, select a Fill Type:
- No Fill: Does not add mesh faces to close mesh body.
- Uniform: Adds a uniform set of mesh faces to close mesh body.
- Minimal: Adds a minimal number of mesh faces to close mesh body.
Click OK.
The trimmed or split mesh bodies display in the canvas. A Plane Cut feature displays in the Timeline.
Tips
- Use Plane Cut to slice a mesh body along a plane and either trim away one side of the body, split the mesh body into two separate bodies, or slice the mesh faces but leave the mesh body whole.
- Adjust the Fill Type to either leave a mesh open or close the mesh body after you cut it. You can fill the voids that the cut plane leaves behind with either uniform or minimal mesh faces.
- Right-click the feature in the Timeline and select Edit Feature to edit adjust its settings.