Convert a solid body to a mesh body
Use the Tessellate tool to convert an existing solid or surface body into a mesh body in Fusion.
In the Design workspace, on the Mesh tab, select Create > Tessellate
 .
.The Tessellate dialog displays.
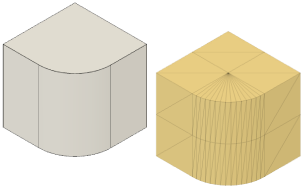
In the canvas, select a solid or surface body to tessellate.
In the dialog, adjust the Refinement settings:
- Refinement Options:
- High: Applies preset values to achieve a high level of refinement.
- Medium: Applies preset values to achieve a medium level of refinement.
- Low: Applies preset values to achieve a low level of refinement.
- Custom: Uses custom values that you specify below.
- Surface Deviation: Specify the maximum distance between the surface of the original body and the mesh body.
- Normal Deviation: Specify the maximum angle between the normal vectors of each face on the mesh body.
- Maximum Edge Length: Specify the maximum length of any face edge on the mesh body.
- Aspect Ratio: Specify the ratio between the height and width of each face edge on the mesh body.
- Refinement Options:
Click OK.
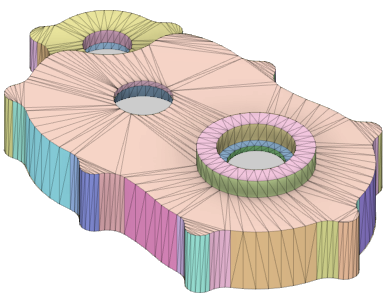
The new mesh body displays in the canvas and in the Browser, in the Bodies folder. A Tessellate feature displays in the Timeline. Face groups are automatically calculated and applied to the mesh body.
Tips
- Check Preview to display a preview of the mesh body in the canvas, as well as a Triangle Count, that updates as you adjust the settings.
- Check Create Quads to create quad faces on the mesh body where possible. You can convert a mesh body with quad faces directly to a T-spline body.
- Right-click the feature in the Timeline and select Edit Feature to edit adjust its settings.