Create a chamfer
Learn how to use the Chamfer tool to bevel edges on a solid body in Fusion.

Click Design > Solid > Modify > Chamfer
 .
.The Chamfer dialog displays.
In the canvas, select edges, faces, or features to chamfer.
The selection set displays as a row in the selection box.
In the dialog, select the chamfer Type:
- Equal Distance: Bevels edges based on an equal distance to each side.
- Two Distance: Bevels edges based on a different distance to each side.
- Distance And Angle: Bevels edges based on a single distance and an angle.
Adjust the Distance or Angle values for the chamfer:
In the canvas, drag the distance or angle manipulator handles.
In the dialog, in the row in the selection box, specify the distance or angle values.
Tip: HoldCtrl(Windows) orCommand(MacOS) to modify the selection set after you adjust the Distance or Angle values.
Optionally, for the Two Distance chamfer type, click Flip
 to flip the first and second sides.
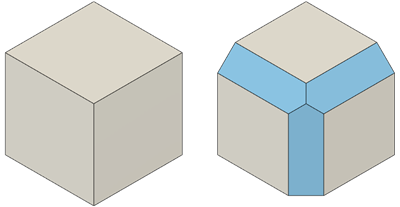
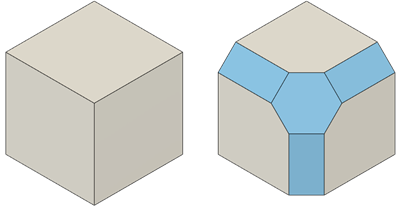
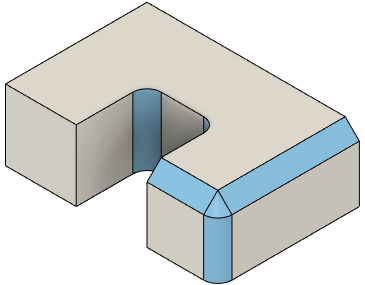
Select a Corner Type:
- Chamfer: Creates a chamfer to join beveled edges at the corner.
- Miter: Merges beveled edges into a mitered corner point.
- Blend: Blends beveled edges into adjacent faces.
Optionally, in the table, click the
+icon to add a selection set to the list. Repeat steps 2-6 to create fillets with different settings than the first selection set.Click OK.
The chamfers display on the solid body in the canvas.
Tips
Hold
Ctrl(Windows) orCommand(MacOS) to modify the selection set once the chamfer tool preview displays on the body in the canvas.Use Tangent Chain to dynamically control selection sets.
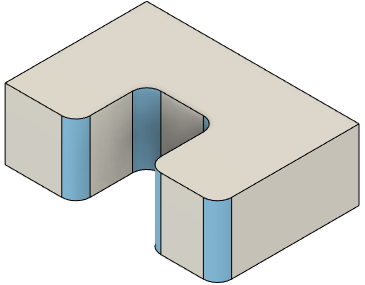
- If you start with a body and a single Fillet operation like this:

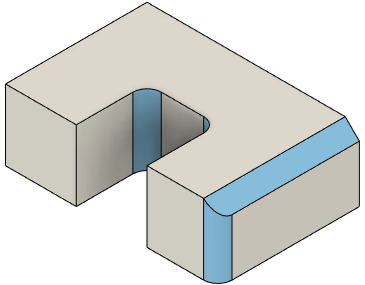
- With Tangent Chain off, you select a single edge at a time, with the following Chamfer result:

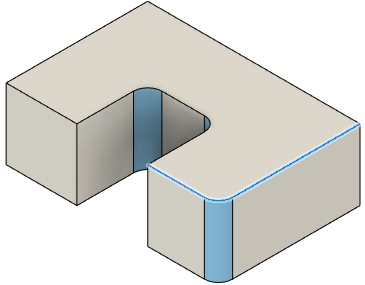
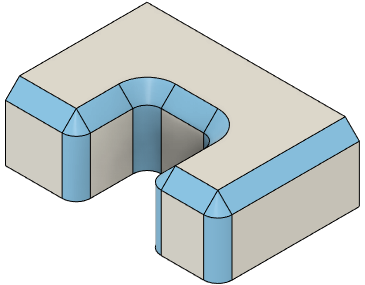
- With Tangent Chain on, you select tangentially connected edges, with the following Chamfer result:
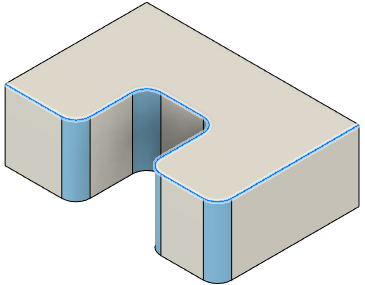
- If you roll back the Timeline and add additional edges to the earlier Fillet operation:

- When you replay the later Chamfer operation, the selection set updates to include new tangentially connected edges, with the following Chamfer result:
Uncheck Tangent Chain to exclude tangentially connected edges when you select edges.