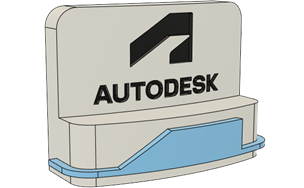
Emboss a solid body
Learn how to use the Emboss tool to emboss or deboss a solid body with sketch profiles in Fusion.
On the toolbar, click Solid > Create > Emboss
 .
.The Emboss dialog displays.
In the canvas, select the Sketch Profiles you want to emboss.
You can select any 2D sketch profile, including text (as long as the font is not a single line font).
On a solid body, select the Faces you want to emboss.
In the dialog, select the Effect:
- Emboss
 : Add material.
 - Deboss
 : Remove material.
- Emboss
Adjust the Depth value for the emboss feature.
- In the canvas, drag the depth manipulator handle.
- Or specify an exact value.
Adjust the Alignment settings to position the emboss feature on the solid body.
- In the canvas, drag the distance and angle manipulator handles.
- Or specify exact values for:
- Horizontal Distance
- Vertical Distance
- Rotation Angle
Click OK.
The Emboss feature displays on the solid body in the canvas and is added to the Timeline.

Tips
- You can use the Emboss tool to wrap text around a solid body, as long as the text doesn't use a single line font.
- In parametric designs, emboss features maintain their link to the original sketch. If you edit the sketch, the emboss features created from that sketch will update to reflect the change.
- If you adjust the depth value from positive to negative, the Effect will automatically change from Emboss to Deboss, and vice versa.
- Uncheck Tangent Chain if you don't want to automatically select tangentially connected geometry.
- Click the Flip Normal icon to flip the normal side of the selected sketch profiles.