Solids from sketches
The following tools in the Design workspace, in the Solid > Create panel, let you create a solid body from a closed sketch profile, open sketch curve, or planar face in Fusion.
You can use the following tools to create a solid body from a sketch:
- Extrude

- Revolve

- Sweep

- Loft

- Rib

- Web

- Emboss

- Boss

- Snap Fit

- Rest

- Lip

You can specify the type of operation you need for your design.
| Operation | Description |
|---|---|
| Combines the new shape with an existing body. | |
| Cuts an area out of an existing body. | |
| Creates a body at the intersection of an existing body and the new body. | |
| Creates a new body in the active component. | |
| Creates a new body in a new component. (Hybrid Design type only) |
Extrude
The Extrude tool adds depth to sketch profiles or faces.
You select an extrusion type, select sketch profiles or faces to extrude, then specify the distance and taper angle. For the Thin Extrude type, specify the wall thickness.

Revolve
The Revolve tool revolves a sketch profile or planar face around an axis.
You select a profile or planar face, then select the axis to revolve around. Optionally, check Project Axis to project the axis to the same plane that the revolved profile is on, or uncheck to keep the axis in its original location.
Sweep
The Sweep tool sweeps a sketch profile, planar face, or solid body along a path to create a new swept body.
Once you specify a sweep type, select geometry to sweep and a path to sweep along. Optionally, select a guide rail or guide surface to control the scale and orientation fo the swept body.
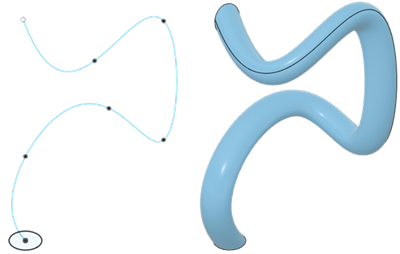
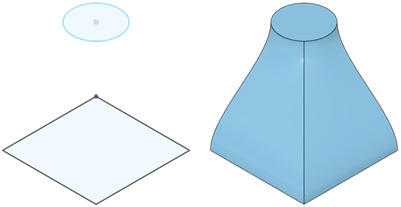
Loft
The Loft tool creates a smooth shape that transitions between two or more sketch profiles or planar faces.
You select a series of profiles or planar faces to loft between. Optionally, select rails or a centerline to guide the shape.
Rib
The Rib tool creates a thin feature from an open sketch profile, extruded to the nearest faces on a solid body.
The rib feature is extruded in a direction parallel to the sketch plane.
You select an open sketch profile, then specify the thickness.
Web
The Web tool creates a thin feature from an open sketch profile, extruded to the nearest faces on a solid body.
The web feature is extruded in a direction perpendicular to the sketch plane.
You select an open sketch profile, then specify the thickness.

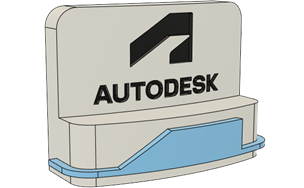
Emboss
The Emboss tool raises or recesses a sketch profile relative to faces on a solid body by a specified depth and direction.
You select sketch profiles, select faces on a solid body to emboss, then adjust depth, effect, and alignment.
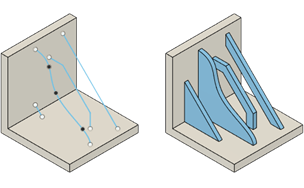
Boss
This feature is part of an extension. Extensions are a flexible way to access additional capabilities in Fusion. Learn more.
The Boss tool creates a boss feature to fasten two solid bodies together and reinforce thin areas of a design.
Select a sketch point between two solid bodies, then adjust the settings for each side of the boss feature and the fastener that will assemble them together.

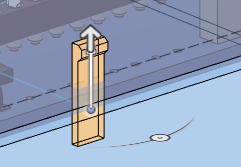
Snap Fit
This feature is part of an extension. Extensions are a flexible way to access additional capabilities in Fusion. Learn more.
The Snap Fit tool creates a cantilever snap fit feature to fasten two solid bodies together in a design.
Select a snap fit type, select a sketch point between two solid bodies, then adjust the settings for the hook, groove, or loop on each side of the snap fit feature.
You can clear the selection set to adjust the Selection Mode: - Automatic: Automatically selects all visible sketch points. - Manual: Lets you manual select each sketch point to create snap fits. Use this if you only want to select some of the sketch points that are visible in the canvas.
When you create multiple snap fit features at once, you can choose whether to control their rotation angles uniformly, independently, or align them to an object.
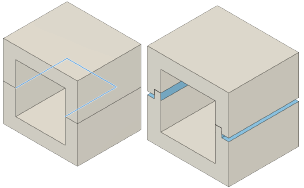
Lip
This feature is part of an extension. Extensions are a flexible way to access additional capabilities in Fusion. Learn more.
The Lip tool creates a lip or groove on a solid body, or creates an interlocking combined feature on a pair of solid bodies.
Select an edge on a solid body then choose between the Lip, Groove, or Lip And Groove types. Select a Guide Type, a Pull Direction or Guide Surface to locate the feature, then adjust the dimension settings. Optionally, select one or two Extents for the feature and choose an Extent Result option.
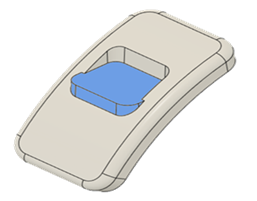
Rest
This feature is part of an extension. Extensions are a flexible way to access additional capabilities in Fusion. Learn more.
The Rest tool creates a rest feature that intersects the overall solid body and forms a flat area that can be used for other features or placement of other components.
Select a closed sketch profile and a solid body, then specify the thickness.