Extrude a solid body
Learn how to use the Extrude tool to create a solid body from a sketch profile or face in Fusion.

On the toolbar, click Solid > Create > Extrude
 .
.The Extrude dialog displays.
In the canvas, select one or more coplanar sketch profiles or planar faces to extrude.
In the dialog, select an extrude Type:
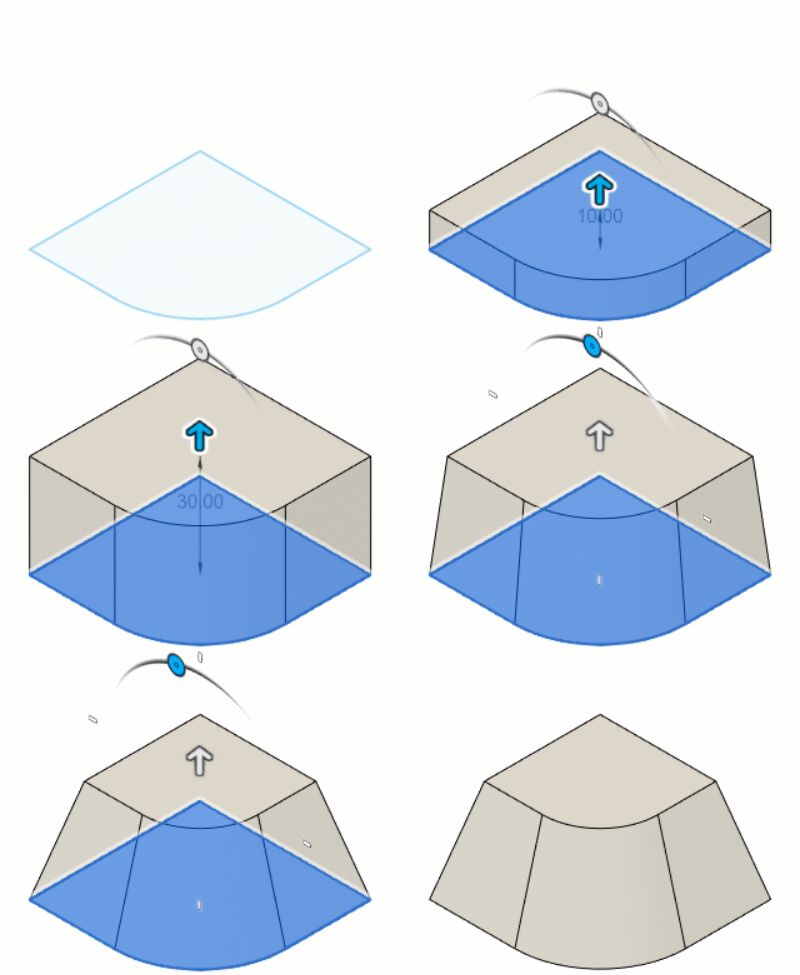
 Extrude: Extrudes the entire area within selected closed profiles.
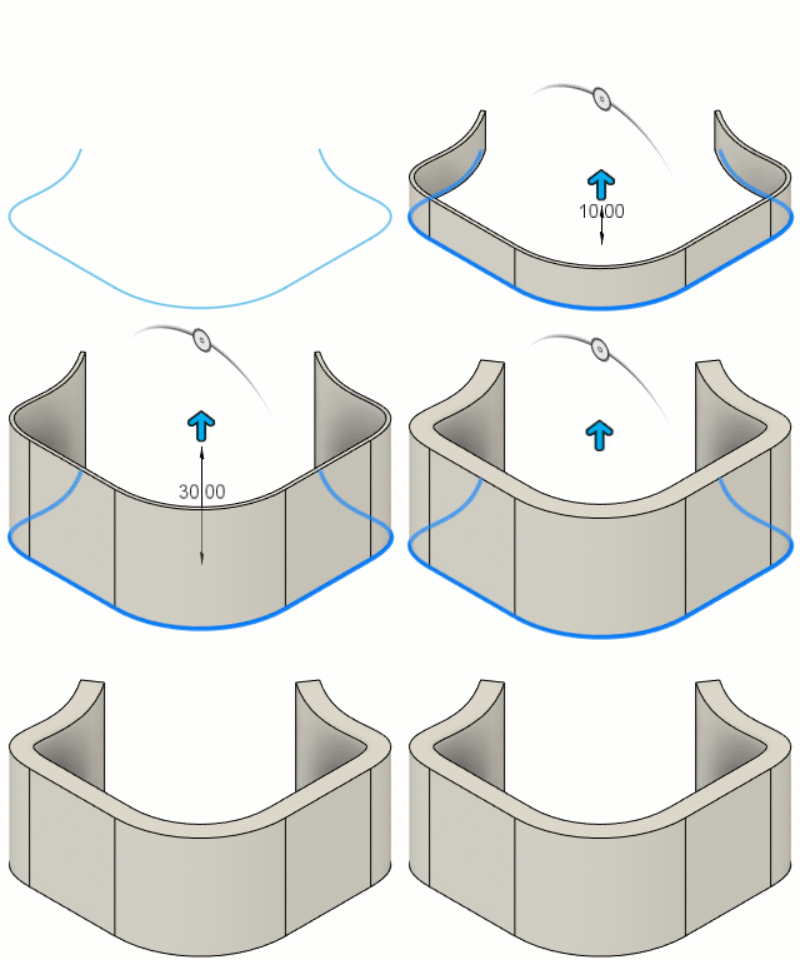
 Thin Extrude: Extrudes a thin wall along selected open or closed profiles.
Select a Start setting, then adjust its associated settings:
 Profile Plane: Starts the extrusion from the profile plane.
 Offset: Starts the extrusion a specified offset distance from the profile plane.
- Specify the distance to Offset the extrusion from the profile plane.
 Object: Starts the extrusion from a face or plane that you select.
- Select a face or plane Object to start the extrusion from.
Select a Direction setting, then adjust its associated settings:
 One Side: Creates an extrusion on one side of the profile plane.
 Two Sides: Creates a unique extrusion on each side of the profile plane.
- Adjust the settings in step 6 independently for each side.
 Symmetric: Creates identical extrusions on each side of the profile plane.
- Select a Measurement type:
 Half Length: Extrudes the specified distance to each side.
 Whole Length: Extrudes half the specified distance to each side.
- Select a Measurement type:
Select an Extent Type, then adjust its associated settings:
 Distance: Extrudes to a distance that you specify.
- Specify the Distance to extrude.
 To Object: Extrudes to a body, face, or plane that you select.
- Select a body, face, or construction Object to extrude to.
- Select an Extend setting to control how the extrusion extends to or through the selected object:
 To Selected Face: Extrudes up to the selected face only.
 To Adjacent Faces: Extrudes up to the selected face and any adjacent faces.
 To Body: Extrudes up to the faces of the selected body.
 Through Body: Extrudes all the way through the selected body.
- Specify the distance to Offset the extrusion from the selected object.
 All: Extrudes through all visible bodies.
Specify the Taper Angle to taper the extrusion.
For the Thin Extrude type, specify the Wall Thickness.
For the Thin Extrude type, specify the Wall Location.
 Side 1: Offsets the extrusion to one side of the profile.
 Side 2: Offsets the extrusion to one side of the profile.
 Center: Centers the extrusion on the profile.
Select an Operation, and adjust its associated settings:
 Join: Combines the new body with an existing body.
 Cut: Removes an area from an existing body.
- Objects to Cut: Check or uncheck objects to cut.
 Intersect: Creates a body at the intersection of an existing body and the new body.
- Objects to Cut: Check or uncheck objects to cut.
 New Body: Creates a new body in the active component.
 New Component: Creates a new body in a new component. (Hybrid Design type only)
Click OK.
The extruded solid body displays in the canvas.

Tips
- Click the Flip icon to flip the extrusion over the selected profile plane.
- Use the Thin Extrude type to extrude a thin feature along an open or closed sketch profile.
- Select the To Object extent type to extend the extrusion up to a face, a set of adjacent faces, up to a body, or all the way through a body.
- Specify an Offset value to maintain a specific distance from the object.
- Use Tangent Chain to dynamically control selection sets for the Thin Extrude type.