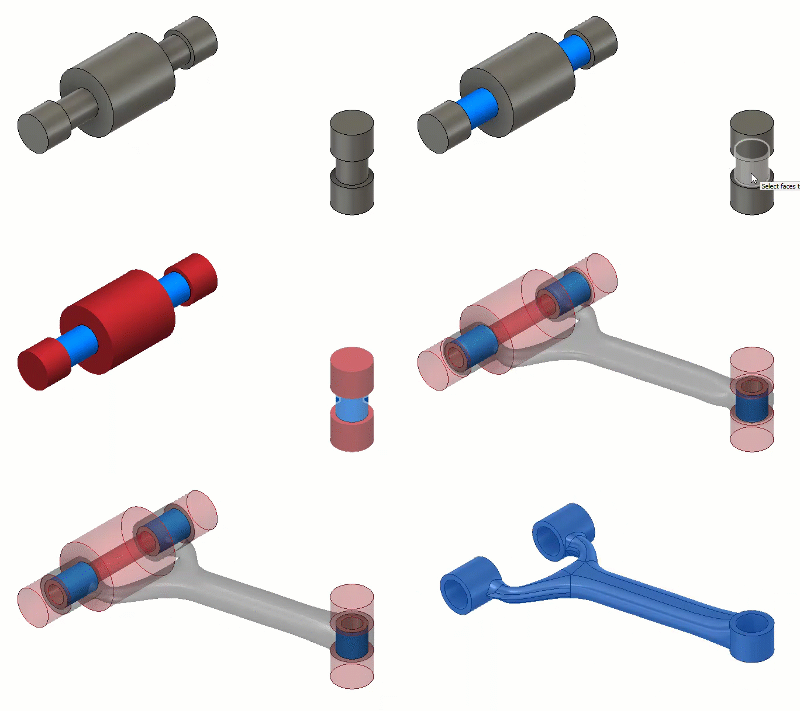
Generate design alternatives
Learn how to use the Automated Modeling tool to automatically generate design alternatives in Fusion.

Generate design alternatives
On the Design workspace toolbar, click Solid > Create > Automated Modeling
 .
.The Automated Modeling dialog displays.
In the canvas, select at least two faces that you want to connect.
Tip: Check out the best practices to generate good-quality design alternatives.Optional, select Bodies to Avoid:
- In the dialog, click Select.
- In the canvas, select solid bodies that you want the new geometry to avoid.
- Select the Opacity field to change the opacity of the selected bodies.
Select an Operation, and adjust its associated settings:
 New Body: Creates a new body in the active component.
 New Component: Creates a new body in a new component.
Click Generate Shapes.
The generation starts and the design alternatives appear in the Alternatives area.
Explore the design alternatives and select the one that best suits your needs.
Important: Generated design alternatives that have not been selected and placed in the design are only available for 14 days. After this time, use the Regenerate Shapes button to generate them again. Additionally, these alternatives are only available to the project owner who generated them. Collaborators accessing the design and editing the Automated Modeling feature need to use the Regenerate Shapes button to see additional design alternatives for the given setup.(Optional) Use the volume slider or appropriate icons to change the volume of the alternative.
Click OK.
The design alternative you selected displays as a solid body in the canvas and in the Browser, nested in the Bodies folder. Additionally, the Automated Modeling
 feature group is added to the Timeline.
Select a different design alternative
In the Timeline, double-click the Automated Modeling
 feature.
The Edit Feature dialog displays.
In the dialog, select a different design alternative.
Click OK.
The new design alternative you selected displays as a solid body in the canvas and in the Browser, nested in the Bodies folder.
Edit a design alternative directly
In the Timeline, right-click the Form
 feature and select Edit.
The Form contextual environment opens.
Use the Form tools to edit the T-Spline body directly.
Click Finish Form.
You exit the Form contextual environment and return to the Design workspace.