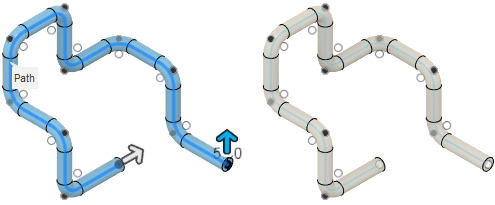
Create a solid pipe
Learn how to use the Pipe tool to create a solid body in the shape of a primitive pipe in Fusion.

On the toolbar, click Solid > Create > Pipe
 .
.The Pipe dialog displays.
In the canvas, select a Path for the pipe to follow.
Drag the Distance manipulator handle along the path in the canvas, or specify an exact percentage value.
Select a Section type:
- Circular: Sweeps a circular section profile along the path.
- Square: Sweeps a square section profile along the path.
- Triangular: Sweeps an equilateral triangular section profile along the path.
Specify the Section Size.
Optionally, check Hollow to hollow the inside of the pipe, then specify the Section Thickness.
Select an Operation, and adjust its associated settings:
 Join: Combines the new body with an existing body.
 Cut: Removes an area from an existing body.
- Objects to Cut: Check or uncheck objects to cut.
 Intersect: Creates a body at the intersection of an existing body and the new body.
- Objects to Cut: Check or uncheck objects to cut.
 New Body: Creates a new body in the active component.
 New Component: Creates a new body in a new component. (Hybrid Design type only)
Click OK.
The solid body displays in the canvas, in the shape of a primitive pipe that follows the path you selected.
Note: You can uncheck Tangent Chain if you do not want to include tangentially connected geometry when you select faces or edges.