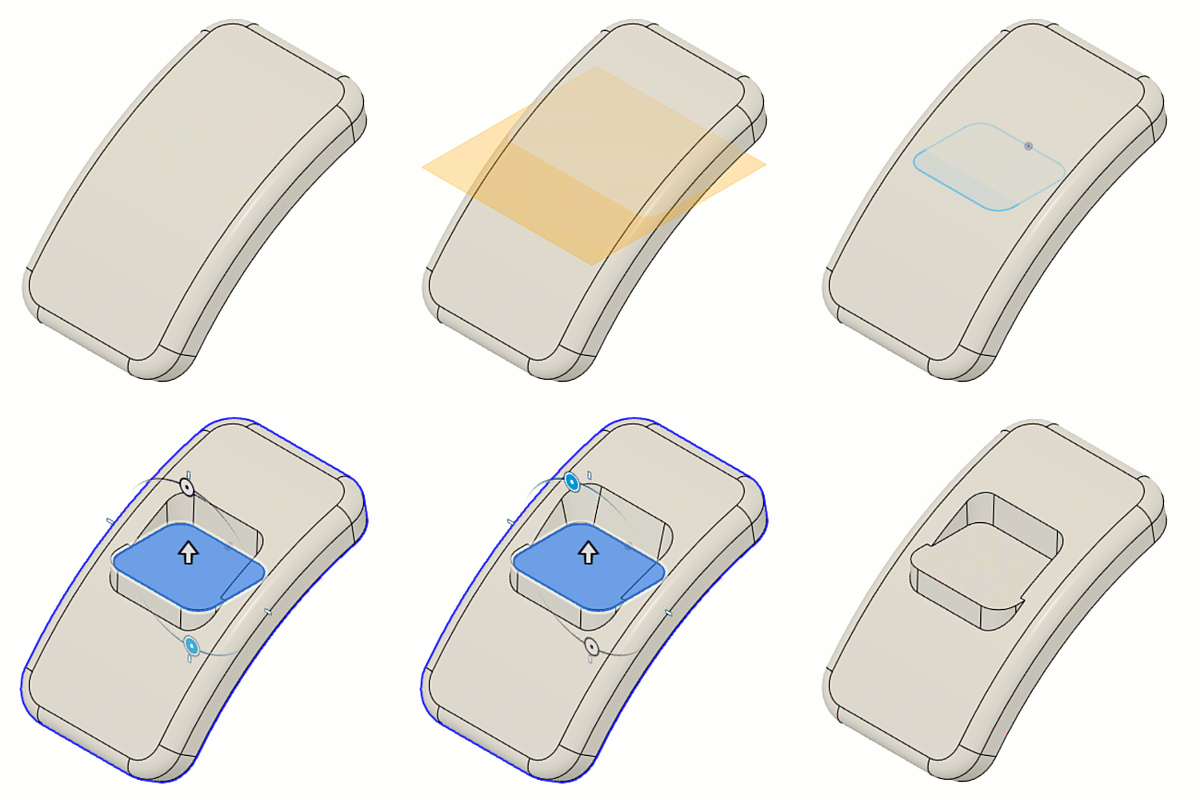
Create a rest
Learn how to use the Rest tool to create a rest feature that intersects the overall solid body and forms a flat area that can be used for other features or placement of other components in a design in Fusion.

This feature is part of an extension. Extensions are a flexible way to access additional capabilities in Fusion. Learn more.
On the toolbar, select Plastic > Create > Rest
 .
.The Rest dialog displays.
In the canvas, select closed sketch profiles and a solid Body to create a rest.
A preview of each rest feature you place displays in the canvas.
Optional: Flip the rest feature over the selected sketch profile.
Specify the distance to Offset the Position of the rest feature from the rest plane.
Specify the Thickness of the rest wall.
Check the Side 1 box to offset the thickness to one side of the sketch profile.
Specify the Draft Angle value for Side 1 of the rest feature.
Check the Side 2 box to offset the thickness to one side of the sketch profile.
Select an Extent Type and adjust its associated settings:
- All: Extrudes the rest through the selected body.
- To Object: Extrudes the rest from the sketch profile to a body, a face, or a plane that you select.
If needed, use the Advanced options to control creation of unwanted holes:
- Top Faces: Select top faces of the solid body to specify areas where the rest feature will be created.
- Trim: Removes an unwanted rest area extending out of the solid body.
Click OK.
The rest feature is created and displays on the solid body in the canvas.
Tips
- Assign a plastic rule to the components that contain the bodies if you want the rest feature to inherit some of its dimensions from the plastic rule.