Revolve a solid body
Learn how to use the Revolve tool to create a solid body in Fusion.
On the toolbar, click Solid > Create > Revolve
 .
.The Revolve dialog displays.
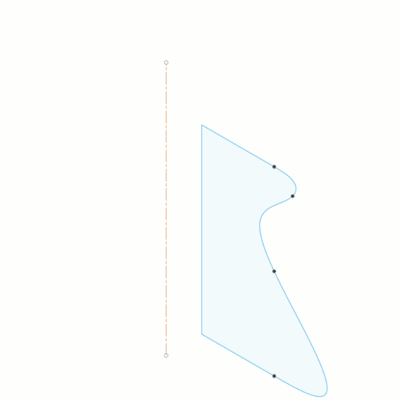
In the canvas, select a coplanar sketch profile or face to revolve.
In the canvas, select a linear sketch curve, edge, cylindrical face, or axis to revolve around.
In the dialog, select an Extent Type setting, and adjust its associated settings:
 Partial: Revolves the profile around the axis to an angle value that you specify.
- Direction: Select a direction setting.
 One Side: Revolves profile on one side of the profile plane.
 Two Sides: Revolves profile on each side of the profile plane.
 Symmetric: Revolves profile symmetrically on each side of the profile plane.
- Angle: Drag the manipulator handle or type a value to specify the angle of revolution.
- Direction: Select a direction setting.
 To Object: Revolves to a body, face, or plane that you select.
- Direction: Select One Side or Two Sides .
- Angle:
(To)Select body, face, plane, or vertex to revolve to.
- Direction: Select One Side
 Full: Revolves the profile 360 degrees around the axis.
Select an Operation type, and adjust its associated settings:
 Join: Combines the new body with an existing body.
 Cut: Removes an area from an existing body.
- Objects to Cut: Check or uncheck objects to cut.
 Intersect: Creates a body at the intersection of an existing body and the new body.
- Objects to Cut: Check or uncheck objects to cut.
 New Body: Creates a new body in the active component.
 New Component: Creates a new body in a new component. (Hybrid Design type only)
Click OK.
The revolved solid body displays in the canvas.
Tips
- Use Project Axis to project the axis to the same plane that the revolved profile is on. Uncheck to keep the axis in its original location.
 |
 |
| Left: Check Project axis | Right: Uncheck Project Axis |