Activity 3: Shell the knife body and divide into components
In this activity, you finish the knife by first shelling the body and then by splitting into multiple bodies. The final step is to convert the bodies into components.

Prerequisites
- The previous activity is complete.
Steps
Shell the inside of the knife body.
From the Design workspace > Solid tab Modify drop-down menu, select Shell.
Select Knife body from the browser. Set the Inside Thickness to 1 mm.
 Note: In the Shell tool, selecting bodies from the browser will only shell the inside of those bodies. Selecting the face of a body shell removes that face and shells the inside.
To finish, click OK.
Split the knife body into two pieces.
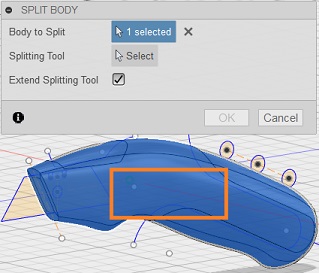
To split the knife body, go to the Modify drop-down menu and select Split body.
Click on Select adjacent to Body to Split, and select Knife body from the browser.

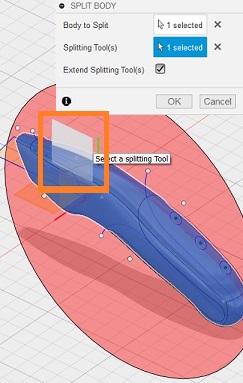
Click on Select adjacent to Splitting Tool(s), and select the plane that cuts down the middle of the knife body. If you have trouble selecting the plane, zoom out until you can see it or hold down the left mouse button to bring up the selection menu and select Work Plane

To finish, click OK.
Convert the bodies to components.
You should now see two knife bodies and two grips in your Bodies folder. In this last step, you convert these bodies into components.
- From the browser, select all four bodies. (Hold shift to enable multiple selections.)
- Right-click and select Create Components from Bodies.
- You can drag the components apart to view the separate knife body parts and grips.
Activity 3 summary
In this activity, you used the Shell tool to modify the solid knife body into a more physically realistic hollow structure. You then split the body into several pieces, and then converted the bodies to components.
