Activity 3: Trim away extraneous surfaces
In this activity, you trim away all the surfaces that are not needed in the final design. You
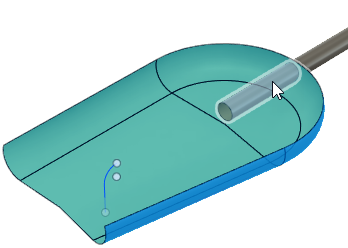
Trim the piece of the shaft that extends into the shovel face
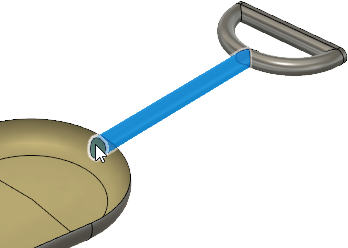
Trim the circular piece of the shovel face, where it meets the shaft
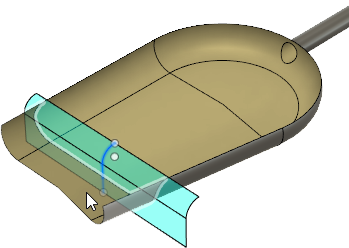
Trim the front edge of the shovel face to shorten the face and create a flat opening.

Shovel surface as created (left), and shovel surfaces trimmed (right)
Prerequisites
- Activity 2 is complete.
Steps
Trim away the stem, where it extends into the shovel face.
- Click
 (Design workspace > Surface tab > Modify panel > Trim) to open the Trim dialog.
 - In the canvas, select the shovel face as the Trim Tool, then click on the piece of the shaft that extends into the shovel face.

- In the Trim dialog, click OK to trim away the excess shaft and close the dialog.
- Click
Trim away the circular bit of the face to punch out the hole where it meets the shaft.
- Click
 (Design workspace > Surface tab > Modify panel > Trim) to open the Trim dialog.
 - In the canvas, select the shaft as the Trim Tool, then click on the circular piece of the face where it meets the shaft.

- In the Trim dialog, click OK to punch out the hole and close the dialog.
- Click
Trim away the front of the face, using the line and arc sketch to shorten the face and create a flat edge.
- Click
 (Design workspace > Surface tab > Modify panel > Trim) to open the Trim dialog.
 - In the canvas, select the sketch at the front of the face as the Trim Tool, then click on the front edge of the face to trim it away.

- In the Trim dialog, click OK to shorten the shovel face and close the dialog.
- Click
Hide the front edge sketch, so it's not in the way.
- In the Browser, expand
 Sketches
 - Click
 next to the
  Sketch2, to hide the sketch.
- In the Browser, expand
Activity 3 summary
In this activity, you trimmed away all the surfaces that are not needed in the final design. You trimmed the
- Piece of the shaft that extends into the shovel face
- Circular piece of the shovel face, where it meets the shaft
- Front edge of the shovel face to shorten the face and create a flat opening.