Create a ruled surface body
Use the Ruled tool to create a ruled surface at a specified distance and angle from selected edges in Fusion.
Click Design > Surface > Create > Ruled
 .
.The Ruled dialog displays.
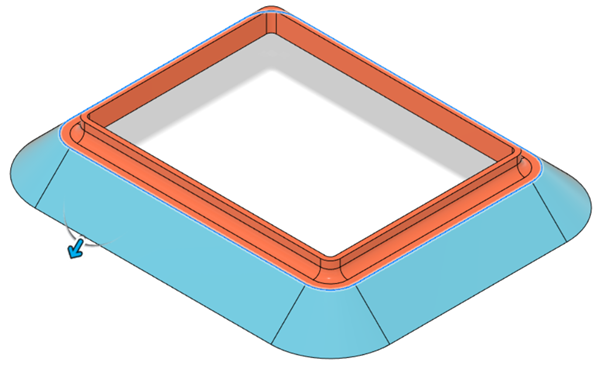
Select edges on a solid body, surface body, or sketch to extend the ruled surface from.
On the Feature tab in the Ruled dialog, select the ruled surface type:
- Normal: Creates a ruled surface normal to the face of the selected edges.
- Tangent: Creates a ruled surface tangent to the face of the selected edges.
- Direction: Creates a ruled surface in a direction that you select.
Specify the Distance and Angle to extend the ruled surface:
- Use the distance and angle manipulator handles in the canvas.
- Enter exact values in the dialog.
Select an Operation:
- New Body
- New Component
Optional: On the Analysis tab, select an Analysis Type to analyze the previewed result in context:
None: Displays no analysis.
Zebra: Displays alternating black and white stripes on a body to help you analyze surface curvature.
Curvature Map: Displays a color gradient on a body to help you analyze areas of high and low surface curvature.
Isocurve Analysis: Applies UV mapping and curvature combs to help you analyze the quality of the surface curvature.

Click OK.
The ruled surface body displays in the canvas.
Tips
- Use Tangent Chain to dynamically control selection sets.
- Check Mitered Corners if you want to create sharp corners instead of rounded corners.
- Check Alternate Faces to flip the direction or angle when edges share more than one face.