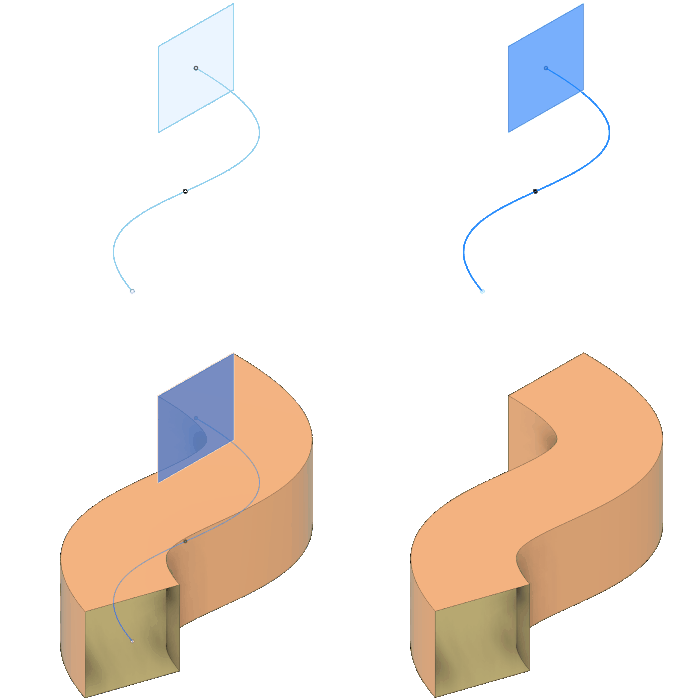
Sweep a surface body
Learn how to use the Sweep tool to create a surface body in Fusion.

Click Design > Surface > Create > Sweep
 .
.The Sweep dialog displays.
On the Feature tab in the in the Sweep dialog, select one of the 3 Type settings:
- Single Path: Sweeps the selected profile along the path.
- Path + Guide Rail: Sweeps the selected profile along the path and uses the guide rail to control scale and orientation of the swept geometry.
- Path + Guide Surface: Sweeps the selected profile along the path and uses the guide surface to control scale and orientation of the swept geometry.
Select geometry:
- Profile: Select a sketch profile, sketch curve, or planar face to sweep.
- Path: Select a sketch curve or edge to sweep along.
- Guide Rail: For a Path + Guide Rail sweep, select a guide rail.
- Guide Surface: For a Path + Guide Surface sweep, select a guide surface.
Use the manipulator handles in the canvas, or enter exact values, to adjust path settings:
- Single Path
- Distance: Specify the percentage of the path length to sweep.
- Orientation
- Perpendicular
- Taper Angle: Specify the angle to taper the sweep away from the path.
- Twist Angle: Specify the angle to twist the sweep around the path.
- Parallel
- Perpendicular
- Path + Guide Rail
- Extent
- Perpendicular to Path
- Distance
- Full Extents
- Path Distance: Specify the percentage of the path length to sweep.
- Guide Rail Distance: Specify the percentage of the guide rail distance to sweep.
- Perpendicular to Path
- Profile Scaling: Controls the scale and orientation based on the guide rail.
- Scale: Use path - guide rail distance to scale profile in both X and Y directions.
- Stretch: Use path - guide rail distance to scale profile in X (stretches profile between rails while maintaining height).
- None: Does not scale profile along sweep; just use guide rail as a orientation guide.
- Extent
- Path + Guide Surface
- Distance
- Single Path
Select an Orientation type:
- Perpendicular: Orients the swept body perpendicular to the path.
- Parallel: Orients the swept body parallel to the path.
Select an Operation from the dropdown menu, and adjust its associated settings:
- New Body
- New Component (Hybrid Design type only)
Optional: On the Analysis tab, select an Analysis Type to analyze the previewed result in context:
None: Displays no analysis.
Zebra: Displays alternating black and white stripes on a body to help you analyze surface curvature.
Curvature Map: Displays a color gradient on a body to help you analyze areas of high and low surface curvature.
Isocurve Analysis: Applies UV mapping and curvature combs to help you analyze the quality of the surface curvature.

Click OK to finish.
The swept surface body displays in the canvas.
Tips
- Uncheck Chaining to select single edges without selecting its adjacent edges.