Create a T-Spline plane
Learn how to use the Plane tool to create a T-Spline body in the shape plane in Fusion.

In the Design workspace, Form contextual environment, select Create > Plane
 .
.The Plane dialog displays.
In the Plane dialog, select a Rectangle Type:
- Center: Specify a center point and one corner.
- 2-Point: Specify two opposite corners.
In the canvas, select a plane or planar face.
Draw a rectangle on the plane.
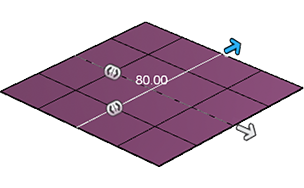
A preview of the T-Spline body displays in the canvas.
Specify the Length and Width of the plane:
- Drag the distance manipulator handles in the canvas.
- Enter exact values in the dialog.
Specify the number of Length Faces and Width Faces on the plane:
- Drag the quantity manipulator handles in the canvas.
- Enter exact values in the dialog.
Select a Symmetry option:
- None
- Mirror: Adds mirror symmetry to the plane for future edits.
- Length Symmetry: Mirrors along the X axis.
- Width Symmetry: Mirrors along the Z axis.
Select an Operation option:
- New Body
- New Component (Direct Modeling mode only)
Click OK.
The plane displays in the canvas.