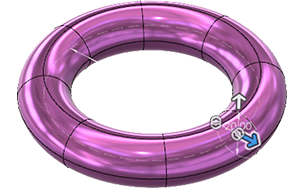
Create a T-Spline torus
Learn how to use the Torus tool to create a T-Spline body in the shape of a primitive torus in Fusion.

In the Design workspace, Form contextual environment, select Create > Torus
 .
.The Torus dialog displays.
In the canvas, select a plane or planar face.
Click to place a center point on the plane.
Click or enter an exact value to specify the inner Diameter 1 of the torus.
A preview of the T-Spline body displays in the canvas.
Specify Diameter 2 to determine size of the ring section of the torus:
- Drag the distance manipulator handle in the canvas.
- Enter an exact value in the dialog.
Specify the number of Diameter 1 Faces and Diameter 2 Faces on the torus:
- Drag the quantity manipulator handles in the canvas.
- Enter exact values in the dialog.
Select a Symmetry option:
- None
- Mirror: Adds mirror symmetry to the torus for future edits.
- Length Symmetry: Mirrors along the X axis.
- Width Symmetry: Mirrors along the Z axis.
- Height Symmetry: Mirrors along the Y axis.
- Circular: Adds circular symmetry to the torus for future edits.
- Symmetric Faces: Specify the number of symmetric faces around the axis of the torus.
Select an Operation option:
- New Body
- New Component (Direct Modeling mode only)
Click OK.
The torus primitive displays in the canvas.