Duplicate a T-Spline body around an axis
Learn how to use the Circular - Duplicate tool to create duplicates of a T-Spline body around an axis in Fusion.

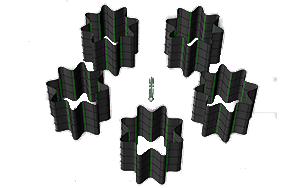
Add circular symmetry between multiple T-Spline surfaces
In the Design workspace, Form contextual environment, select Symmetry > Circular - Duplicate
 .
.The Circular - Duplicate dialog displays.
Select a T-Spline body.
Select a linear object to define the Axis to revolve the duplicates around.
In the Circular - Duplicate dialog, specify the Quantity of duplicates to create.
Click OK.
Duplicates of the body display in the canvas, identical to the original, revolved around the axis of symmetry. Any changes you make to one copy are reflected in the other copies.
Add circular symmetry to a T-Spline body by duplicating one segment
- Identify the faces that you want to duplicate. Select all the other faces on the model and delete them.
- Select Symmetry > Circular - Duplicate.
- Select the T-Spline surface and the axis.
- In the Circular - Duplicate dialog, select the number of duplicates needed to form the complete body, then select OK.
The green lines show that there is radial symmetry around them.
Remove symmetry from a T-Spline body
Select a body and select Symmetry > Clear Symmetry.
Tips
- Faces are welded together if they are within the weld tolerance.
- Use Clear Symmetry to remove the link between surfaces.