T-Spline symmetry
The tools in the Design workspace, Form contextual environment, on the Symmetry panel let you add symmetry to T-Spline bodies in Fusion.
You can use the following tools to add symmetry to a T-Spline body:
- Mirror - Internal

- Circular - Internal

- Mirror - Duplicate

- Circular - Duplicate

- Clear Symmetry

- Isolate Symmetry

Mirror - Internal
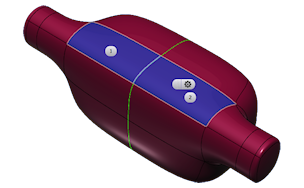
The Mirror - Internal tool creates mirror symmetry within the geometry of a T-Spline body.
You select a face on each side of the body, then edges, then vertices. Green symmetry lines display on the body in the canvas.

Circular - Internal
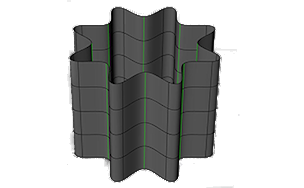
The Circular - Internal tool creates circular symmetry within the geometry of a T-Spline body.
You select a face on the body, then specify the number of symmetry lines. Green symmetry lines display on the body in the canvas.
The possible areas of symmetry are calculated automatically based on the selected face and the body.

Mirror - Duplicate
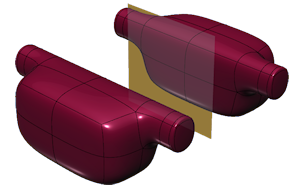
The Mirror - Duplicate tool creates a duplicate T-Spline body mirrored across a plane.
You select a T-Spline body, then select a mirror plane. Any changes you make to one copy are reflected in the other copy.
You can also check the Weld option and set a Toleranace to join the T-Spline bodies where they intersect.

Circular - Duplicate
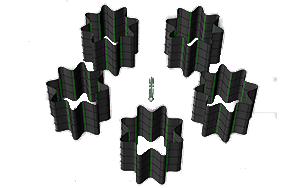
The Circular - Duplicate tool creates duplicates of a T-Spline body around an axis.
You select a T-Spline body, then an axis to revolve the duplicates around. Any changes you make to one copy are reflected in the other copies.
You can also check the Weld option and set a Toleranace to join the T-Spline bodies where they intersect.

Clear Symmetry
The Clear Symmetry tool removes symmetric constraints from one or more T-Spline bodies.
Isolate Symmetry
The Isolate Symmetry tool prevents symmetric constraints from being applied to specific faces, edges, or vertices on a T-Spline body.
You select the faces, edges, or vertices to isolate. Isolated faces display red on the body in the canvas.