Activity 1: Create T-Spline forms using the Box and Revolve tools
In this activity, you:
- Create a T-Spline form using the Box tool.
- Create a T-Spline form using the Revolve tool.
Prerequisites
- Basic Training> 03 - Sculpting> 03_Sculpting_Introduction.f3d
Steps
In the Design workspace, on the Solid tab, select Create Form to access the Form tools.
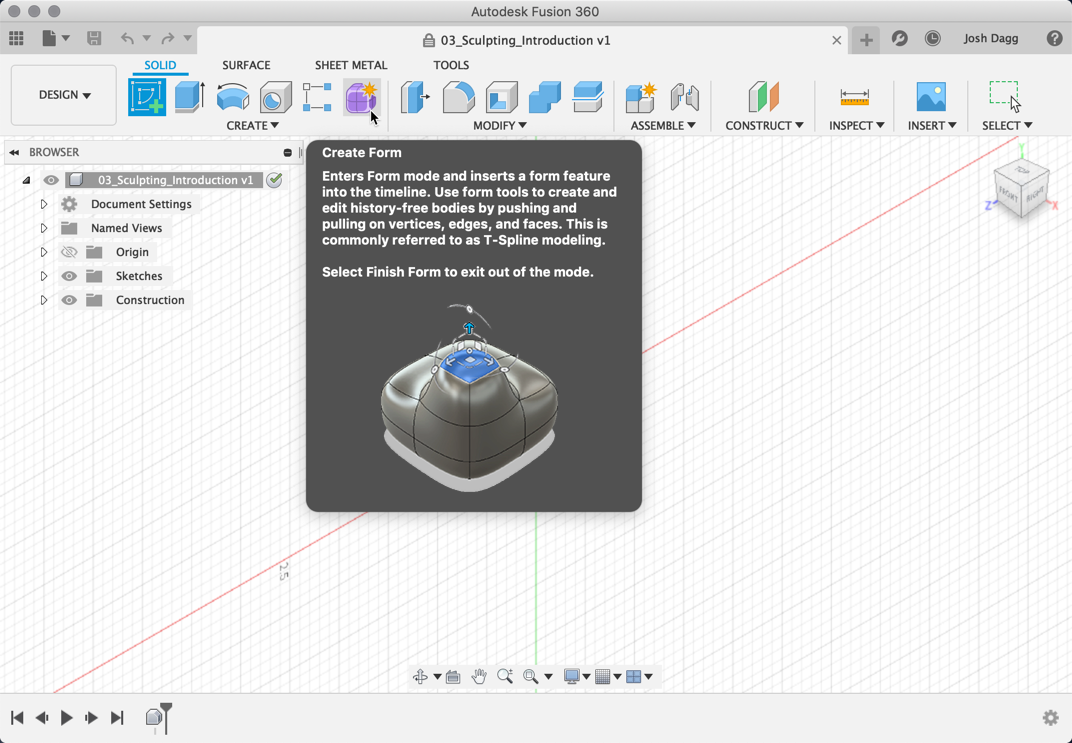
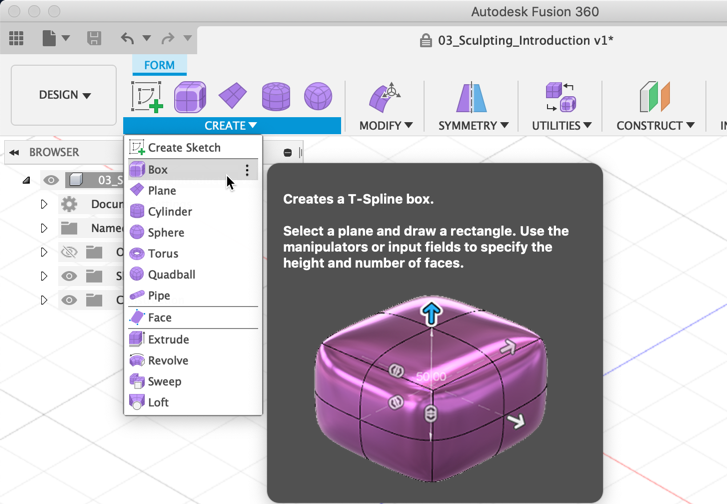
Select the Box tool.
- Select the Create drop-down to expand the list of tools.
- Select Box to create a T-Spline box.
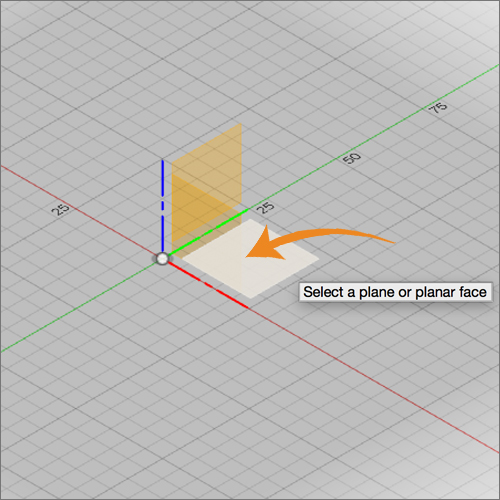
Postion the box by selecting a plane and the origin and creating the initial box. When you create a new primitive, you first need to indicate which plane you want to build on and then enter the dimensions of the primitive.
- Select the bottom plane.
- Select the origin to specify the center point of the box 2D profile.
- Drag the mouse and click on the plane again to specify the initial size of the rectangle.
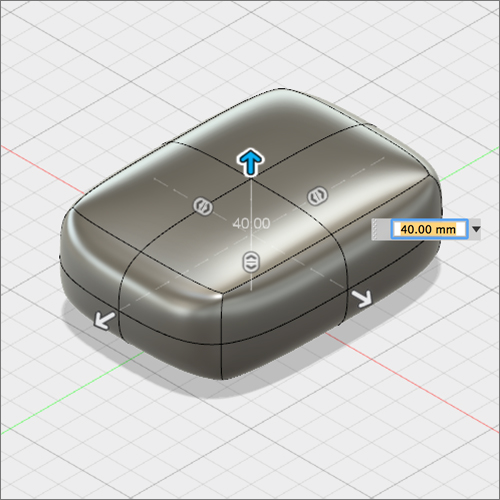
Set the length of the box to 175 mm, the width of the box to 150 mm, and the height to 75 mm.
- In the Box dialog, set the length to 175 mm and the width to 150 mm
- Drag the arrow pointing up from the box and set the height equal to 75 mm.
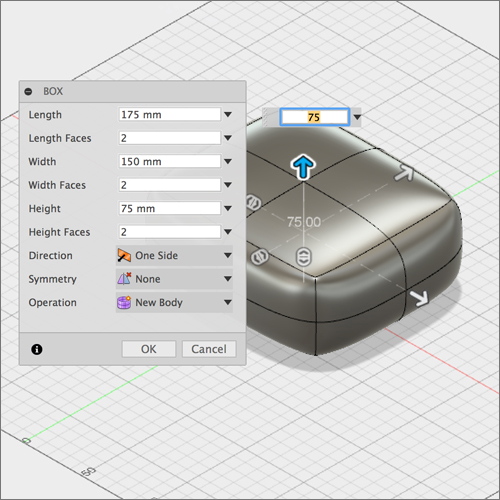
Increase the number of length faces to 3 and the number of width faces to 3.
- In the Box dialog, set Length Faces to 3.
- To set the width faces, drag the double-headed arrow manipulator on the box primitive up until it equals 3.
- Select OK to complete the box primitive setup.
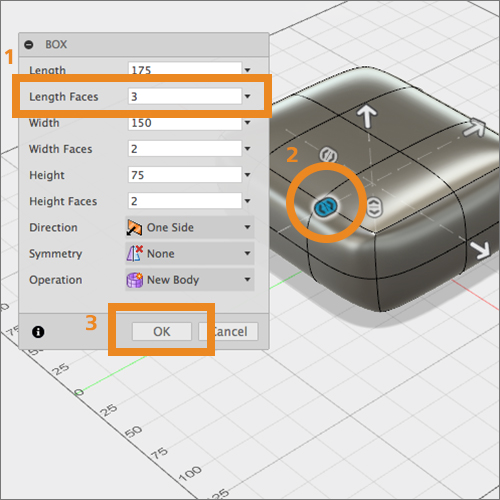
To indicate that you are done creating T-Spline forms for the moment, select Finish Form at the end of the Form toolbar to return to the top level of the Design workspace.

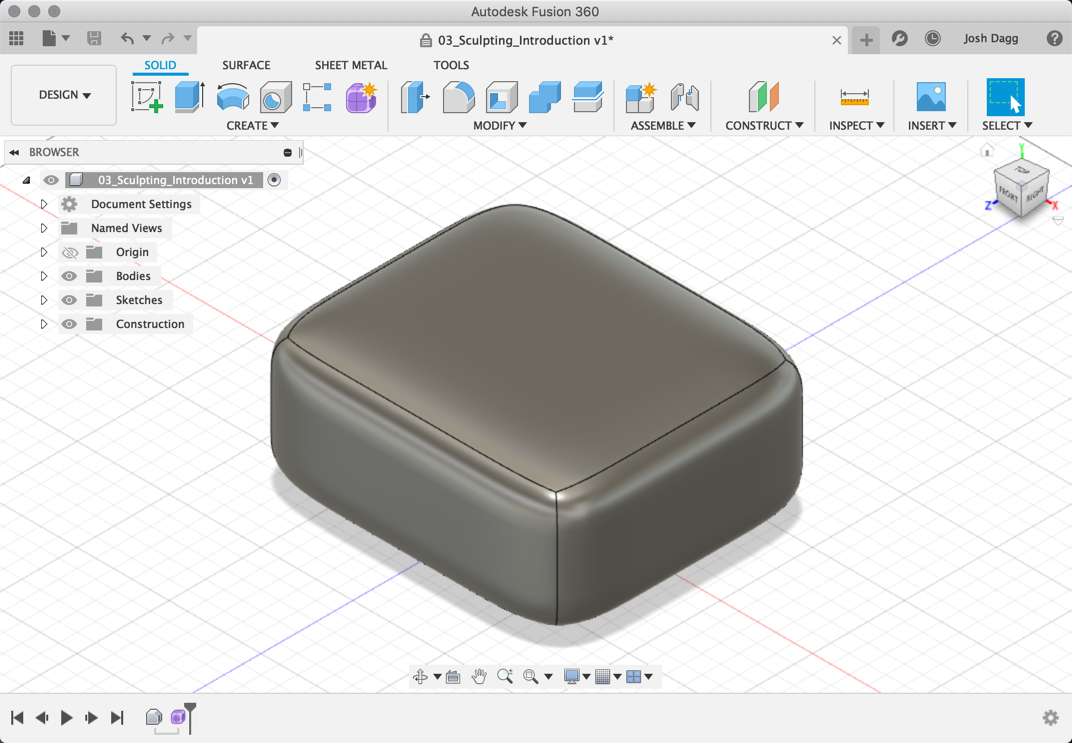
The T-Spline box is converted to a solid body and you are brought back to the Design workspace.
Note:If you create a closed T-Spline form, it is converted to a solid body when you select Finish Form. If you create an open T-Spline form, for example a T-Spline Plane, it is converted to a surface body when you select Finish Form.
Turn off the visibility of the box form and turn on the visibility of the Revolve sketch.
- In the Browser, select the drop-down arrow next to the Bodies folder.
- Select the eye icon next to Body1 to turn off the visibility of the form.
- In the Sketches folder, select the eye icon next to Revolve to turn on the visibility of the sketch.
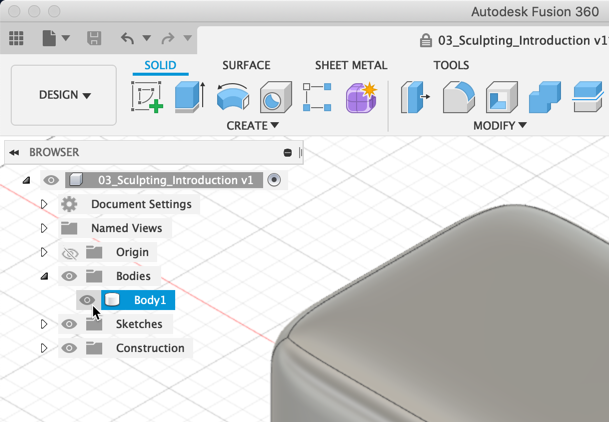
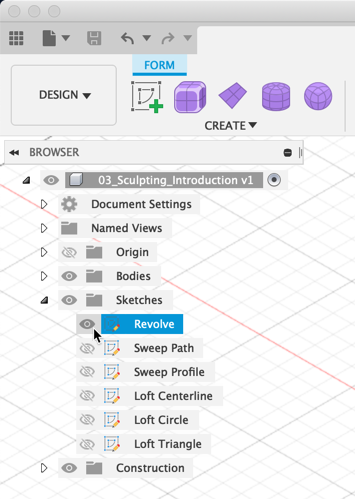
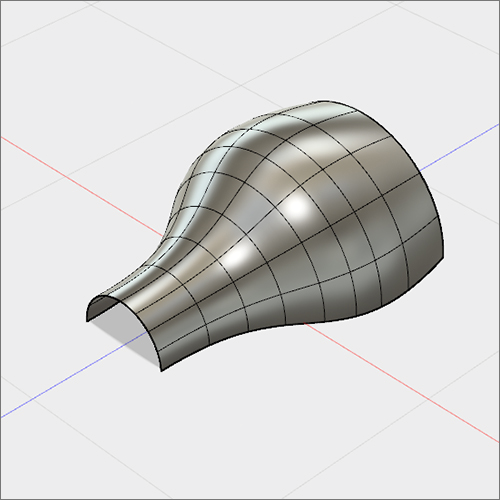
Revolve a T-Spline using the sketch curve as input. The Revolve tool creates a form by rotating 2D geometry about a fixed axis.
- Select Create Form.
- Select Create > Revolve.
- Select the sketch curve to identify it as the Profile curve to be revolved.
- In the dialog, select the Axis selector to pick the axis around which you will revolve the sketched curve.
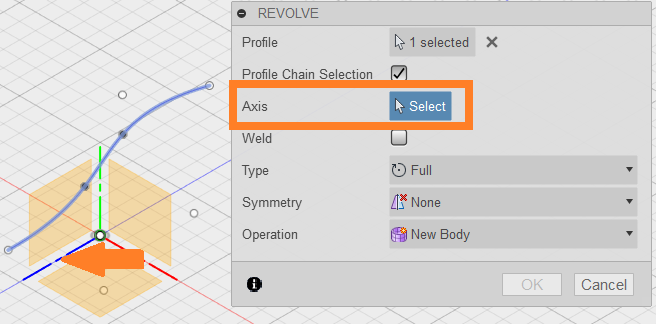
- Select the blue axis. A T-Spline form is revolved 360 degrees around the blue axis.
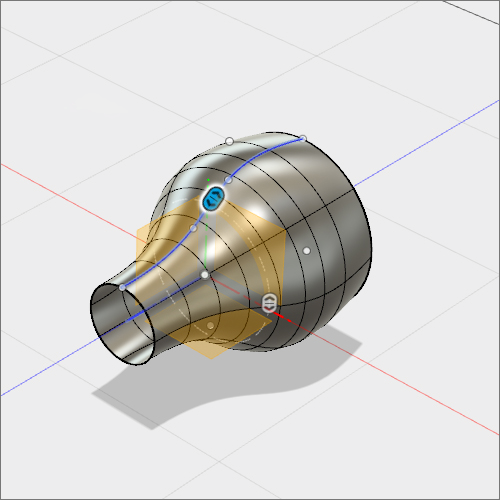
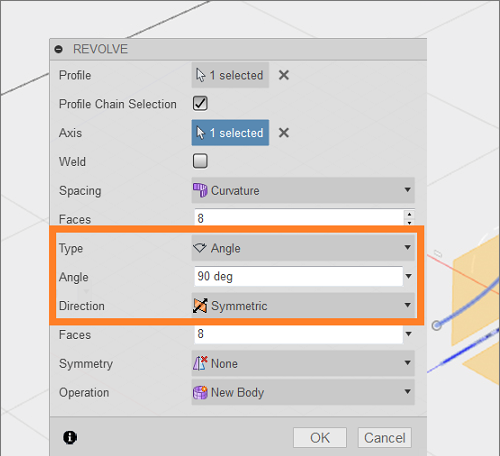
Change the settings to 90 degrees and Symmetric.
- In the Revolve dialog, change the Type from Full to Angle
- Enter 90 degrees for the Angle field.
- Change the Direction from One Side to Symmetric.
- Select OK.
- Select Finish Form to return to the Model workspace.
Activity 1 summary
In this activity, you:
- Used the Box tool to create a T-Spline form.
- Used the Revolve tool to create a T-Spline form.