Activity 3: Modify a T-Spline form
The power of T-Splines is that it allows for freeform manipulation of shapes by moving, rotating and scaling vertices, edges, and faces of a T-Spline surface. The most common tool you will use to do this is Edit Form. You can also add and remove faces in your forms to get detail where you need it without making the entire form overly complex.
In this activity, you:
- Move, rotate and scale T-Spline geometry with Edit Form.
- Add geometry to a T-Spline body with Edit Form.
Prerequisites
- Basic Training > 03 - Sculpting > 03_Sculpting_Introduction.f3d
- Complete Activity 1: Create a T-Spline box and a T-Spline form using the Revolve tool
- Complete Activity 2: Create T-Spline forms using the Sweep and Loft tools
Steps
Hide the previously created loft body, Body 4 (1), and turn on the visibility of the T-Spline box created in Activity 1.
- In the browser, turn off visibility for Body 4 (1).
- Turn off visibility for the three Loft sketches.
- Turn on visibility for Body1.
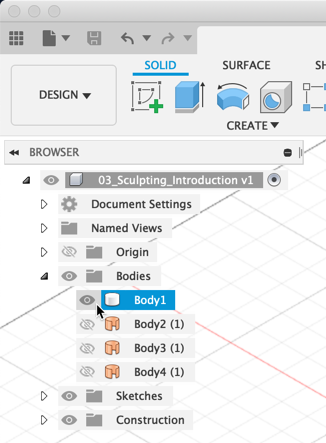
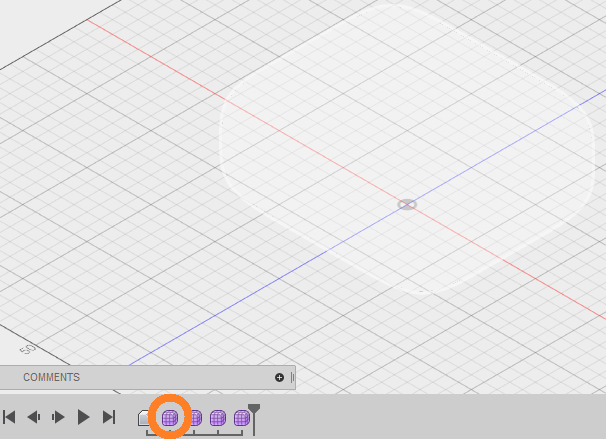
Locate the T-Spline shape to edit in the timeline.
- In the parametric timeline at the bottom of the canvas, locate the four T-Spline form icons.
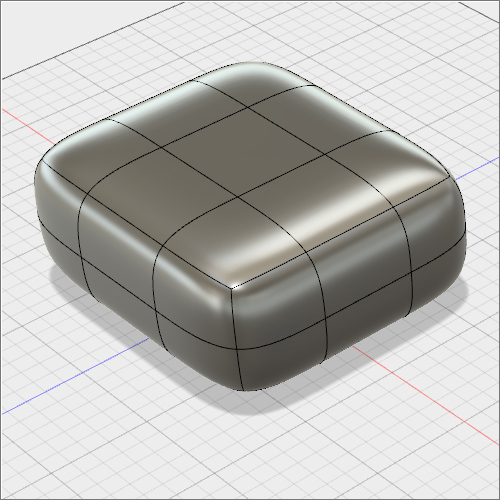
- Move the pointer over the first form icon and notice that the primitive box is highlighted in the canvas.
- Right-click on the form icon in the timeline and select Edit.
 Note:
Note:T-Spline operations are not recorded in history in the same way that solid and surface operations are. However, you can go back in history and make adjustments to your T-Spline shapes and those changes will be recomputed in the history of your model when you select Finish Form.
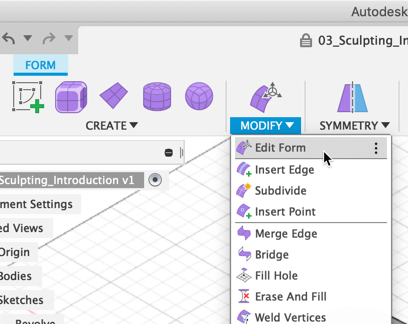
Start the Edit Form tool. The Edit Form tool is used to directly manipulate Faces, Edges, and Vertices.
- Click Modify > Edit Form.
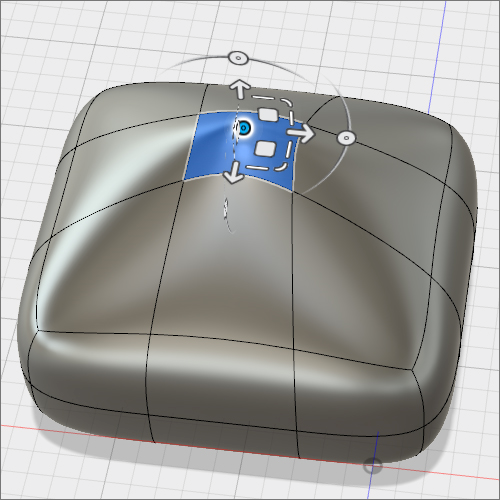
- Select the top face located at one of the corners of the box. The manipulator displays on the face with an assortment of tools.
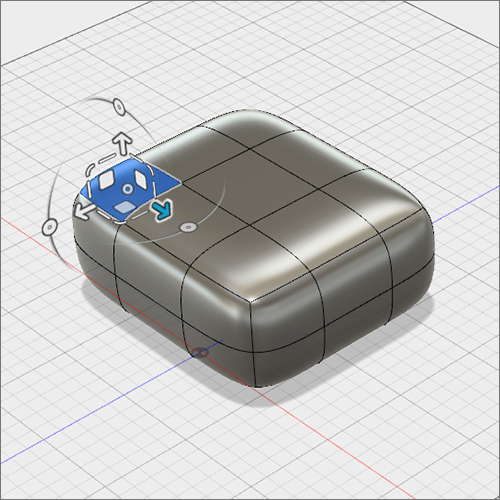 Note:
Note:Directly manipulating a face creates the greatest changes in your form, while manipulating a single vertex results in smaller changes.
Drag the up-arrow on the manipulator 30 mm along the Y-axis to move the selected face.
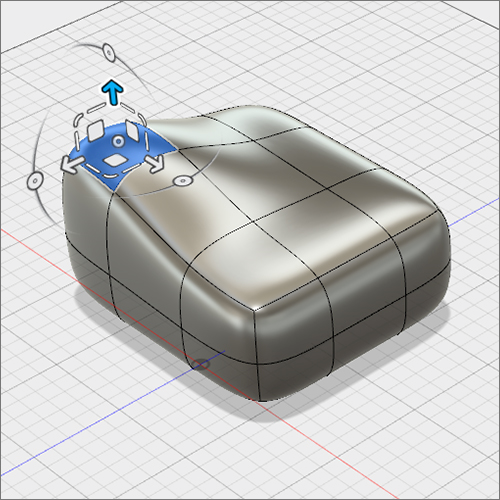 Note:
Note:When you move a face on a surface, the surrounding faces move to maintain continuity.
Drag one of the white squares on the manipulator to translate the selected face on a plane parallel to a given plane in world space.
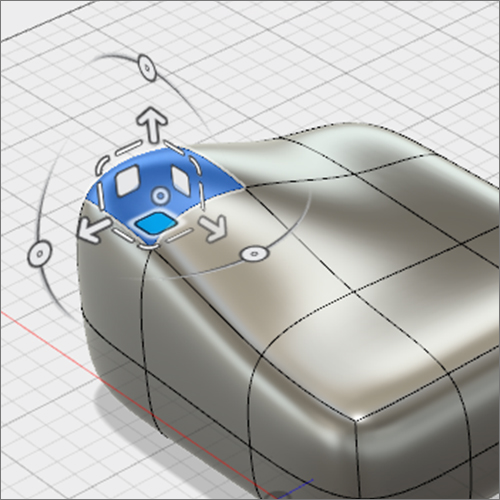 Note:
Note:By default, the Edit Form manipulator uses the World Space coordinates. You can also use View Space (based on the camera view), Selection Space, and Local Space (based on the normal direction of the surface). These can be changed in the Coordinate options in Edit Form.
Move a T-Spline edge and a vertex and compare the result to moving a face.
- Select a single edge and use any of the translate manipulators to see how it differs from moving a face.
- Select a single vertex and translate it to see how this creates more subtle changes.
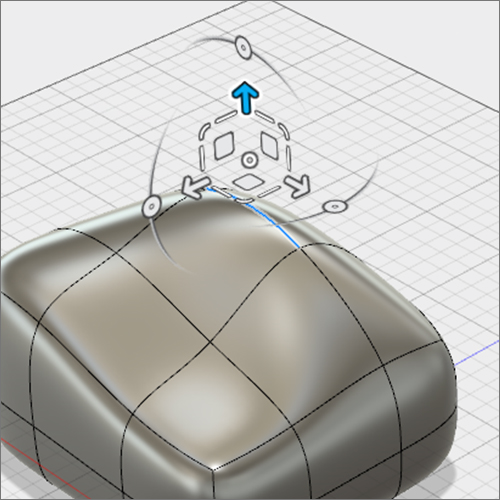
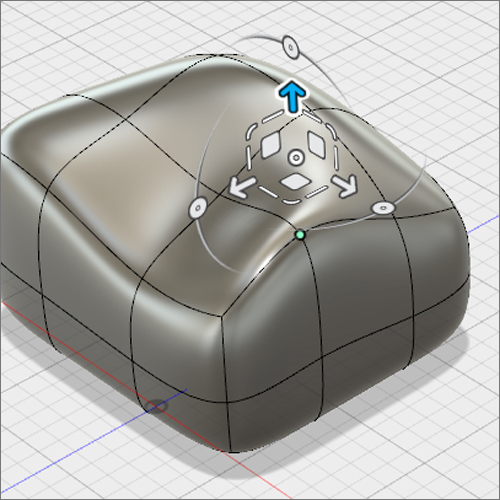
Select a face and drag one of the circular arcs to rotate the selected geometry about a single axis.
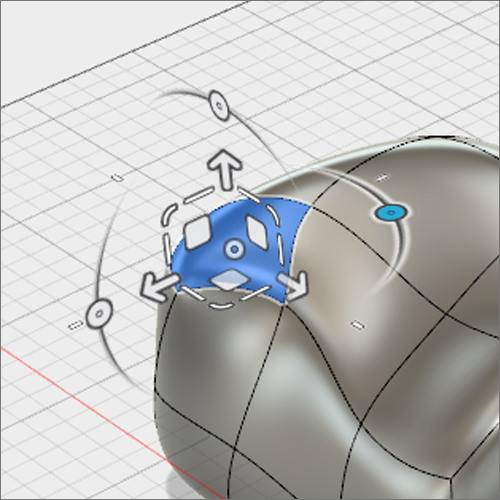 Note:
Note:Be careful not to rotate geometry too far, as self-intersecting faces (geometry that twists through itself) results in the form not converting into a solid body.
Select a face and drag one of the straight lines to scale the selected face in one direction.
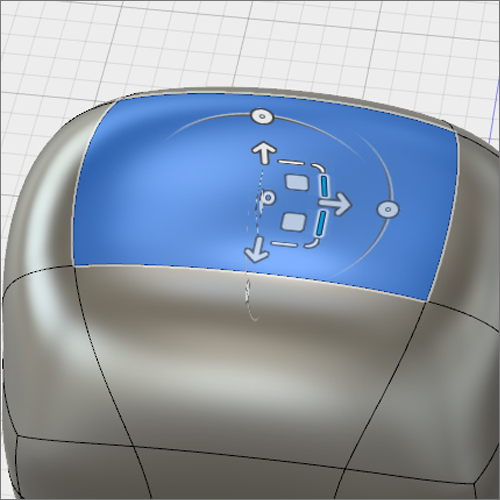
Select a face and drag one of the small corner manipulators to scale the selected face along a plane.
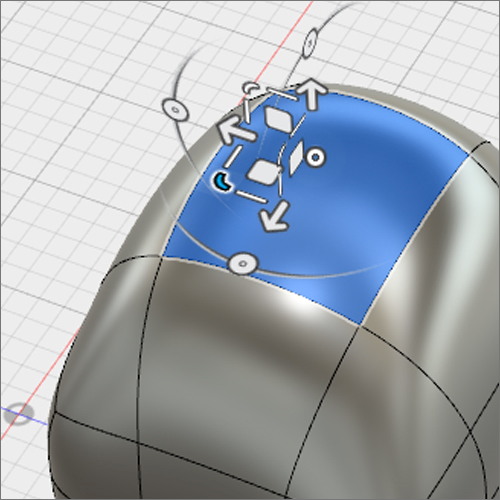
Select a face and drag the circular manipulator. Dragging left or right will scale the geometry in all directions up or down.
Extrude a face to add geometry.
- Select a single face.
- With the Edit Form dialog still open, hold down the option-tool keys on a Mac or alt key on Windows and drag the single arrow to add geometry outward from the selected face.
- Release the keyboard keys as well as the left-mouse button.
- Select OK to close the Edit Form dialog.
Note:You can use this hotkey function to extrude any edge or face selected on a T-Spline form.
Activity 3 summary
In this activity, you accomplished:
- Moved, rotated, and scaled T-Spline geometry with Edit Form.
- Added geometry to a T-Spline body with Edit Form.