Extrude a T-Spline body
Learn how to use the Extrude tool to create or modify a T-Spline body in Fusion.

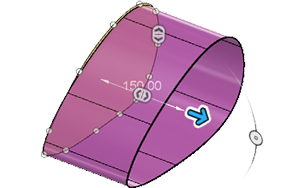
In the Design workspace, Form contextual environment, select Create > Extrude
 .
.The Extrude dialog displays.
In the canvas, select the Profile to extrude.
Drag the manipulator in the canvas or enter an exact value in the dialog to set the Distance.
In the dialog, specify the face Spacing:
- Uniform: Sets the spacing evenly along the curve.
- Curvature: Creates more faces where the curve is tightest.
To make the surface closer to the profile's shape, drag the manipulator to add more faces. Or, set the number manually in the dialog box.
Specify the Angle of the extrusion.
Select a Direction setting, then adjust its associated settings:
 One Side: Creates an extrusion on one side of the profile plane.
 Two Sides: Creates a unique extrusion on each side of the profile plane.
- Adjust the settings in step 6 independently for each side.
 Symmetric: Creates identical extrusions on each side of the profile plane.
Specify the number of Front Faces.
Optionally, check Keep Creases.
Click OK.
The extruded T-Spline body displays in the canvas.
Tips
- Uncheck Profile Chain Selection if you don't want to automatically select tangentially connected geometry.