Create sheet metal flanges
Learn how to create different types of sheet metal flanges in the Design workspace in Fusion.
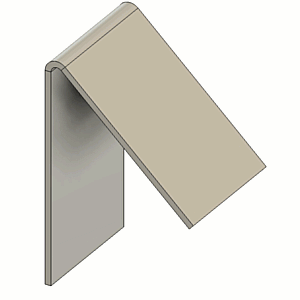
Create a base flange
On the Sheet Metal tab, select Create > Flange
 .
.The Flange dialog displays.
In the dialog, select the
 Edge Flange type.
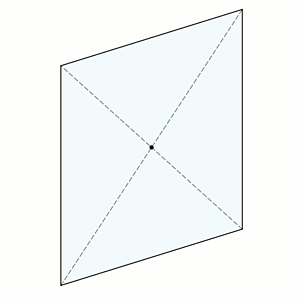
In the canvas, select one or more closed sketch profiles.
Select the Orientation of the sheet metal material:
 Side 1: Offsets material to one side of the profile.
 Side 2: Offsets material to the opposite side of the profile.
 Center: Centers material on the profile.
Select an Operation:
 New Body: Creates a new body in the active component.
 New Component: Creates a new body in a new component.
If there is no Sheet Metal Rule assigned to the component, select a Sheet Metal Rule:
- Steel (mm)
- Stainless Steel (mm)
- Aluminum (mm)
- Steel (in)
- Stainless Steel (in)
- Aluminum (in)
- Use Modify > Sheet Metal Rules to create your own, and they will appear in the list.
Click OK.
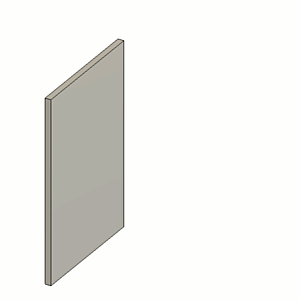
The base flange displays as a sheet metal body in the canvas and in the Browser, nested in the Bodies folder of the active component. A Flange feature displays in the Timeline.
Create a flange along a sheet metal edge
- Repeat steps 1-2 from the first task.
- In the canvas, select one or more edges on a sheet metal body.
- Specify the Height to extrude the flange from the height datum:
- In the canvas, drag the distance manipulator handle.
- Or specify an exact value.
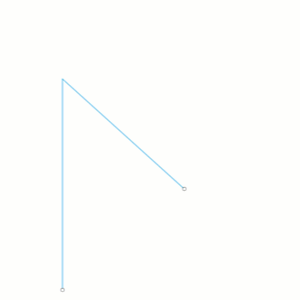
- Specify the Angle of the flange relative to the selected sheet metal edges:
- In the canvas, drag the distance manipulator handle.
- Or specify an exact value.
- In the selection box, select a Flange Width Type for each selected sheet metal edge, and adjust its associated settings below the selection box:
 Full Edge: Creates a flange along the entire length of the edge.
 Symmetric: Creates a flange of a specific width centered on the mid-point of the edge.
- Distance: Specify the overall distance of the flange, centered on the edge.
 Two Sides: Creates a flange of a specified width with the center of the edge but two possible distances to both sides.
- Distance 1: Specify the distance from the center of the flange edge to one side.
- Distance 2: Specify the distance from the center of the flange edge to one side.
 Two Offsets: Creates a flange to two selected offsets.
- Reference 1: Select a reference object to offset the edge of the flange from.
- Offset 1: Specify the distance to offset the edge of the flange from its reference.
- Reference 2: Select a reference object to offset the edge of the flange from.
- Offset 2: Specify the distance to offset the edge of the flange from its reference.
- Select the Height Datum to measure the flange height:
 Inner Faces: From the intersection of the inner faces of the base flange and the new flange.
 Outer Faces: From the intersection of the outer faces of the base flange and the new flange.
 Tangent To Bend: Tangent to the bend between the base flange and new flange, parallel to the new flange.
- Select the Bend Position:
 Inside: Positions bend inside the boundary of the outermost faces of the base flange and new flange.
 Outside: Positions the bend outside the boundary of the innermost faces of the base flange and new flange.
 Adjacent: Positions the bend so that it starts at the selected edge on the base flange.
 Tangent: Positions the bend so that it is tangent to the selected edge on the base flange.
- Optional:
 Flip the flange 180 degrees over the base flange.
 - Optional: Check Miter Corners to miter the corners where sheet metal corners would otherwise overlap.
- Optional: Check Override Rules to override one or more values from the Sheet Metal Rule.
- Click OK.
The flange is added to the sheet metal body in the canvas. A Flange feature displays in the Timeline.
Create a contour flange
- Repeat steps 1-2 from the first task.
- In the canvas, select one or more open sketch profiles.
- Specify the Distance to extrude the flange from the profile:
- In the canvas, drag the distance manipulator handle.
- Or specify an exact value.
- Select the Orientation of the sheet metal material:
- Side 1
- Side 2
- Center
- Select the Direction to extrude the contour flange from the profile:
 One Side: Creates an extrusion on one side of the profile plane.
 Two Sides: Creates a unique extrusion on each side of the profile plane.
 Symmetric: Creates identical extrusions on each side of the profile plane.
- Select an Operation:
- New Body
- New Component
- If there is no Sheet Metal Rule assigned to the component, select a Sheet Metal Rule.
- Optional: Check Override Rules to override one or more values from the Sheet Metal Rule.
- Click OK.
The contour flange displays as a sheet metal body in the canvas and in the Browser, nested in the Bodies folder of the active component. A Flange feature displays in the Timeline.
Create a contour flange and join it to a sheet metal edge
- Sketch or project an open sketch profile on a plane that is normal to the sheet metal edge you want to bend.
- Repeat steps 1-2 from the first task.
- In the canvas, select the sheet metal edge.
- Select the open sketch profile.
- In the selection box, select a Flange Width Type for the selected sheet metal edge, and adjust its associated settings below the selection box:
- Full Edge
- Symmetric
- Distance
- Two Sides
- Distance 1
- Distance 2
- Two Offsets
- Reference 1
- Offset 1
- Reference 2
- Offset 2
- Select the Orientation of the sheet metal material:
- Side 1
- Side 2
- Center
- Optional: Check Override Rules to override one or more values from the Sheet Metal Rule.
- Click OK.
The contour flange is created and joined to the sheet metal body in the canvas, bending a the selected sheet metal edge. A Flange feature displays in the Timeline.

Create a lofted flange
On the Sheet Metal tab, select Create > Flange
.The Flange dialog displays.
In the dialog, select the
 Lofted Flange type.
In the canvas, select two open or closed sketch profiles.
Select the Orientation of the sheet metal material:
- Side 1
- Side 2
- Center
Select the Forming Type that best represents the manufacturing method:
 Brake Form: Creates sheet metal flanges that will be formed using a press brake with a punch and die.
 Die Form: Creates sheet metal flanges that will be formed using a stamping die.
Select the Facet Control and adjust its associated setting:
 Chord Tolerance: Specify the maximum distance from an arc segment to the chord that spans between its end points to determine the number of facets to create around the bend.
 Facet Angle: Specify the maximum angle between the end points of each facet to determine the number of facets to create around the bend.
 Facet Distance: Specify the maximum distance between the end points of each facet to determine the number of facets to create around the bend.
 Facet Number: Specify the number of facets to create around the bend.
Select an Operation:
- New Body
- New Component
If there is no Sheet Metal Rule assigned to the component, select a Sheet Metal Rule.
Optional: Check Override Rules to override one or more values from the Sheet Metal Rule.
Click OK.
The lofted flange displays as a sheet metal body in the canvas and in the Browser, nested in the Bodies folder of the active component. A Flange feature displays in the Timeline.
Tips
Hold
Ctrl(Windows) orCommand(MacOS) to modify the selection set once the sheet metal flange preview displays on the body in the canvas.Uncheck Tangent Chain to exclude connected geometry when you select flange profiles.
Check Override Rules to override one or more values from the Sheet Metal Rule assigned to the component.
Check Miter Corners to miter the corners where sheet metal corners would otherwise overlap.