Activity 1: Create a dynamic event simulation study for metal rolling
In this activity you create a new study, Study 1 - Event Simulation, to evaluate the strain experienced by the steel metal slab as it is reduced in thickness by 25%. To set up the study you:
- Save the tutorial model to a personal folder
- Calculate the event duration
- Set the event duration for the analysis
- Define the number of results save intervals
- Select the desired units system
Prerequisites
- Fusion is started.
- Data file location: Samples > Basic Training > 11-Simulation > Plate Rolling.
Steps
Open the starting shape model, Plate Rolling in the Z up direction, from the Basic Training folder in the Data Panel.
If the Data Panel is not currently shown, click
 Show Data Panel at the top of the screen.
The top level (home view) of the Data Panel is divided into two subsections: ALL PROJECTS and SAMPLES. Scroll down until you reach SAMPLES.
Double-click the Basic Training folder to open it.
Double-click the 11 - Simulation folder to open it.
Double-click the Plate Rolling model to open it in the canvas.
Note: The sample model is read-only, so you must save a copy of it to a personal project
Identify a personal project in which to save the model.
- Click
 (File > Save as).
 - Enter a name, such as Plate Rolling, in the name field.
- Expand the arrow button next to the Location field.
- Locate and click on an existing project, or click New Project to start a new project.
- Click
Identify or create a folder in which to save the model.
- Double-click on a folder in the project to select it, or create a new folder.
- To create a new folder, click New Folder.
- Type a name, such as Plate Rolling for the folder.
- Press Enter.
- Double-click the folder to make it the current file saving location.
- Click Save.
Switch to the Simulation workspace and select Dynamic Event Simulation as the new study.
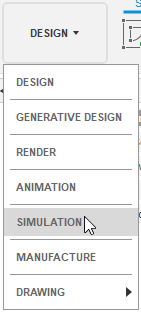
Click on the Change Workspace drop-down menu at the top left end of the toolbar and select Simulation.

In the New Studies dialog box, select
 Dynamic Event Simulation.
Important: Do not click Create Study yet.While still in the New Study dialog, and using the information in the tutorial introduction, calculate the time required to move the steel slab under the roller.
The Event Duration is the time required to move the 100 mm long steel slab under the roller. The angular velocity of the roller is 314.159 rad/s, or 3000 RPM. The tangential velocity at the bottom of the roller, then, is calculated as:
Tangential velocity = radius x angular velocity
or
Tangential velocity = 175 mm x 314.159 rad/s = 54978 mm/s
When the steel slab engages with the roller, the friction between the it and the roller provides the steel slab with the same nominal velocity of ~55000 mm/s. To move the 100 mm long steel slab through the roller, traveling at ~5500 mm/s takes:
Event Duration = length (mm)/ velocity (mm/s)
Event Duration = 100 (mm)/ 55000 (mm/s) = 0.002 s
If we set our duration to 0.002 s, the steel slab will travel approximately 110 mm.
In the New Study dialog set the Event Duration as calculated.
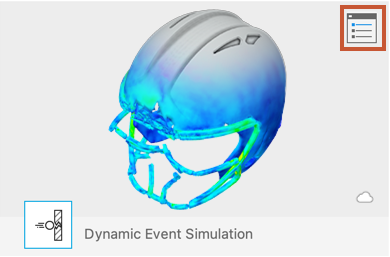
In the upper right corner of the large thumbnail image, click
 Settings to access the Settings dialog.
The General settings appear initially.
In the Settings dialog type 0.002 s in the Total Event Duration field.
Change the Number of Result Intervals to 20, then create the study.
In the Settings dialog, type 20 as the Number of Result Intervals.
Note: The solver outputs the initial condition and twenty calculation increments for the event simulation.Click Back to apply the changes.
In the New Study dialog, click Create Study to create the study and close the dialog.
Check the units system and change it to Metric (SI), if necessary.
- In the Browser on the left of the canvas, hover over
 Units then click
  Edit.
Edit. - In the Units Settings dialog, choose Metric (SI) from the Default Unit Set drop-down list.
- Click OK to accept the change and close the dialog.
- In the Browser on the left of the canvas, hover over
Activity 1 summary
In this activity, you switched to the Simulation workspace to create a Event Simulation study, and then you defined its parameters. You
- Saved the tutorial model to a personal folder
- Calculated the event duration from the introductory information
- Set the Event Duration in the Settings dialog
- Defined the Number of Results Save Intervals
- Set units system to Metric (SI).