Activity 3: Sketching to create pockets
In this activity, you sketch a circular pattern of arcs to create pockets between gear teeth in a hollow cylinder. This requires you to:
Sketch an arc using three points.
Apply a tangent constraint to the arc.
Create a circular pattern of arcs.
Convert the arcs in the pattern into 3D geometry.
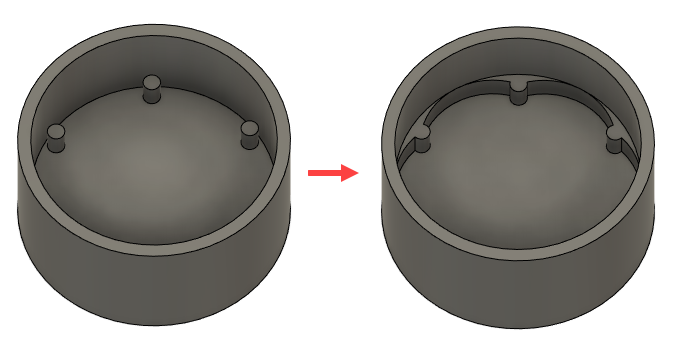
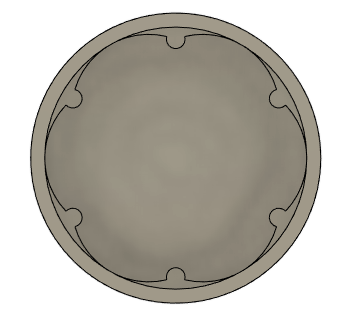
Round geer teeth (left), pockets added (right)
Steps
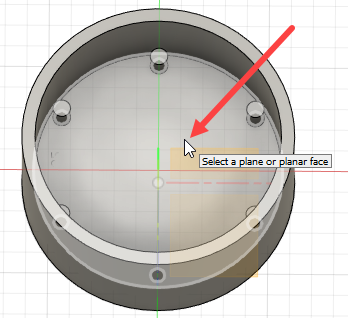
Start sketching an 3-point arc between two of the extruded cylinders on the top of the cylinder's base.
- Click Solid > Create > Create Sketch
 .
. - Select the top of the base of the cylinder as the plane you want to sketch on.
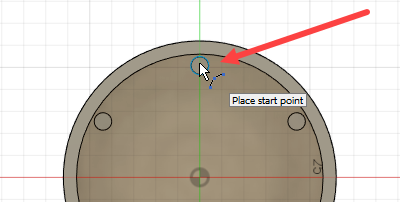
- Click Sketch > Create > Arc >3-Point Arc
 .
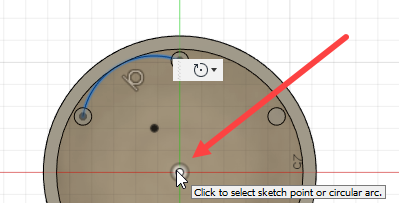
. - Click the center of a circle to select it as the starting point of the arc.
- Click the center of an adjacent circle to select it as the end point of the arc.
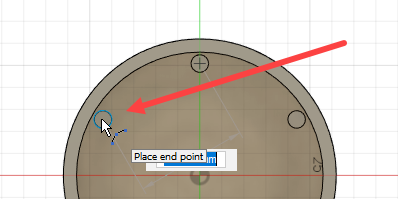
- Click a point near the inside edge of the cylinder to complete the arc.
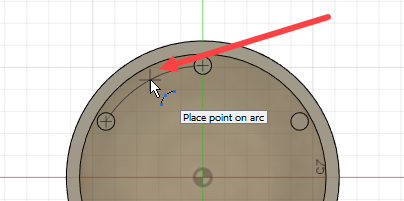
- Press Esc to finish creating the arc.
- Click Solid > Create > Create Sketch
Apply a tangent constraint to the arc and the inside edge of the cylinder. This ensures that if the edge of the cylinder moves, the sketch moves with it.
- Click Sketch > Constraints > Tangent
 .
. - Click to select the arc.
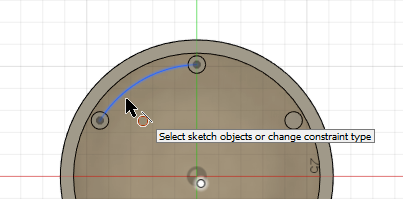 <
< - Click to select the inside edge of the cylinder.
- Press Esc to finish applying the constraint.
- Click Sketch > Constraints > Tangent
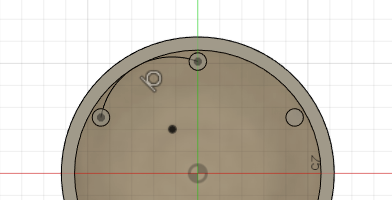
Create a circular pattern of six arcs from the arc you have sketched.
- Click Sketch > Create > Circular Pattern . This displays the Circular Pattern dialog.
- Click Select next to the Objects field on the Circular Pattern dialog and select the arc.
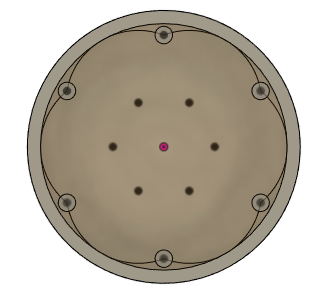
- Click Select next to the Center Point field and select the center point of the face.
- Type 6 in the Quantity field.
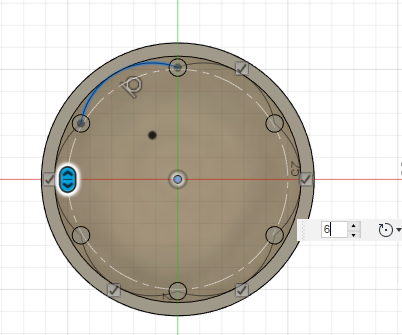
- Click OK on the Circular Pattern dilaog to create the pattern.
- Click Sketch > Finish Sketch.
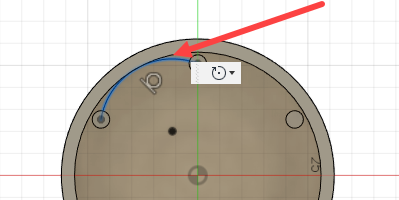
Extrude the circles in the pattern by a distance of 6 mm to convert them into 3D features.
- Click Modify > Press Pull. This displays the Press Pull dialog.
- Click Select on the Press Pull dialog and click to select the areas between each arc and the inside edge of the cylinder. Selected areas are displayed in blue.
When you have selected an area, the Extrude dialog is displayed.
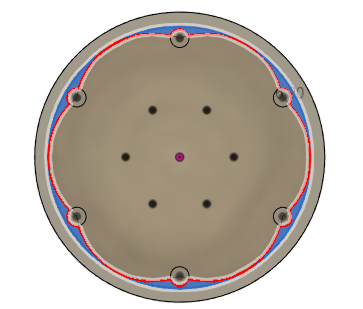
- Type 6 mm in the Distance field.
- Click OK on the Extrude dialog.
Tip: Use the ViewCube to orient the view to display the pockets inside the cylinder.
Activity 3 summary
In this activity, you sketched a circular pattern of arcs inside a hollow cylinder and converted them into pockets. To do this, you:
- Sketched an arc using three points.
- Applied a a tangent constraint to the arc.
- Created a circular pattern of arcs.
- Converted the arcs in the pattern into 3D geometry.
Round geer teeth (left), pockets added (right)