Activity 1: Sketching to create a hollow cylinder
In this activity, you use sketches as the foundation to create a hollow cylinder. This requires you to:
Sketch circles for the base and sides of the cylinder.
Apply dimensions to control the size of the circles.
Convert the sketches into 3D features.

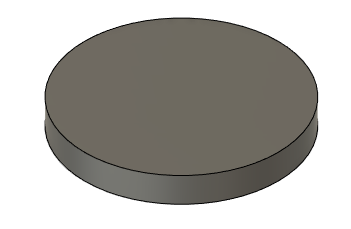
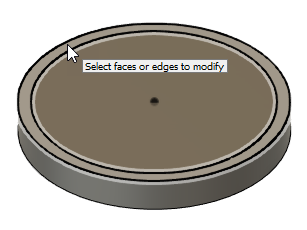
Completed 3D hollow cylinder
Steps
Start sketching a circle, which will become the base of the cylinder, on the XZ plane.
- Click Solid > Create > Create Sketch
 .
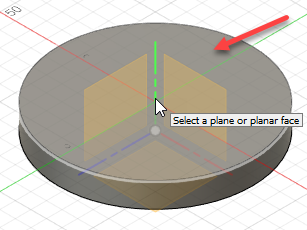
. - Select the XZ plane to sketch on.
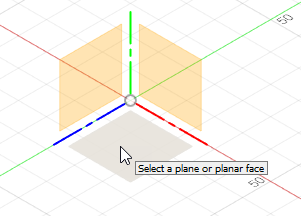
When you have selected the plane, you enter the Sketch contextual tab, which contains commonly used Sketch tools. The Sketch Palette is also available, which lists options relevant to your current task or the currently selected sketch entity. - Click Sketch > Create > Center Diameter Circle
 .
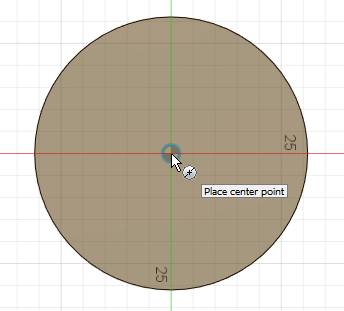
. - Hover over the origin (or center) of the sketch. The cursor snaps automatically to this location.

- Click once to begin placing the circle.
- Drag the mouse away from the center to start sketching a circle.
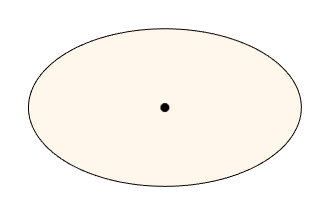
Tip: Don't worry about the exact size of the circle now, we'll apply exact dimensions later in this activity. - Click again to complete the circle.
- Click Solid > Create > Create Sketch
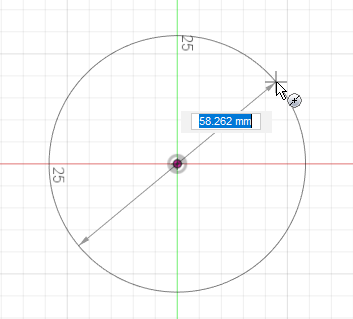
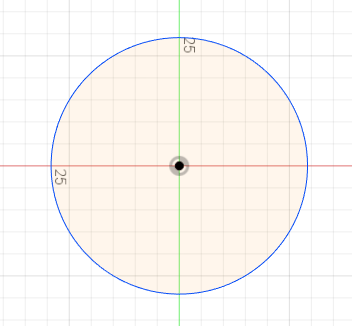
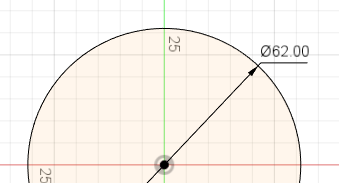
Add a dimension of 62 mm to control the size of the circle, then finish the sketch.
- Click Sketch > Create > Sketch Dimension.
- Click the edge of the circle to select it.
- Click again to place the dimension.
- Type 62 mm.
- Press Enter.
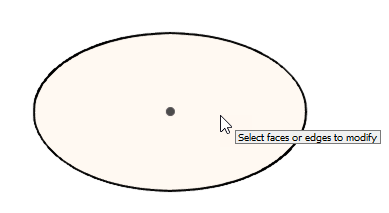
- Click Sketch > Finish Sketch to finish the sketch.
Tip: Click Home View next to the ViewCube to view the sketch at its original size and orientation.
Extrude the circle you have just created, by 8 mm, to convert its 2D sketch profile into 3D geometry.
- Click Modify > Press Pull. This displays the Press Pull dialog.
- Select the area in the middle of the circle as the profile you want to extrude. This displays the Extrude dialog.
- Drag the blue arrow upwards 8 mm to set the depth of the cylinder.
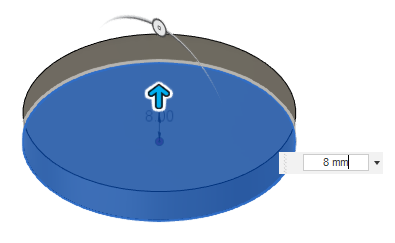
Tip: If you can't drag the mouse to exactly 8 mm, type 8 mm in the Distance field and press Enter. - Click OK on the Extrude dialog.
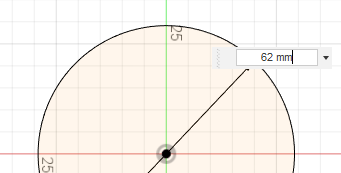
Sketch a circle, with a diameter of 56 mm, on top of the cylinder. This circle will become the sides of the hollow cylinder.
- Click Solid > Create > Create Sketch .
- Select the top of the cylinder as the plane you want to sketch on.
- Click Sketch > Create > Center Diameter Circle .
- Position the cursor over the center point of the top face to use it as the origin of the sketch.
- Click and start dragging the mouse to display the current diameter of the circle, then type 56 mm in the Diameter field.
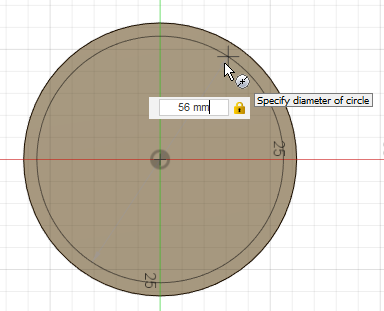
- Press Enter.
- Click Sketch > Finish Sketch to finish the sketch.

- Click Solid > Create > Create Sketch
Extrude the outer ring of the cylinder, by 22 mm, to convert it into 3D geometry.
- Click Solid > Modify > Press Pull. This displays the Press Pull dialog.
- Click the outer ring to select it as the 2D profile you want to extrude.
This displays the Extrude dialog. - Drag the blue arrow upwards 22 mm to set the depth.
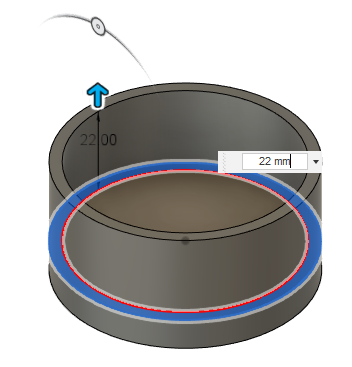
Tip: If you can't drag the mouse to exactly 22mm, type 22mm in the Distance field and press Enter. - Click OK on the Extrude dialog.
Activity 1 summary
In this activity, you created a hollow cylinder. To do this, you:
Sketched circles using a center point and a diameter.
Applied dimensions to control the size of the circles.
Converted the 2D sketch profiles into 3D geometry to create a hollow cylinder.
Completed 3D hollow cylinder