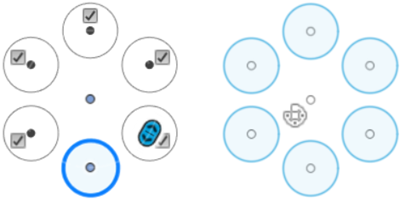
Create a circular sketch pattern
Learn how to use the Circular Pattern tool to create identical copies of sketch geometry in a circular pattern in Fusion.

Create a circular pattern
On the Sketch contextual tab, select Create > Circular Pattern
 .
.The Circular Pattern dialog displays.
In the canvas, select the sketch geometry to pattern.
Select the Center Point for the pattern.
In the Circular Pattern dialog, select an Angular Spacing setting, and adjust its associated settings:
- Full: Distributes the specified number of copies evenly around a full circle.
- Angle: Distributes the specified number of copies evenly along the arc of an angle you specify, in one direction from the original.
- Total Angle: Drag the angle manipulator handle in the canvas, or specify an exact angle value.
- Symmetric: Distributes the specified number of copies evenly along the arc of an angle you specify, symmetrically from the original.
- Total Angle: Drag the angle manipulator handle in the canvas, or specify an exact angle value.
Drag the Quantity manipulator handle in the canvas, or specify the exact number of copies to create.
Click OK.
Copies of the original sketch geometry display in a circular pattern in the canvas.
Edit a circular pattern
- In the canvas, double-click the Circular Pattern glyph at the center of the pattern.
- In the Circular Pattern dialog, adjust the settings for the pattern.
- Click OK.
The circular pattern updates in the canvas.
Tips
- In the canvas, uncheck the box next to any instance in the pattern to suppress it. The instance is excluded from the pattern.
- Uncheck the Suppress setting to turn off suppression for the pattern. The check boxes are removed from the canvas.