To add or modify pipelines
Sketch pipelines in a model or proposal. Pipelines are independent of terrain. They do not drape on the surface but are placed under it. You can adjust pipeline elevation offset settings or directly modify pipeline elevation.
Pipelines snap together at their ends, and also snap to pipeline connectors.
To add pipelines
Click Create
 Drainage
  (Pipeline).
Click once on a pipeline style to select that style.
Note:- If you want to use different pipeline styles than what are shown in the Select Draw Style catalog, you can create and edit pipeline styles using the Style Palette. See About editing styles for more information.
- Once you have sketched a pipeline, you can modify its style. See To apply styles to individual features for more information.
Click the starting point for the pipeline and click again to place a point for each bend.
Double-click to finish the pipeline.
To adjust pipeline elevation using the Properties Palette
With the entire pipeline selected, display the Properties Palette.
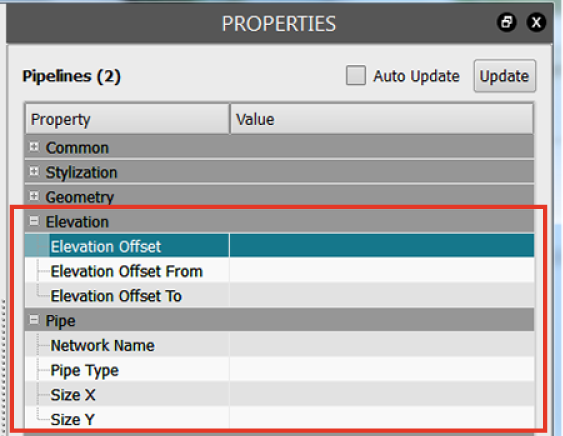
To place the pipelines underground, enter a negative value for Elevation Offset.
To assign a network to the pipelines for later use in Autodesk Civil 3D, enter a value for Network Name in the Pipe section.
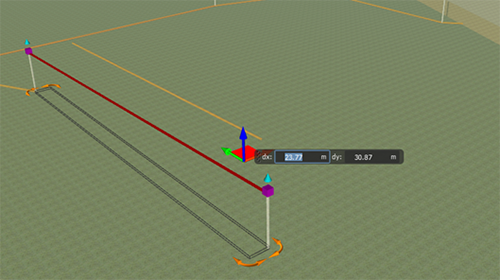
To adjust pipeline elevation using gizmos
Disable the selectability of all other features.
Click
 in the Toolbar to display the Model Explorer, and click
  for each layer except pipelines. When a layer is unlocked (
 ), it becomes selectable.
Reduce the surface opacity so you can see the underground structures.
From the Views menu in the Toolbar, click
 to display View Settings, and click
  to display the Visualization tab. Move the Surface Opacity slider to the left.
Select the pipeline to adjust.
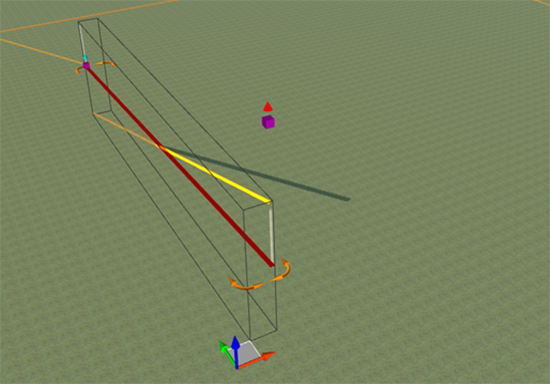
Do one of the following:
Move the entire pipeline up or down.
Adjust individual vertices to move sections of the pipeline up or down.
Sharing Pipelines with Autodesk Civil 3D
You can export pipelines to IMX format, and then import the IMX file into Autodesk Civil 3D.
Autodesk Civil 3D reads the elevation value from either the pipeline vertexes or the terrain. Pipelines you create are initially 2D. If you edit any pipeline vertex, that pipeline becomes 3D. If the pipelines you export are 2D, export the entire model to ensure that the terrain is exported, which allows Autodesk Civil 3D to find the elevation of the pipelines. If the pipelines are in 3D, you don't need to export the terrain.