To modify abutment attributes
Choose an abutment style for your bridge from a catalog of parametric abutment styles, and edit abutment attributes.
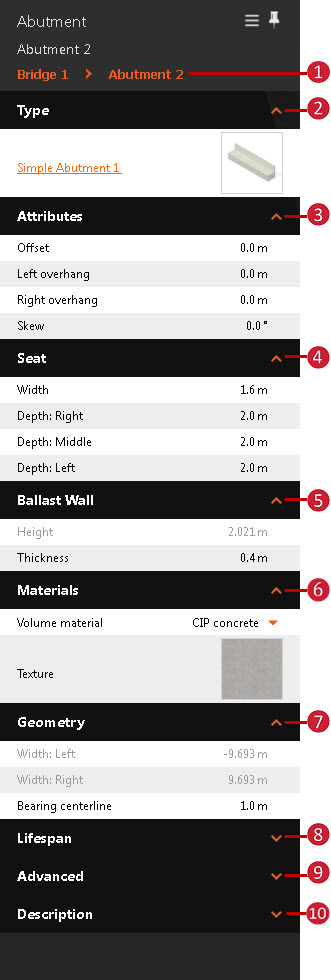
- Select the abutment.
- Available attributes vary based on the abutment component style. Most attributes for the selected abutment are editable in the Stack.
| | - Click the abutment name to view all abutments in the bridge, or select a different abutment.
- Type
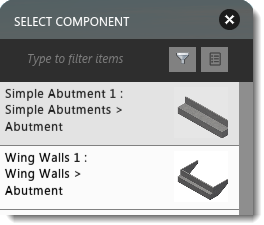
- Select the orange Abutment component style name to choose another parametric abutment component style in the catalog. Double-click a new style to apply it to the selected abutment.
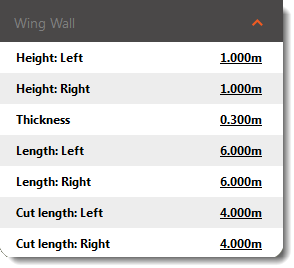
Note: Wing Wall style abutments have additional editable properties in the Stack: - Click the thumbnail image in the Abutment panel to see a more detailed view of the current abutment style (Wing Wall abutment style pictured below).
- Attributes (will vary based on abutment component style)
- Modify skew and offset..
- Modify overhang values for simple abutment styles.
- Modify azimuth for wing wall abutment styles.
- Seat
- Modify seat depth and width.
- Ballast Wall
- Ballast wall height represents the height of the ballast wall at the middle of the abutment seat.
- Modify ballast wall thickness.
- Materials
- Expand the drop-down menu to change volume materials. Choose between Precast concrete, CIP concrete, Structural steel, or Other Volume Material.
- Click the Texture thumbnail image to view a catalog of available abutment texture styles. Double-click a new texture style to apply it to the selected abutment. These styles are stored in the Materials/Bridge style catalog.
- Geometry
- Modify the bearing centerline.
- Abutment width is determined by the bridge's deck width.
- Add Creation and Termination date values if you want to Use Model Time.
- Map data source properties to the selected abutment, as well as add a Link or Tooltip. See: About Creating Links, Tooltips, and Watermarks.
- Optionally, add a description.
|