To modify pier attributes
Piers are generated by default when you create a bridge. Choose pier styles for your bridge from a catalog of parametric pier components, and edit pier attributes in the Stack. You can manually move, rotate, or remove piers in-canvas.
Note: Move and rotate bridge piers using the
transform and rotate gizmos. Change the number of piers for a bridge in the Stack. To manually delete a pier from a bridge, select a pier then press the Delete key.
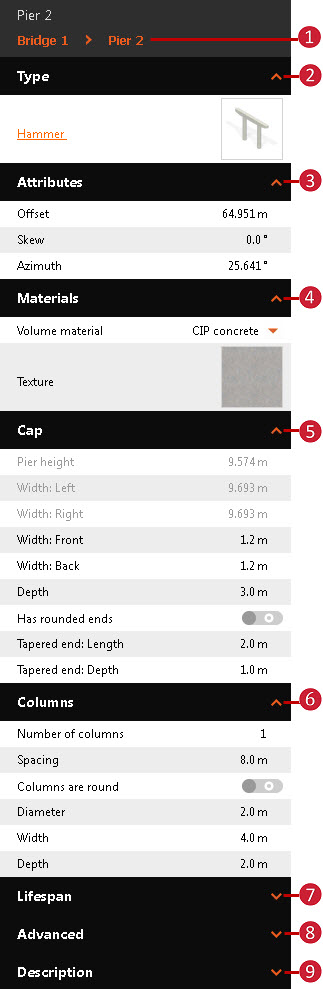
- Select the bridge and then click again on a pier to select it. Attributes for the pier will display in the Stack.
- Most attributes for the selected pier are editable in the Stack.
| | - Click on the current pier name to view all the piers in the bridge, and/or select another pier to work with.
- Type
- Select the orange pier foundation component style name to choose another parametric pier foundation component style in the catalog.
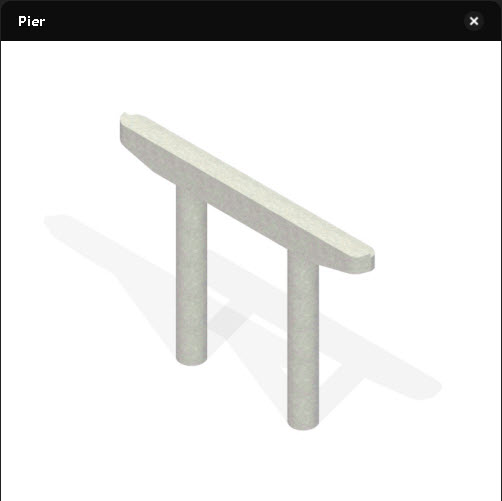
- Click the thumbnail image to see a schematic view of the current pier component style.
- Modify attributes such as skew, offset, and azimuth.
- Materials
- Expand the drop-down menu to change volume materials. Choose between Precast concrete, CIP concrete, Structural steel, or Other Volume Material. This will cause material quantities for your bridge to re-calculate. See To review bridge material quantities.
- Click the Texture thumbnail image to view a catalog of available pier texture styles. Double-click a new texture style to apply it to the selected pier. These styles are stored in the Materials/Bridge style catalog.
- Cap: modify properties specific to the pier component style, such as Cap and Columns. These options will vary depending on the pier component style you choose.
- Column: modify properties specific to the pier component style, such as Cap and Columns. These options will vary depending on the pier component style you choose.
- Add Creation and Termination date values if you want to Use Model Time.
- Map data source properties to the selected pier, as well as add a Link or Tooltip. See About Creating Links, Tooltips, and Watermarks.
- Optionally, add a description.
|