To use point cloud image lookup
Import images corresponding to the point cloud data to display real world pictures at specific locations along the terrain.
Click Manage
 Point Clouds
  (Point Cloud Image Lookup)
Use the Point Cloud Image Lookup dialog to import the CSV (Comma Separate Values) file with corresponding images, and map the images to locations on the point cloud data. You need to know the file structure to set these options. Note: The minimum requirement for the log file format is to have X,Y,Z,image_name as comma separated values with or without a file header. For example: X,Y,Z,Image 1123398.937,202909.414,77.02,C:\Images\LB_0_000000.jpg 1123398.938,202909.414,77.02,C:\Images\LB_0_000001.jpg 1123398.937,202909.414,77.018,C:\Images\LB_0_000002.jpg 1123398.937,202909.415,77.016,C:\Images\LB_0_000003.jpg
- Image CSV: Browse to the location of the Comma Separated Values file, select the file, and click Open.
- Important: The CSV (log file) must be in the same folder as the associated image files.
- Coordinate System: Select the coordinate system of the source image data. The image coordinate system is not always the same as the point cloud data coordinate system.
- Delimiter: Data items in a CSV file are commonly separated by a comma, but the delimiter can also be a semi-colon, tab, or space. Select the delimiter used in your data file.
- X Column: Identify the column heading (first row of the file) for the X coordinate data.
- Y Column: Identify the column heading (first row of the file) for the Y coordinate data.
- Z Column: Identify the column heading (first row of the file) for the Z coordinate data.
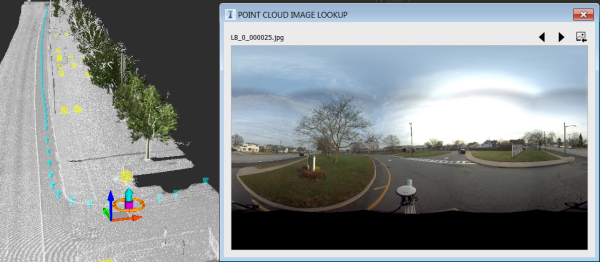
Click Apply. Images are loaded along with their locations on the terrain. The image window can be resized and moved as desired.
Click the Previous Image and Next Image buttons in the Point Cloud Image Lookup window, or click an image location marker (blue triangle) in the terrain to view the corresponding image.
Optional: To import a new set of images, click the Import an image folder button (top-right corner of the Point Cloud Image Lookup window). The images you import will replace the current set.
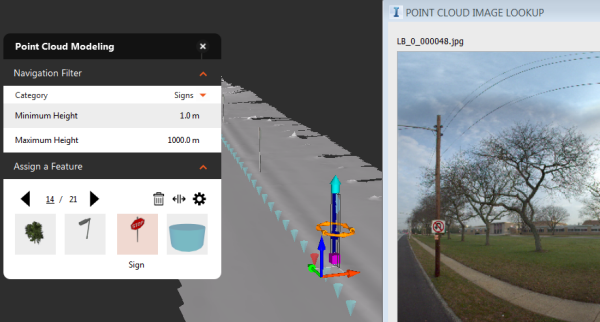
Use this tool during feature modeling or linear feature extraction to get additional detail. In the following example, you can see in the image that the feature identified as a sign is a utility pole with a no u-turn sign attached.