
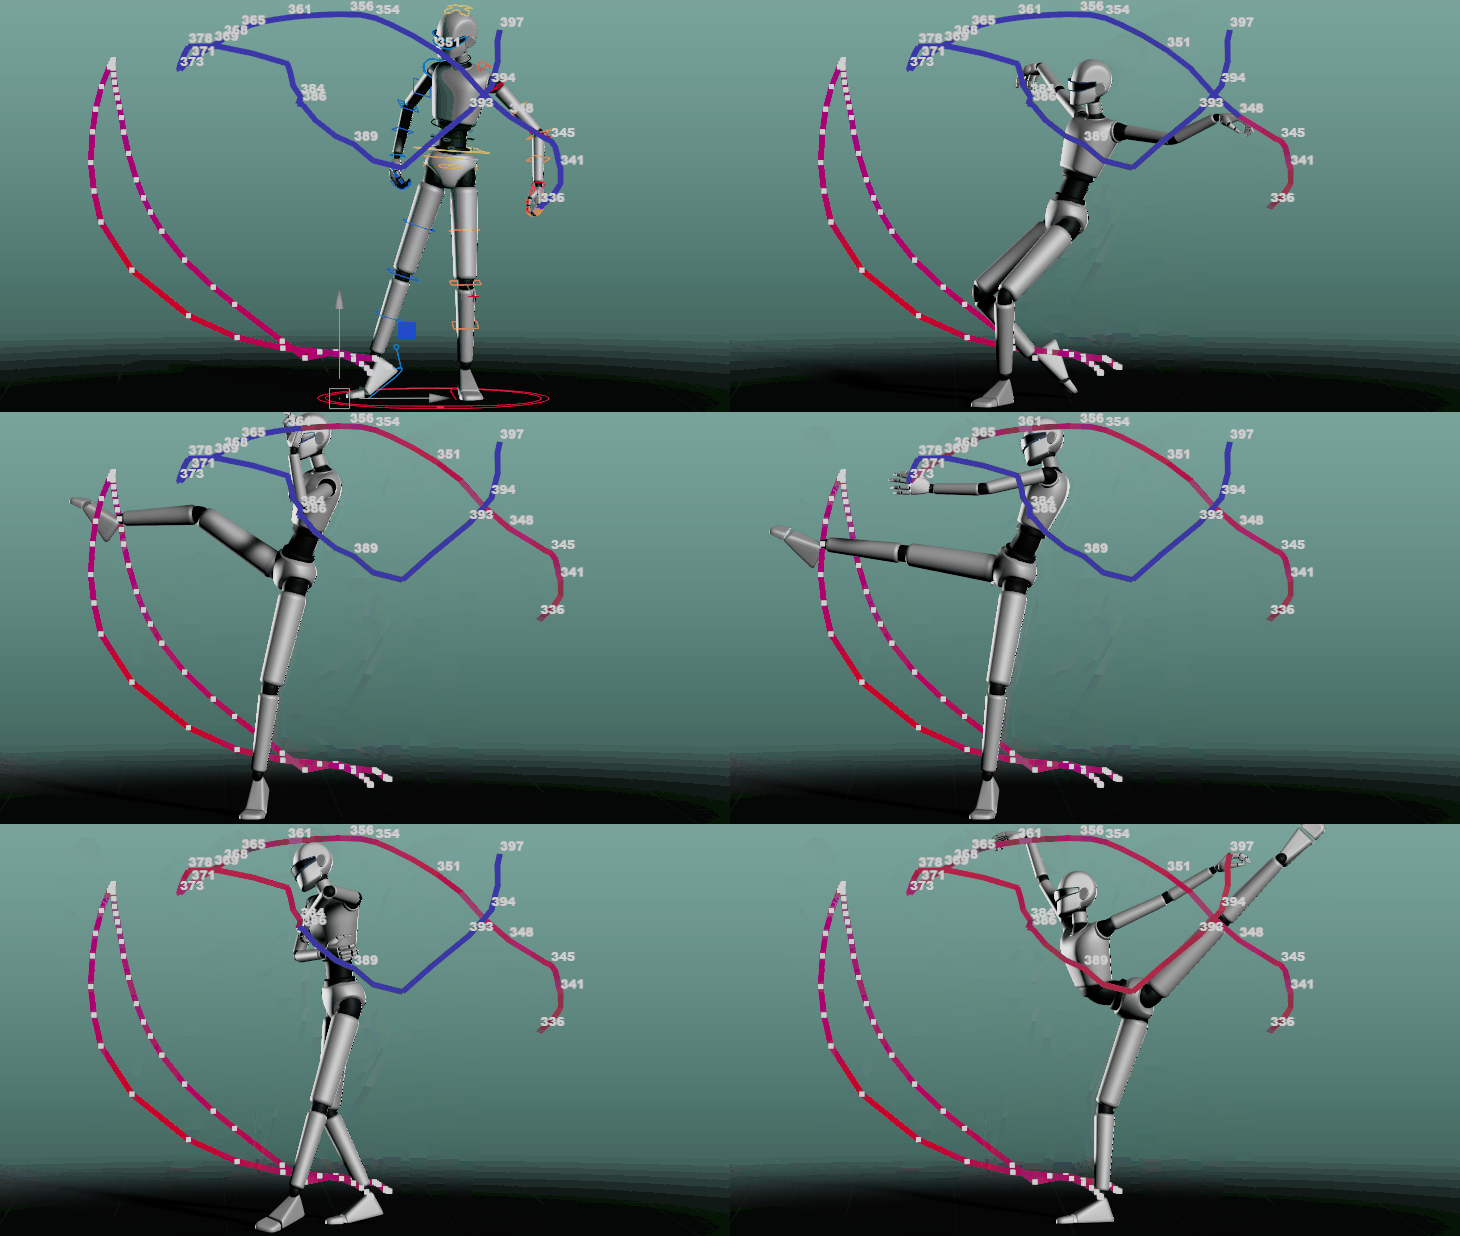
Use Motion Trails to view the flow of your animation. This topic covers how to attach a Motion Trail to your object or make changes or adjust an existing Motion Trail. Find description and examples of the Motion Trail Editor options in Motion Trail Editor.
To create a Motion Trail
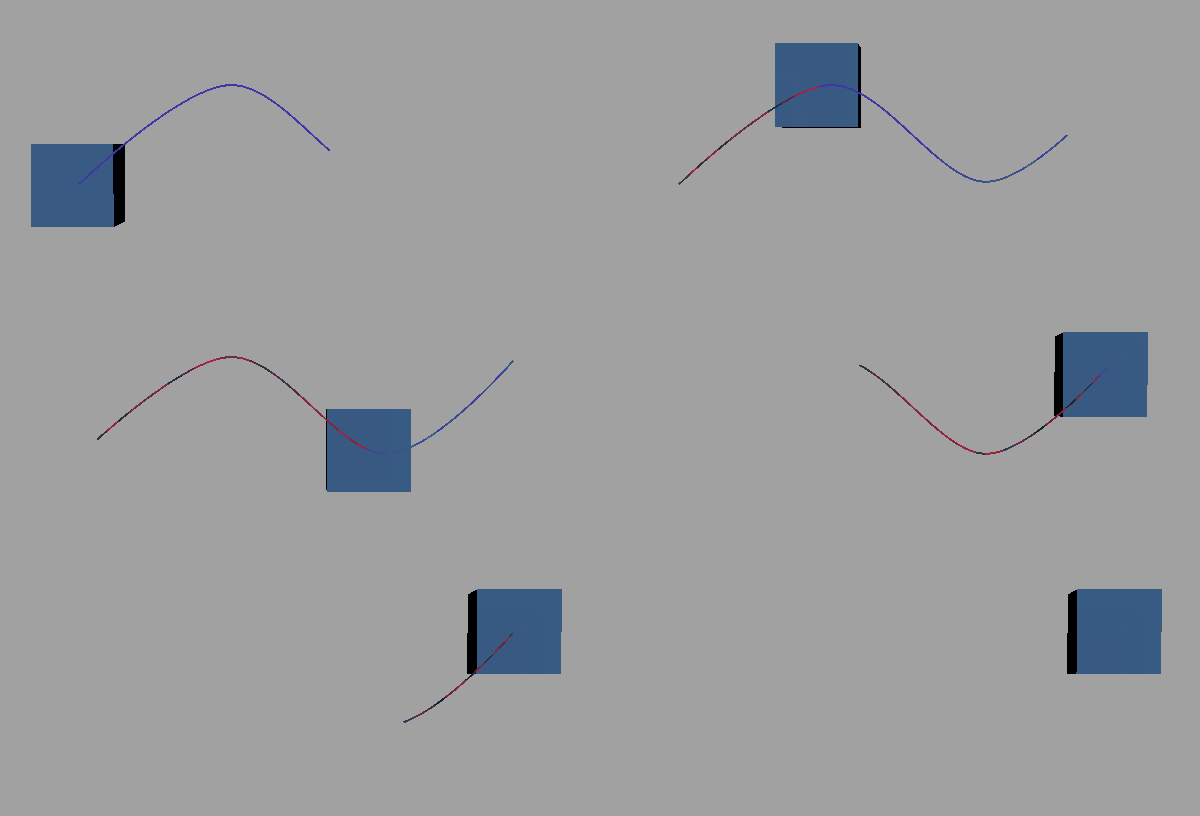
- Select the animated object you want to preview. In this example, there is a blue cube with a simple animation.

- In the Animation menu set (F4), select Visualize > Open Motion Trail Editor. The Motion Trail Editor appears.
- Set the options you want the trail to have, for example, if you want the
Motion Trail to appear only when you select the object, set
Pinning/Draw to
Draw When Selected. If you want to see the trail at all times, select
Always Draw.
You can also change these once the trail is created in the Motion Trail Editor.Note: You can have multiple Motion Trails on the same object. The name is incremented numerically, for example objectname_motionTrail1, Objectname_motionTrail2, and so on.
- Set a
Path Mode. In this example, the cube is set to
Before and After
 , which draws the trail to show the animation before and after the current frame.
- With the object selected, click
Create Motion Trail.
A Motion Trail appears following the animation on the object and in the Motion Trail Editor, an entry called motionTrail1HandleShape appears in the Motion Trail list.
- Play back the animation.
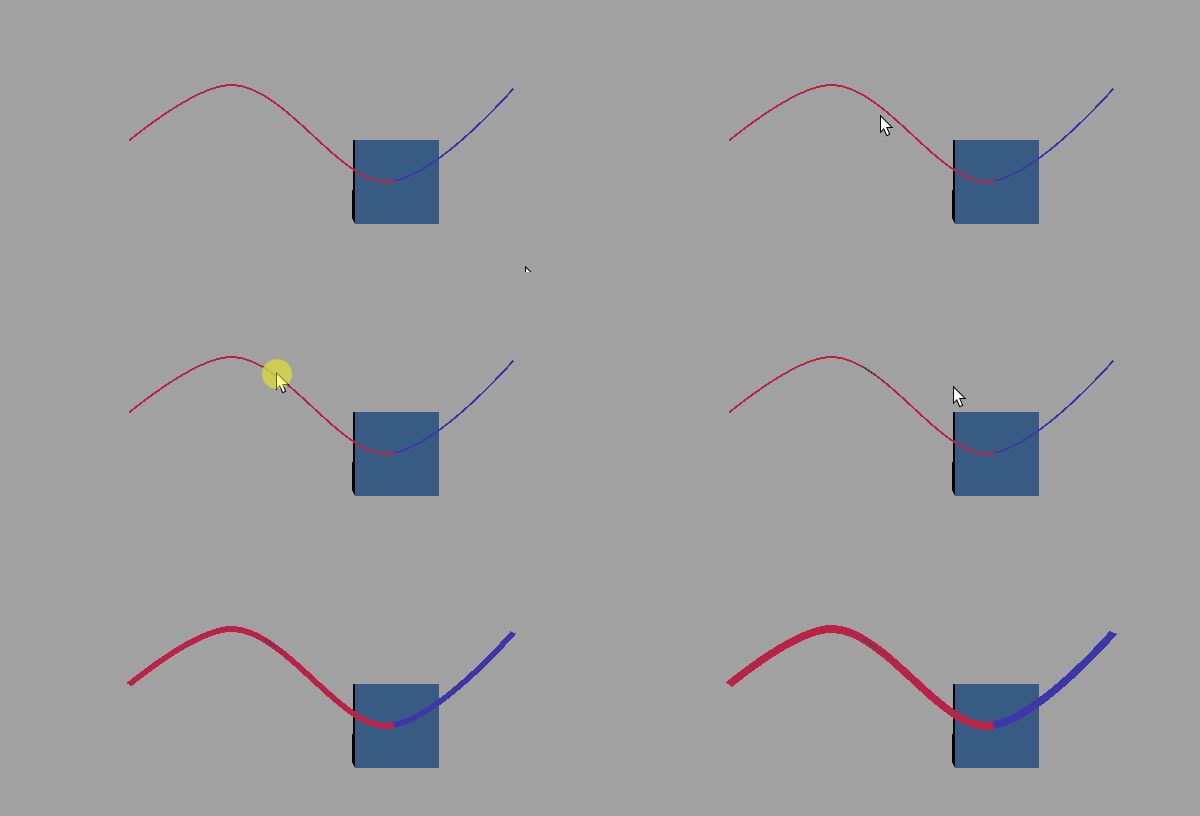
- To change the way the
Motion Trail appears, select the
Motion Trail in the Viewport, and change the
Trail Thickness setting in the
Display Options section of the
Motion Trail Editor.
Edit a Motion Trail
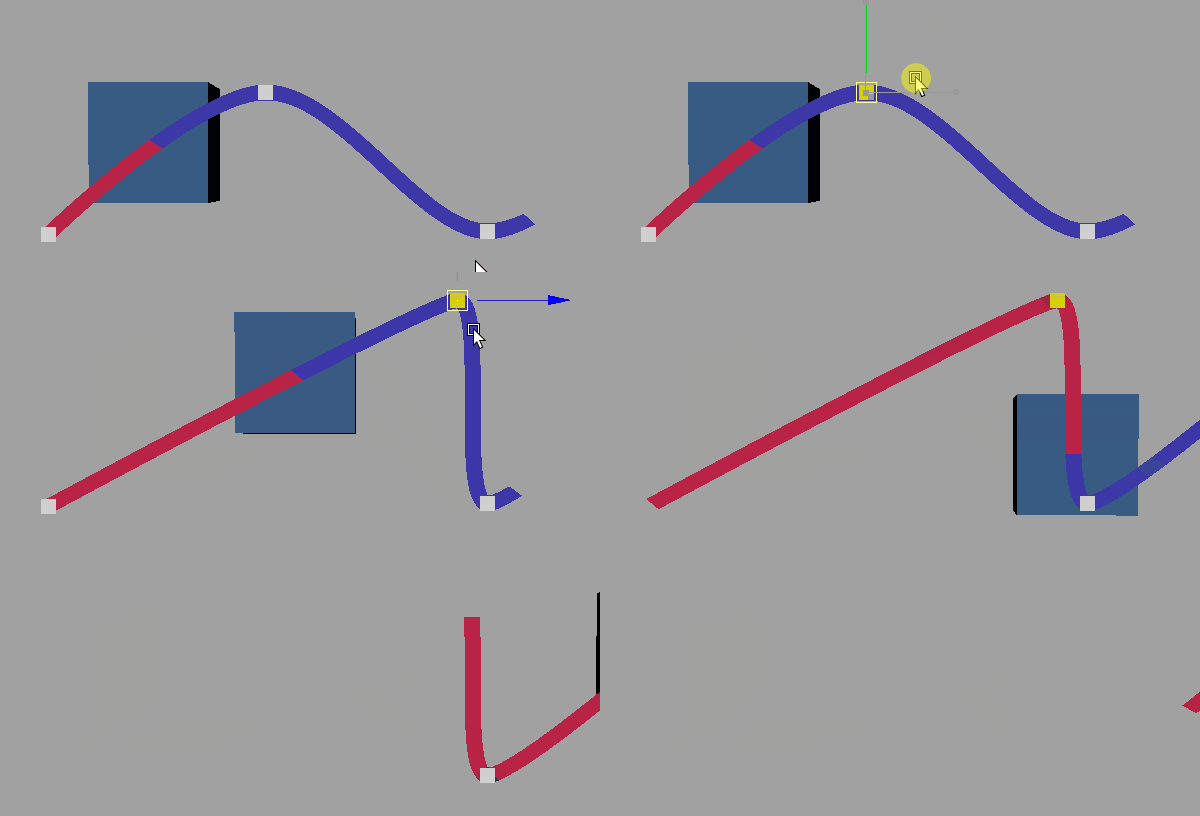
You can change the path of the animation by editing its Motion Trail.
To edit an existing Motion Trail
- Select the
Motion Trail, and then turn on
Show Keyframes in the
Display Options section of the
Motion Trail Editor.

- Click a keyframe on the trail, and translate it(W) so the
Motion Trail bends.
Hide or Delete a Motion Trail
To delete a Motion Trail
- Select the Motion Trail in the Motion Trail list and click Delete Selected Trail.
- To remove all trails from the scene, select Delete All Trails.
You can also select the Motion Trail in the Viewport or Outliner (it will be named something like motionTrail1Handle) and press Delete.
To hide a Motion Trail
In the
Motion Trail Editor, select the
Motion Trail in the
Motion Trail list, and click the corresponding Eye
 icon.
icon.
You can also select the trail in the Outliner (it will be named something like motionTrail1Handle) and press Ctrl + H. To show it again, select it in the Outliner and press Shift + H.
Customize a Motion Trail color
There are no settings in the Motion Trail Editor for matching the color of Motion Trail to an object in your scene.
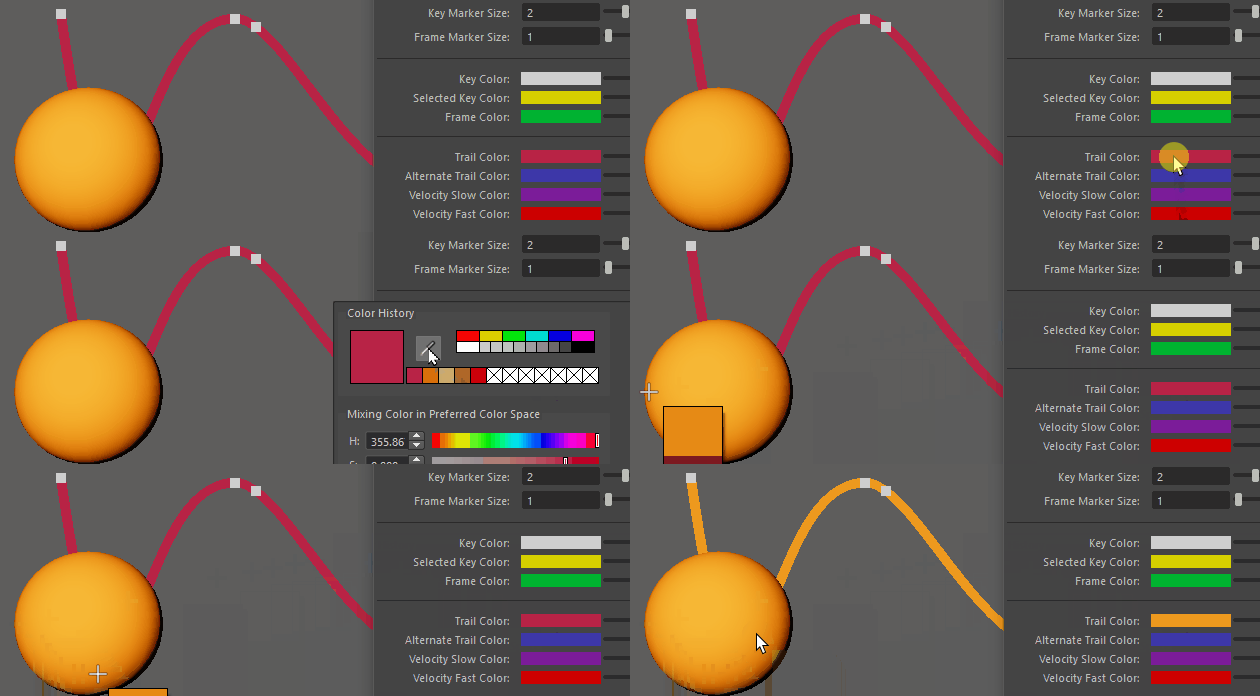
- In the Motion Trail Editor, select the Motion Trail.
- Click the Trail Color color tile in the Display Settings area of the editor to open a Color History window.
- Use the Eyedropper tool
 to select the color of your object.