- Required Weight Difference
- Specifies a threshold value (%) for how much a vertex’s skin weight needs to differ from its neighbor before it is smoothed by the Smooth Skin Weights operation. All vertices whose weights fall outside the threshold are ignored by the Smooth Skin Weights operation.
- Smoothing Iterations
- Lets you set the number of times the smoothing algorithm is run. If you set a large number of Smoothing Iterations, the amount of smoothing the vertices receive is increased, which provides better results. However, the more times the smoothing algorithm is run, the longer the effect takes to process. The default iteration value is 5.
- Preview
- When on, the vertices that will be smoothed by the Smooth Skin Weights operation highlight yellow in the scene view when you click Apply. The current Weight Change Percentage value and the roughness of the target skin’s weighting determines which vertices are highlighted.
- Obey Max Influences
- When Maya encounters weights that are near zero, the weights are pruned to provide efficient processing. Activate this option to ensure that if any of your smoothed weights are small, Maya always refers to the influence weight you specified in the Set Max Influences dialog in the Edit Influences Menu. This is important when you require a fixed number of weights. This setting is active by default.
- Skin Cluster
-
The Skin Cluster list contains all the skin clusters associated with the currently selected geometry
- The Skin Cluster area lets you select individual skin clusters on geometry that have more than one or more skin cluster applied.
-
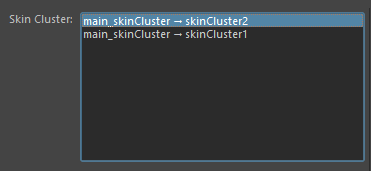
- Skin Cluster list
- Skin clusters on the selected geometry appear here.
Note: If no skin cluster are found this list remains empty. Select geometry to update the list.
- The most recently added skin cluster appears at the top of the list.
See Smooth skin weights.