If you are new to Maya and want to get started on creating a material and assigning it to your object, see Apply color and shading to an object.
When creating materials, it is common to map textures to various attributes of the material. Commonly used texture maps include: color maps, transparency maps, specular maps and bump maps.
You can map a 2D or 3D texture to your material. Textures map to geometry based on the object’s UV texture coordinates.
The following example demonstrates how to map a file texture as a color map and a bump map to the material. You can do this in two ways: by clicking the map
 button in the material's
Attribute Editor or
Property Editor, or by
connecting the nodes in the Hypershade to build a shading network
.
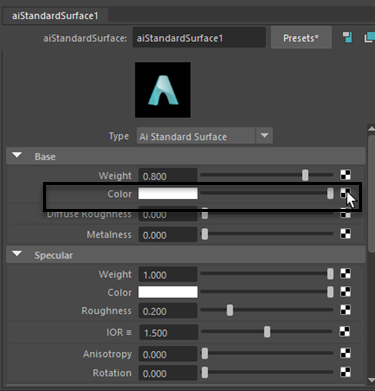
To map a texture to a material using the Attribute Editor or Property Editor
-
Select your material in the Hypershade. In the material Attribute Editor or Property Editor, click
 beside the attribute that you want to connect a texture to; for example,
Color. The
Create Render Node window appears.

- Select File from the Create Render Node window.
-
In the File node Attribute Editor, map to the image file by clicking the browse
 icon beside the
Image Name attribute.
Note: A
 icon beside an attribute indicates that it is mapped to a texture.

In this example, a File texture is mapped to the Base > Color attribute of an aiStandardSurface shader to add shading to the belt of the model, and a normal map to the Geometry > Bump Mapping attribute of the shader to add surface detail.
The model and materials used in this example are courtesy of Turbo Squid artist Michael Weisheim Woolfy.
To map a texture to a material in the Hypershade work area
To add a color map to your material
-
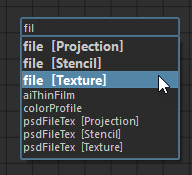
Press Tab and enter the type of your node; in this case, File. For all 2D textures, the mapping method for the texture is indicated beside its name (for example, file [Stencil]).
Alternatively, you can drag and drop the texture from the Create tab into the work area.

-
In the File node Property Editor, map to the image file by clicking the browse
 icon beside the
Image Name attribute.
Note: A
 icon beside an attribute indicates that it is mapped to a texture.

-
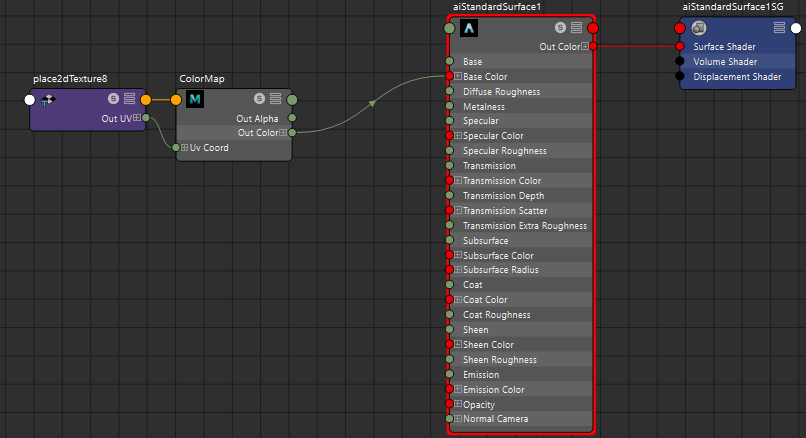
Middle mouse or left mouse-drag to create a connection line between the file node's Out Color attribute and your material's color attribute.

To add a bump map to your material
- Press Tab and create a bump 2d node.
- Press Tab and create a
File node, and click the browse
 icon beside the
Image Name attribute to map your normal map to the
File texture.
-
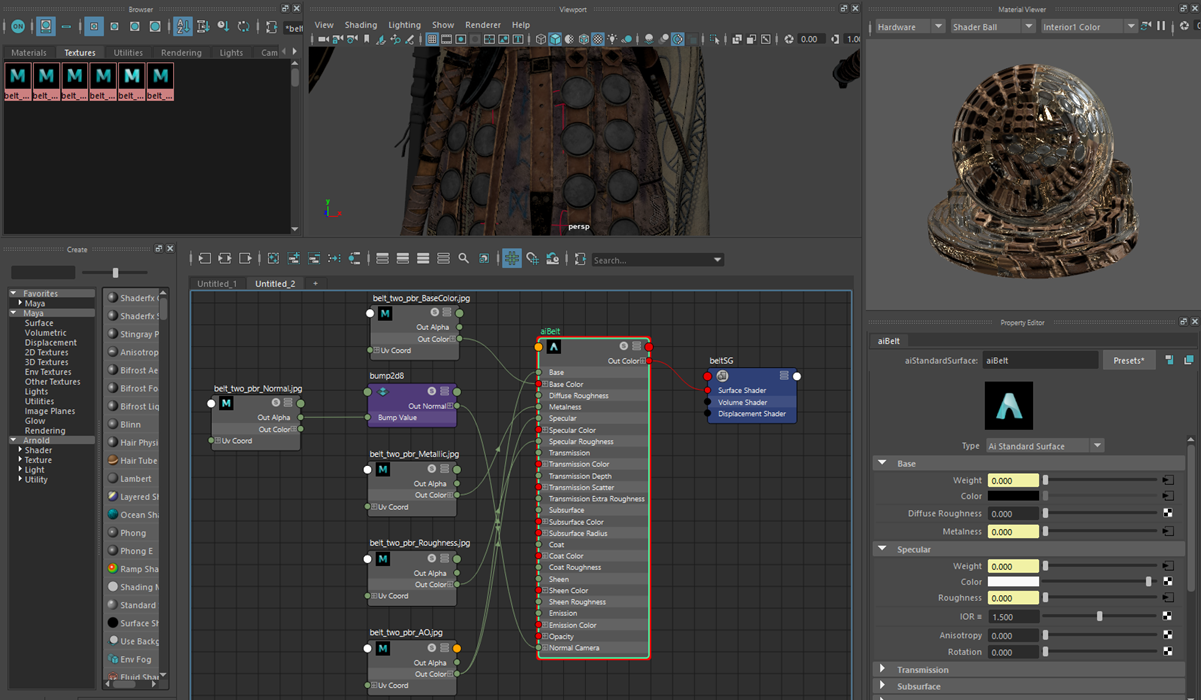
Middle mouse or left mouse-drag to create a connection line between file.outAlpha and bump2d.bumpValue, and from bump2d.outNormal to the Normal Camera attribute of your material.

The model and materials used in this example are courtesy of Turbo Squid artist Michael Weisheim Woolfy.
Additional tips and tricks
When you create a texture, it becomes available in the Textures tab of the Hypershade Browser, and you can drag and drop it into work area to add the texture map to your graph.
You can connect other types of texture maps using the same guidelines. Furthermore, rather than connecting file.outColor, you can connect only the R, G, or B channel of outColor to a material's attribute.
In this example, the metalness of the material is adjusted by connecting the R channel of the file texture's outColor attribute to the material's Metalness attribute.
Here is the final shader after adding a few texture maps.

The model and materials used in this example are courtesy of Turbo Squid artist Michael Weisheim Woolfy.