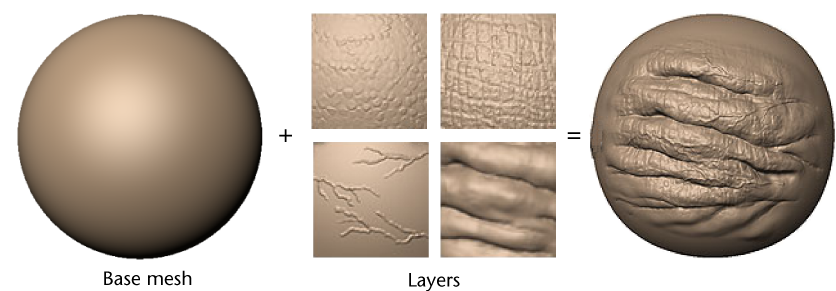
Sculpt layers let you organize your sculpting and combine forms and details in a non-destructive manner. You can create a layer and then sculpt so that only the new details appear on the new layer. To modify your sculpting on that layer you can either perform additional sculpting or remove the layer without affecting details on the base mesh. Sculpt layers combine in an additive manner. They behave much like layer systems in 2D image editing applications such as Photoshop®, but record 3D sculpting information.

You manage sculpt layers using the Layers window, by selecting the Sculpt display button. See Sculpt Layers window.
Sculpt layers let you:
- Maintain sculpted elements separately from one another
Sculpt on one region of a mesh without affecting other areas. You can create a sculpt layer then sculpt on it so the new details are separate from the original mesh. If you need to modify your sculpting on that layer you can either perform additional sculpting on that layer, change the transparency for the layer, mask regions of it temporarily, or remove it without affecting details on other layers or on the base mesh. In this way, you can combine forms and details in a non-destructive manner. Using layers in this way lets you easily adapt to changes in art direction or explore different design iterations.
- Adapt to changes in art direction
Form or detail on one layer can be modified or removed without affecting information on other layers.
- Split surface detail for a shader
For example, you can create texture map sets for a shader with separate channels for skin, mud, warts, and scars, then store each channel's detail on a separate layer.
- Explore different design directions
Create a new layer to try out a new idea. Use the layer masks to selectively blend successful explorations back into the main design by adjusting the layer Strength. For more information, see Amplify, reduce, or invert sculpting on a layer.
- Blend between multiple versions of an object
You can import a mesh that has been modeled and posed in various positions to separate layers, and then blend between the various layers to view the pose and add details to the poses on those layers. You can merge any layers together or flatten the layers into one layer and then extract your work as a normal or displacement map.
When sculpting on a layer, Mudbox calculates the difference between the position of vertices after a tool stroke and their original position on the base mesh. Only the difference in position (the delta) is stored on the layer. This delta is added to the base mesh and to the deltas stored in all the other layers to arrive at the final shape of the model. Because the sculpt layers combine in an additive manner, the order of layers is not important to the final result.
A sculpt layer is automatically locked to the subdivision level on which it is first edited. The layer is available for modification only when that subdivision level is displayed thereafter. This is important to remember when you need to perform any subsequent operations on that layer (for example, if you sculpt, erase, change visibility, and so on).