When you create nesting studies, you need to select from a list of available materials that you can use. Create and maintain this list in the Process Material Library dialog box.
Open the Process Material Library Dialog Box
- In a nesting document, click Process Material Library
 on the
Inventor Nesting ribbon.
on the
Inventor Nesting ribbon.
The Process Material Library dialog box opens.

Add Materials
- Select Materials and Packagings in the tree on the left side of the Process Material Library dialog box.
- Add a material in one of the following ways:
- Click
Add.
The most recently used material is added to the list.
- Click
Add From Provider and select materials from the dialog box that opens.
This shows a list of materials available from applications you have installed on your computer; for example, Inventor.
The first material you add to the Process Material Library will be the default material used for nesting shapes.
- Click
Add.
- In the table, edit details about the material such as ID and category, as well as qualities like thickness and density.
Edited values that differ from the provider's values are highlighted in orange. If invalid values are used, the row is highlighted in yellow and the OK button is disabled. The Color setting applies to display within Inventor Nesting, not to the material itself or nest output.
Set Nesting Parameters
Set default nesting values for materials. These can be changed later when creating a nest.
- In the Process Material Library, select a material in the tree and click the
Nesting tab.
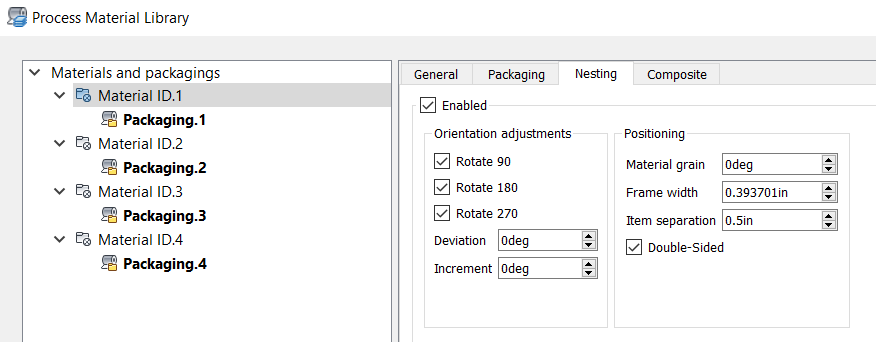
- Select
Enabled to include this material in the nest.
If you do not select this, this material will not be available later when adjusting nesting properties.
- Make changes as needed to orientation adjustments.
Each material can have a defined set of allowable nesting orientations. From this set of orientations, an optimal orientation is selected for each part as it is nested on the material. (You can also specify allowable orientations when setting up your nest later.)
- Rotation angles: Presets in 90 degree intervals.
- Deviation: Allowable deviation from the presets; for example, if you enter 10, a 90-degree orientation is allowed to deviate between 80 and 100.
- Increment: Allowable deviation increments. For example, if you enter 2, a 10-degree deviation can occur in increments of 2; that is, 2, 4, 6, 8, and 10.
- Adjust Positioning values.
These are the default positioning settings for nesting.
- Material grain: A base angle from the X-axis that gives the material a grain appearance. To guarantee the same grain on nested shapes, set their orientation and deviation angles to 0, and deselect their Flip, Mirror, and Rotation boxes.
- Frame width: How close shapes are allowed to be placed near the outer perimeter of the nesting area when using this material. This restriction can be refined on each side by adjusting Trim values in packaging.
- Item separation: The allowable distance between items in a nest.
- Double-sided: Select this if the material surface is the same on both its top and bottom. This can be important when considering flip and mirror.
Set Composite Properties
Set composite properties if you are cutting materials for use in composites manufacturing.
- In the Process Material Library, select a material in the tree and click the
Composite tab.
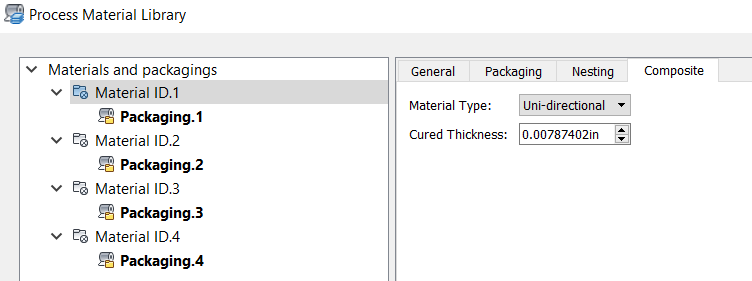
- Select a
Material Type and enter a
Cured Thickness.
The thickness of a ply of material can change when it is cured. Plies are commonly cured only after they are all applied.
Synchronize Materials
- Select Materials and Packagings in the tree on the left side of the Process Material Library dialog box.
- Click
Sync From Provider.
This refreshes the material list with the values from the original materials as stored in their host software.
Add Packaging
Any material you intend to use in a nest must have packaging associated with it. If not, any shapes using that material cannot be nested. Add packaging using the Packaging tab.