Packaging defines the size and form of your raw materials. When you create nesting studies, you need to select from a list of packaging types for your materials. Create this list in the Process Material Library dialog box. Before you can create packaging, you must have at least one material defined in your document.
Open the Process Material Library Dialog Box
- In a nesting document, click Process Material Library
 on the
Inventor Nesting ribbon.
on the
Inventor Nesting ribbon.
The Process Material Library dialog box opens.

Add Packaging
Inventor Nesting creates default packaging for every material added to your document, but you can add your own.
- Select a material in the tree on the left side of the Process Material Library dialog box.
- Click the Packaging tab inside the dialog box.

- Click Add.
- Edit values in the new packaging row.
- Repeat the preceding steps for other material packaging you want to create.
You can also create multiple packagings for the same material if these are available on your work site and if you want to experiment with different varieties when you set up your nests. The default packaging for a given material in the nesting study is bolded in the list.
- To set a packaging as the default type to be used for a material, right-click it in the tree and select
Set as Default Packaging.
You can set multiple packaging defaults for a material. When you create a nesting study, the Create Nesting Study dialog box will be populated with all default packaging for that material.
Access and Modify Packaging Values
There are several ways to access packaging values so you can edit them.
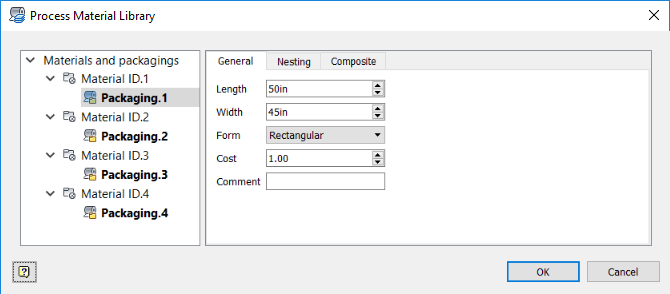
- To see and edit the values of a specific packaging, select it in the tree.
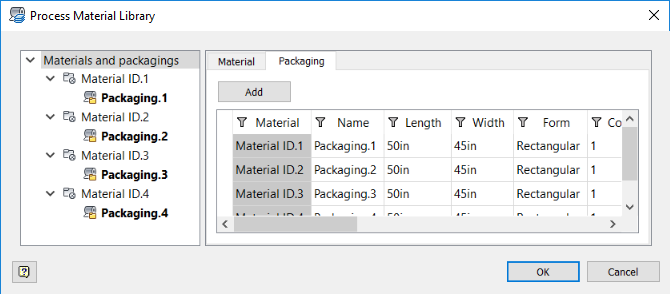
- To see and edit a list of all packagings for a given material, select the material in the tree, then click the
Packaging tab.
- To see and edit a list of all packagings in your document, select
Materials and Packagings in the tree, then click the
Packaging tab.
Edit values for the packaging such as dimensions, cost, and form. Form can be "Roll" or "Rectangle." If you choose Roll, it shows as a 9999999 length sheet in the canvas, but it should only show its needed length.
Set Nesting Parameters
- Select the packaging in the Process Material Library tree.
- Click the Nesting tab.
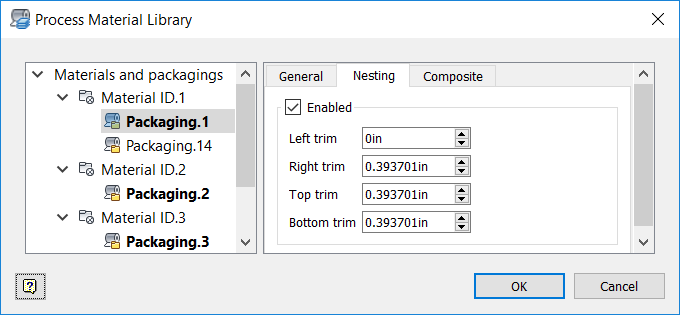
- Make sure
Enabled is selected.
Otherwise, this packaging will not be available later when adjusting nesting properties.
- Adjust trim values for this packaging.
Trim determines how near shapes can be to each perimeter edge of the nesting area. Use this setting in combination with the Frame value that is set in the Process Material Library. While Frame affects the whole perimeter, Trim can be used to refine the distance from each edge. The larger value is always respected (the furthest from the perimeter edge).
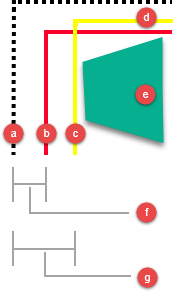
- Sheet perimeter
- Frame line
- Left trim line
- Top trim line
- Nested shape
- Frame value
- Left trim value
Set Deposition Process
Set a deposition process if you are cutting packaging for use in composites manufacturing.
- Select the packaging in the Process Material Library tree.
- Click the
Composite tab.
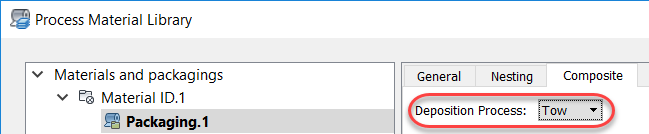
- Select a
Deposition Process:
- Fabric: A swath of material used for draping.
- Tape: Large wound material used in automated layup.
- Tow: Similar to tape but narrower, used for better accuracy on smaller or more complex parts made with automated layup.