Learn how to display different types of results in one view or in several views at the same time.
- Continue working in your project, or open the project
Tutorial_Alpha_Analysis.rstructure.
Note: To open the project, click Explore Tutorials from the Welcome Screen or navigate to the Tutorials folder C:\Users\Public\Public Documents\Autodesk React Structures Tech Preview\Tutorials.
- If you continue working in your project, click the 3D View tab to switch to a 3D view of the model.
- Click
Results
 Types of Results
 Deformations.
The Deformation and Display panels appear in the ribbon.
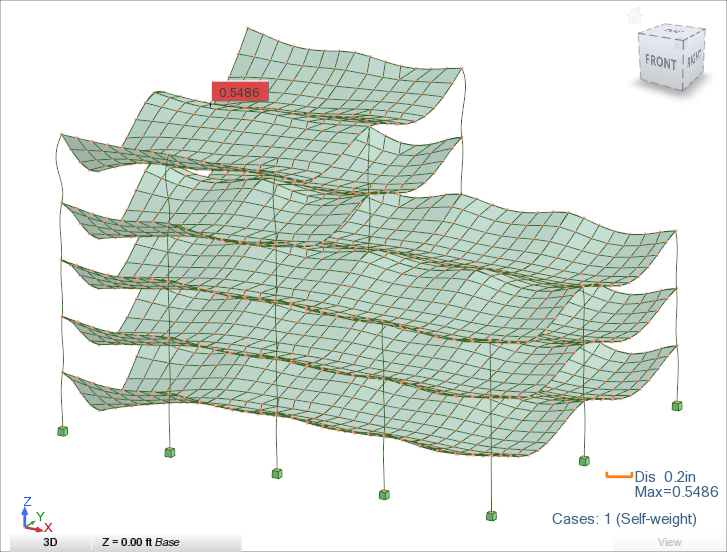
- In the Deformation panel, click
Deformation.
The deformation displays on the structure.
- In the Display panel:
- Click
 Reduce to minimize the deformations in the structure.
- Click
 Labels to display the deformation values as labels on the model.
- Select Global Extremes from the Value Types drop-down menu.
- Click
- In the Type of Results panel, select
 Panel Maps to display the panel map to the 3D view.
Note: The commands on the Types of Results panel have different states:
Panel Maps to display the panel map to the 3D view.
Note: The commands on the Types of Results panel have different states:- Blue border: results display in the drawing area but the Deformations contextual panels are hidden.
- Blue background: results display in the drawing area and the Panel Maps contextual panels display in the ribbon.

- In the Panel Maps - Local panel, select
 Uz Displacement.
The map of displacements in the local z direction displays additionally in the 3D view.
 Note: You can display several types of results simultaneously, and hide the ones that you don't need.
Use the following ways:
- In the Display panel, click
 Clear to hide a specific type of result in the drawing area.
- Click
Results Clear
 Clear All to hide all the results in the drawing area.
- In the Display panel, click
Visualize results in multiple views
You can also arrange views and display different results in each viewer. To do that use the results from the previous tasks.
- Click
View
Windows
 Tile Vertically to rearrange the views as in the image below.
The views distribute vertically and evenly in the drawing area.
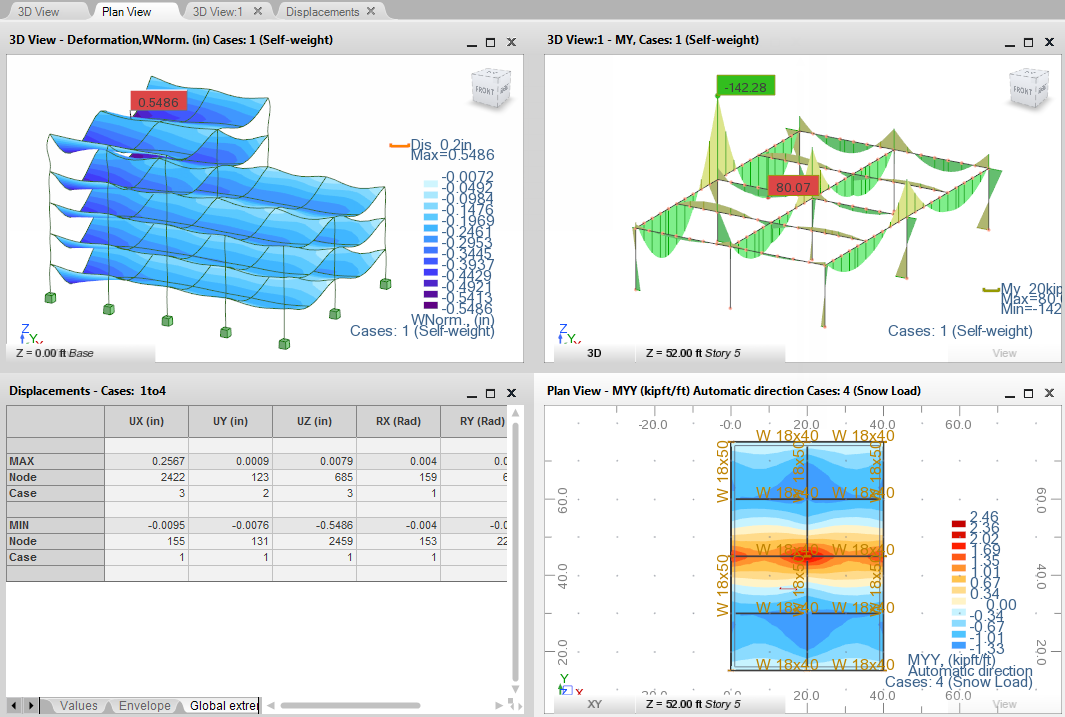 Tip: Each window has its own visual display settings so you can quickly switch between different type of results. Use all available tools to resize your model in each of the view. You can also adjust the display of your results by using the commands in the Display panel for the active view.
 - Save the project as Tutorial_Alpha_END.rstructure.