Creating FlipBooks
The FlipBook tools are only available in SketchBook Pro Desktop.
Learning to create FlipBooks is unbelievably fun! Imagine sending someone a sketch that comes to life. Create cell animation, a prototype, or proof of concept.

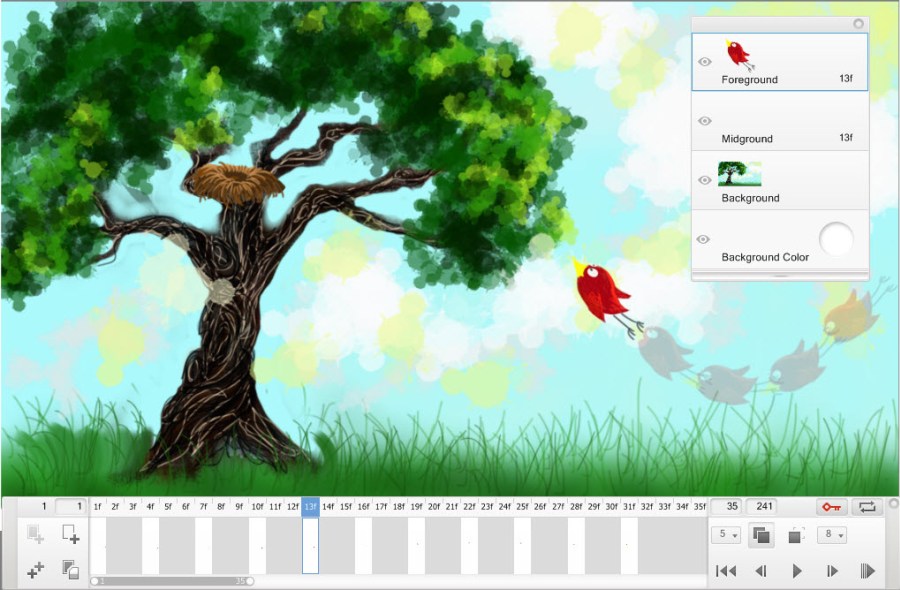
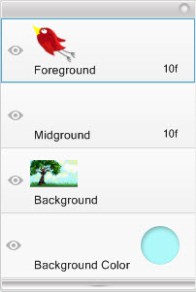
When a FlipBook is created, SketchBook Pro opens with a timeline at the bottom of your canvas, indicating you're in Animation Mode. You can now set keyframes and scrub through your animation, using the timeline that appears. The Layer Editor will contain these four layers, indicating a flipbook was created:

Foreground – Draw the content you want to animate on this layer.
Midground – Draw additional content you want to animate on this layer.
Background – Draw background elements on this layer.
Note:If the Background layer is changed and a keyframe is set the original background is lost.
Background Color – Click
 to access the Color Wheel, Color Palette, and Color Picker to set a background color of your drawing. Use other layers for strokes.
Creating a FlipBook
Select File > New FlipBook, then select either of the following to enter Animation Mode:
New Empty FlipBook – Create a new flipbook where you can draw the animated and static content.
New FlipBook from Image Sequence – Import a sequence of images from software, such as Maya or 3DMax, and bring them into SketchBook Pro. The imported images can be flattened PNG, JPG, and BMP or layered PSD images.
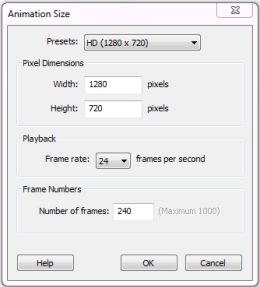
The Animation Size dialogue appears, containing options for setting the parameters your flipbook. Set the parameters you need:

Presets – Set the aspect ratio of the file. Select from NTSC, HD, Full HD, or custom.
Pixel Dimensions – When custom is selected, use these to set the width and height in pixels.
Playback – Set the frame rate per second.
Frame Numbers – Set the length (number of frames) of the flipbook.
Tap OK.
At this point, you will probably want to familiarize yourself with the timeline, setting and displaying keyframes, and how to import, export, and save your animation.