Customizing brushes
Jump to Mobile or Windows 10
The brushes we ship with SketchBook Pro are great and you can do almost anything with them. However, you may want to add to the existing custom brush sets in the Brush Library by creating new brushes to suit your purposes. Many users find they use the default Erasers, Flood Fill, Solid Paint Brush, and Airbrush. Yet, many still tweak the Pencils and Pens to their style. You can customize your brushes and save them.
Customizing brushes in SketchBook Pro Desktop
Check out this video on How to create custom brushes.
Create more brushes by copying a brush and changing its setting or creating a Do-It-Yourself brush.
Tap
 to access the Brush Library.
Tap a brush set.
Tap-hold
 and flick
  to select it.
Select a brush type to base your new brush on. By default, Current Brush is selected. Try starting with Standard.
Tap Create. A
 Do-It-Yourself Brush icon will appear in your brush set.
Once you create a
Do-It-Yourself brush, double-tap the icon to open Brush Properties and do the following:Adjust the pressure sensitivity – In the Advanced tab, set brush radius and opacity according to the amount of pressure applied to the stylus. In the Basic tab, make changes to its Size to vary its brush thickness as the stylus pressure changes.
The brush size values are a rough approximation of pixel size, but can vary.
For example, if lines are too thin to be drawn on the screen, they default to being wider. To resize a marker, try adjusting its opacity and stamp spacing. To make a bigger marker, set the opacity lower and the brush stamp spacing lower.
Change the opacity – In the Advanced tab, set opacity to vary brush opacity as the stylus pressure changes. To have the brush randomly changed opacity as you lay down strokes, see Randomize.
See Brush Properties for help on customizing various aspects of a brush. For adding color randomization, see How to randomizing color.
INFORMATION: If you have custom icons you’d love to assign to your custom brushes, check out How to create texture icons.
Customizing brushes in SketchBook Pro Mobile
The device you are using, as well as the version of SketchBook Pro you are running, will determine the brushes and tools available.
Customizing brushes on a tablet
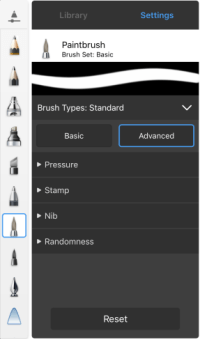
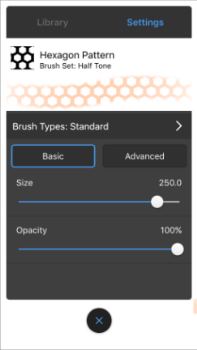
Once in Brush Properties, for many of the brushes, there will be two tabs. The first, Basic, contains basic settings, such as size and opacity. The second, Advanced, contains more complex settings, such as Tilt, Wetness, or Pressure. Tap a tab to access its properties. Flick up or down to access all properties. Due to the complexity of some brushes, this list can be longer.
- Tap
 to open the Brush Library.
 - In the Brush Library, select the brush you want to customize.
- Tap Settings to access Brush Properties and edit the brush.
- Tap the different tabs to access a variety of properties. Make the changes you need.
- To close the panel and return to the canvas, tap the canvas.
For Android and iPhone users
- Tap to open the Brush Library.
- In the Brush Library, select the brush you want to customize.
- Tap Settings to access Brush Properties and edit the brush.
- Tap the different tabs to access a variety of properties. Make the changes you need.
- To close the panel and return to the canvas, tap the canvas.
Customizing brushes in SketchBook Pro Windows 10
Create more brushes by copying a brush and changing its setting or creating a Do-It-Yourself brush.
Along the top of the Brush Palette, tap
to access the Brush Library.Tap a brush set.
Tap-hold
and flick  to select it. A Do-It-Yourself brush appears in that brush set.
Double-tap the Do-It-Yourself brush to open Brush Properties.
Tap the different tabs to access a variety of properties. Make the changes you need.
Your changes are immediately applied to the Do-It-Yourself brush. From here, if you want to change the type of brush from Standard to say Glow, check out What are Brush Types.
Setting a brush stamp and texture
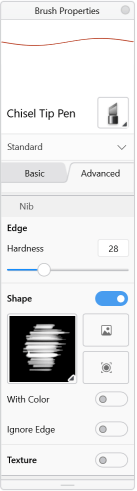
In the Advanced brush properties, you will see a section called Nib. This deals with the brush stamp – it’s edges, shape, and texture. With the addition of Texture, it seemed a good idea to talk a bit about all of this.
When you open Nib, you’ll see Edge, Shape, and Texture. Let’s look at each of these.
Changing the edge of your brush
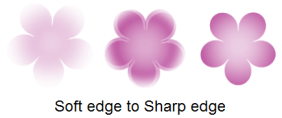
Use the Edge slider to make the edges of your brush softer or sharper.
- For a precision brush, you’d want to set Hardness to a very high value.
- For a pastel-type brush, you’d want to set Hardness to quite a small value.
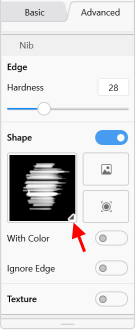
Defining the shape of your brush
If you check out How to capture textures and shapes, it uses Shape to capture a chain link to create a chain brush. Shape has three options for defining the shape of your brush nib:
Use
 to access a list of brush stamp shapes.
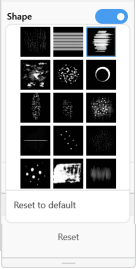
Use
 to use an image on your machine.
Use
 to take a screen capture of something on your screen.
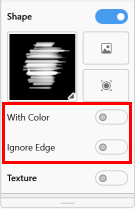
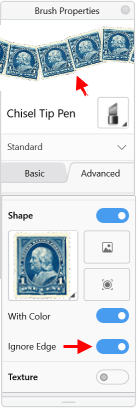
Once you’ve made a selection, you can also opt to use the current colors of the image or capture, by adding a check to With Color. Leaving it unchecked means the brush will use whatever color you set in the Color Editor. You can also decide to ignore the edges of the image or capture. By adding a check to Ignore Edge, your brush stamp shape will not be round.
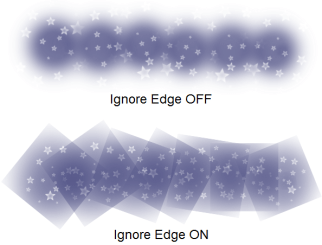
When would I use Ignore Edge
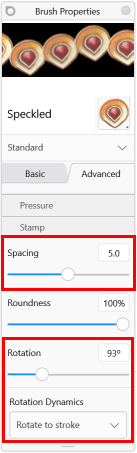
You might use Ignore Edge with the Ellipse tool and assortment of options in Brush Properties to create intricate designs. Start with Ignore Edge to help capture non-circular shapes. Then, use other options, such as Size, and in the Stamp section, Spacing, Rotation, and Rotate to Stroke, to adjust the orientation and size of the stamp. Here are examples of when you might use Ignore Edge:
If you have a shape that will be cut off with a circular stamp

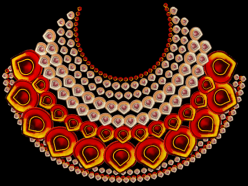
If you are looking to create a string of jewels, such as for a necklace, or embroidered trim.

If you want your shape to flow tightly around a corner.
