Importing brush icons
Jump to Mobile or Windows 10
The device you are using, as well as the version of SketchBook Pro you are running, will determine whether you can create custom brush icons.
Do you have custom brushes you’d like to share or sell? Would you like to export these brushes and have someone imports them, with your custom brush icons? You can!
Custom icons cannot be assigned to default brushes.
You can also create a brush icon by capturing the stamp of a brush, if this functionality is supported in your version of SketchBook. In Brush Properties > Advanced tab, scroll down to Texture and capture the texture stamp.
Here are some things to know when creating brush icons:
- Recommended size: 40 x 40 for LD and 80 x 80 for HD.
- If the image size is larger than the recommended, it will be scaled down to the recommended.
- If the image size is smaller than the recommended, its size won’t change.
- Supported image format: PNG, JPG, or TIFF.
Importing brush icons in SketchBook Pro Desktop
Once you have created an icon (see the recommended size and format above), the next step is assigning it to a brush.
With a brush selected, tap
 to open Brush Properties.
Tap the icon next to the brush name to open a menu of icons.
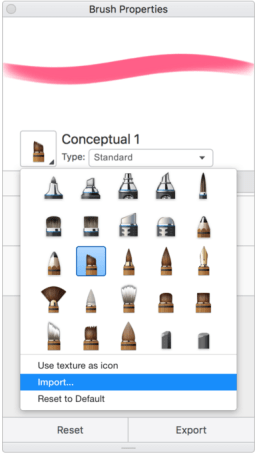
Select Import…
Only PNG, JPG, and TIFF images can be imported as brush icons.
In the dialog that appears, locate and select the icons you want to bring into SketchBook, then tap Open.
Importing brush icons in SketchBook Pro Mobile
SketchBook Pro Mobile doesn't currently support the importing of brush icons.
Importing brush icons in SketchBook Pro Windows 10
Once you have created an icon (see the recommended size and format above), the next step is assigning it to a brush.
Double-tap the brush to open Brush Properties.
Tap the icon next to the brush name to open a menu of icons.

Select Import…
Only PNG, JPG, and TIFF images can be imported as brush icons.
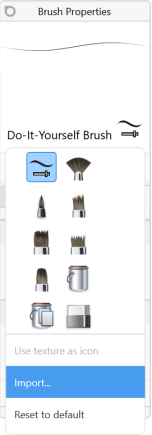
In the dialog that appears, locate and select the icons you want to bring into SketchBook Pro, then tap Open.