Enable APEX Cloth
To enable APEX cloth in a project
In the Stingray Editor, load a scene with a cloth simulation or import an FBX with APEX cloth.
In the viewport, select an object with cloth and then select the settings.ini file.
Turn on apex_cloth in the Property Editor.

You can also manually configure the cloth simulation budget using the attributes in the settings.ini file. See Stingray engine settings.ini file reference for more information.
Associate APEX cloth defintion to the unit's meshes.
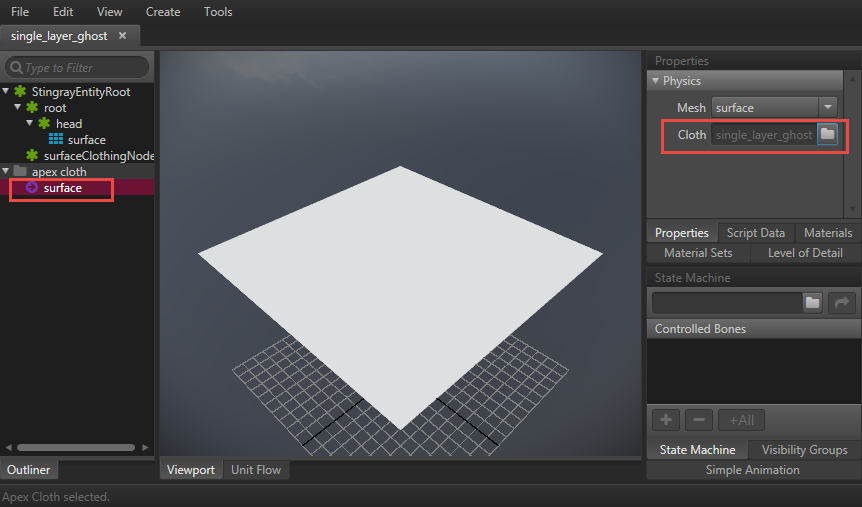
- Open the selected object in the Unit Editor.
- Select a mesh in the Unit Editor Outliner to bind to an APEX cloth.
Either select Create or right-click the mesh to select Add APEX Cloth Resource.
A cloth resource is created and is visible under the 'apex cloth' section in the Outliner.Select the cloth resource and in the Properties Panel, browse for the corresponding cloth definition (.apx files) to bind to the mesh.
Note: APX files are generated when exporting APEX cloth created with the PhysX DCC plug-ins. These files are automatically imported by Stingray when you import an FBX with APEX cloth.

Repeat steps 2-4 for each mesh that should be bound to an APEX cloth.
Restart the editor engine (Ctrl + F6).
Your cloth simulation plays in the viewport.