Shading a Globe
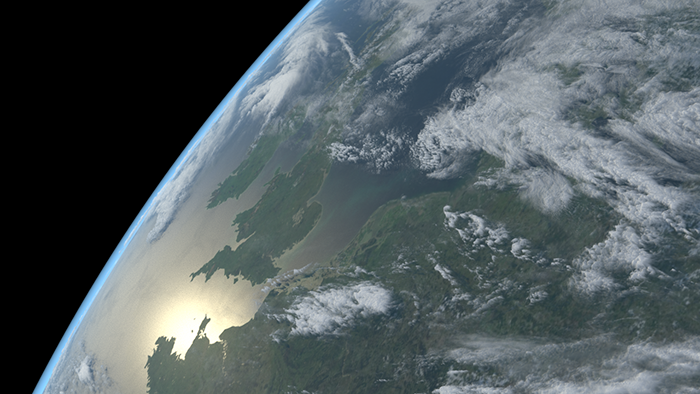
In this tutorial, we will go through the steps of creating a realistic globe and clouds using only shaders. We will add some atmosphere to the horizon with a volume and standard_volume shader. We will also light the scene using a physical_sky connected to a skydome_light light. This scene would make an ideal backdrop for a fictional film about some unfortunate astronauts, for example. Many thanks to Will MacNeil at MPC for providing the scene used for this tutorial.
The final C4D (R18) scene can be downloaded here.
The tutorial is broken up into the following stages:
You will need to download and use these high-resolution textures for use with this scene. Remember to convert the textures to .tx format prior to rendering.
 |
 |
 |
 |
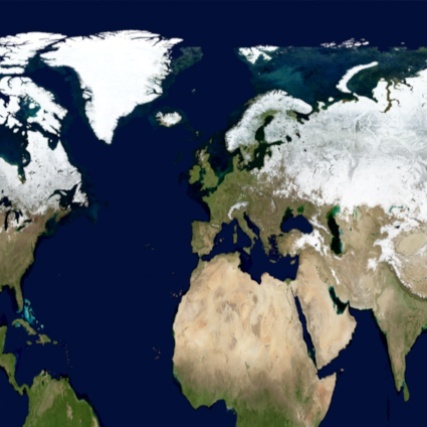
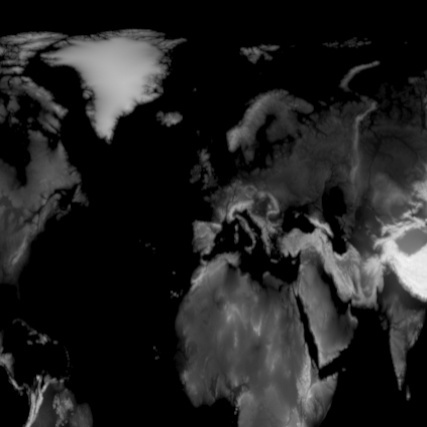
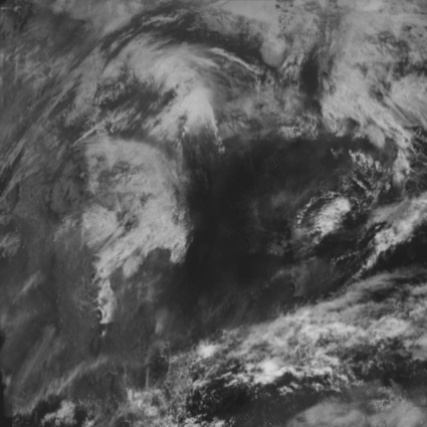
| Earth Color (base_color) | Earth Elevation (displace) | Clouds (emission, opacity, displace) | Earth Mask (specular) |
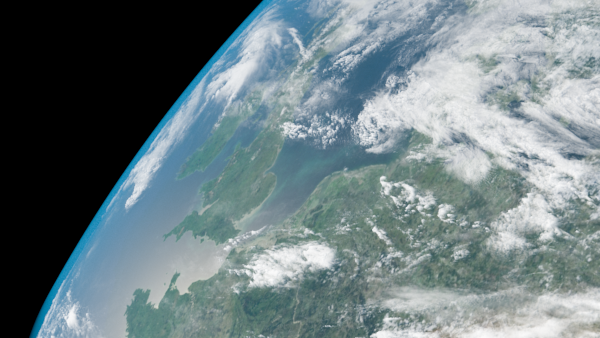
- Begin by opening the start scene. This scene contains an object called Earth and Cloud. We will apply the respective shaders to these two objects.
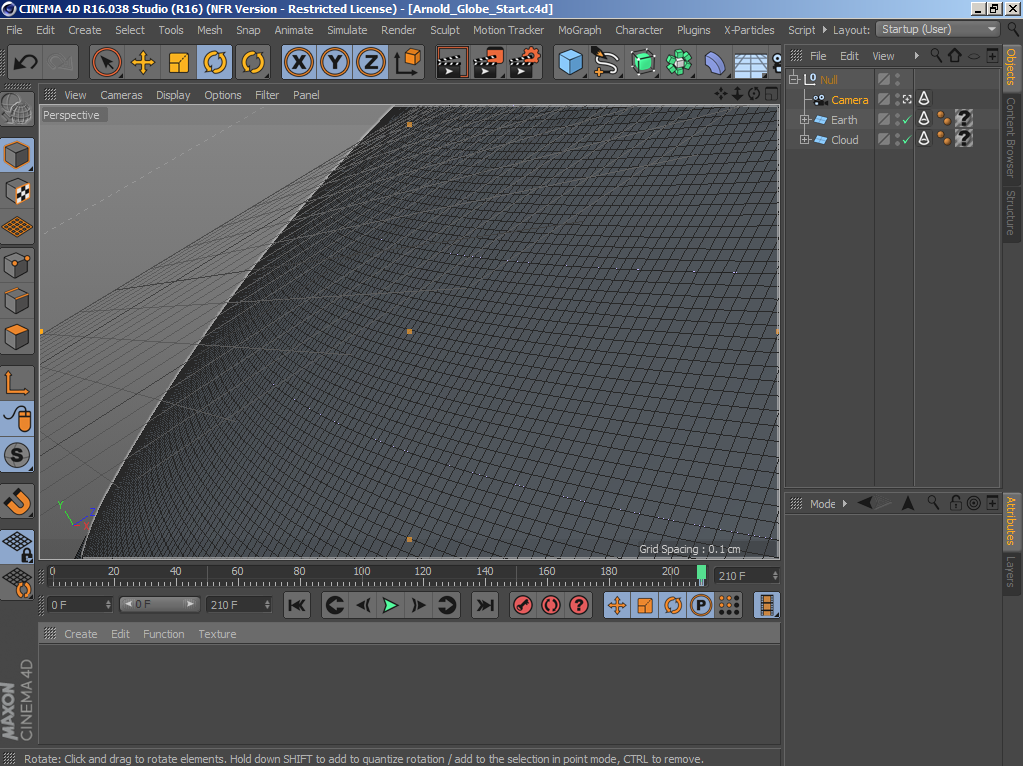
Start scene containing Earth and Cloud objects
- Create an Arnold Sky to illuminate the scene. Change the type to physical_sky. Reduce the Camera visibility in the skydome_light so that the physical_sky is not visible to the camera (as we are in space). You will need to change the direction of the sun in the physical_sky so that it reflects off the sea. You will need to do this step after you have added some specularity to the Earth surface shader in order to see the sun's specular reflection.
Earth Shader
Hide the Cloud object for the time being. We will focus on the Earth shader first.
Diffuse
- Assign a standard_surface Surface shader to the Earth object and rename it 'Earth'. Create an image texture and under Image name open the texture Earth Color. Connect the image texture to the standard_surface.base_color. This will give us the basic diffuse color for the Earth.
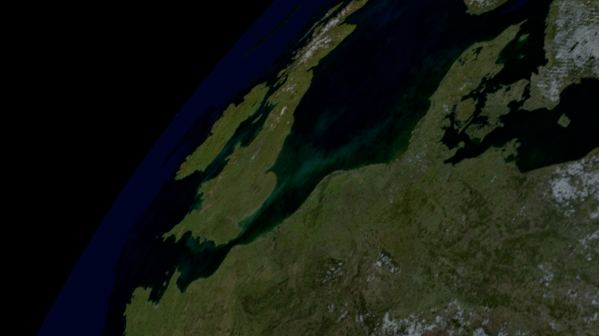
'Earth Color' map connected to base_color of Earth standard_surface shader
Specular
Now we want to add a specular map to determine where the sea is reflective and where the land has no specularity.
- In the Arnold Shader Network Editor select the Earth Standard Surface shader. Create an image texture and open the file Earth Mask . This is the mask that will determine what is shiny (white) and what is matt (black). However, if we look at the image we can see it is the opposite of what we want. Therefore we need to invert the map. We can do this with a ramp texture.
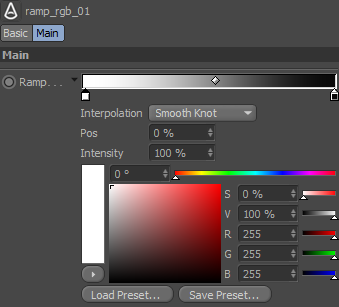
- Create a ramp texture and connect it to the specular_weight of the Earth standard_surface shader.
- Connect the image texture to the input of the ramp texture.
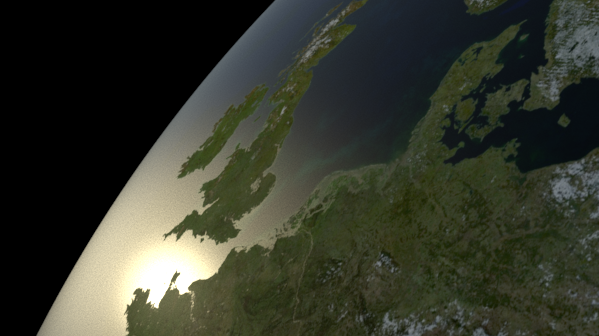
Land/sea shininess determined by 'Earth Mask' texture connected to specularity of Earth shader
Displacement
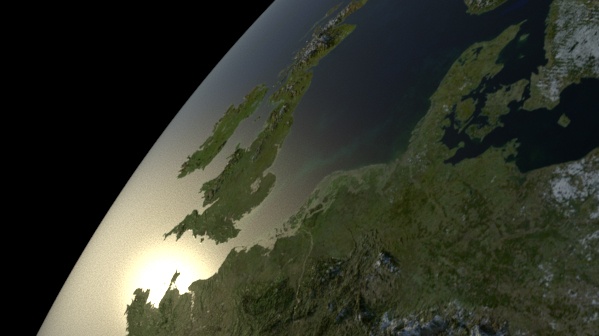
The Earth's surface is looking a little bit flat. We can add some elevation to the surface using the displacement map - 'Earth Elevation'.
Create an image texture and connect it to the Arnold Displacement port of the Earth Standard shader. Under Image name open the texture Earth Elevation. In order to see fine detail in the displacement, we will need to add some subdivisions to the Earth geometry.
Select the Earth geometry and right click on it to create an Arnold tag - C4DtoA Tags> Arnold Parameters. Under the subdivision tab, change the type to catclark and increase the iterations to 4. Under the Displacement tab, increase the height to around 100cm.
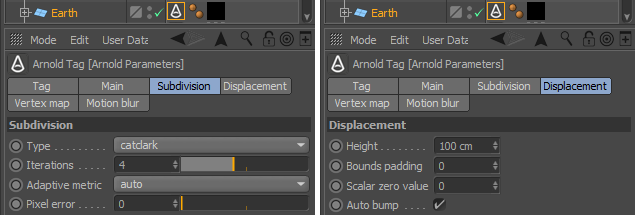
Earth Displacement settings
 |
 |
Earth terrain is being displaced using 'Earth Elevation' texture
Clouds Shader
The clouds shader is a little bit simpler to set up. We will use the clouds image and connect it to the emission, opacity, and displacement of a standard_shader.
- Create a Standard Surface shader for the clouds. Rename it to Clouds and assign it to the Cloud object.
- Create an image texture and open the Cloud image. Connect the cloud image texture to the Geometry > Cutout opacity, Emission Color attributes and the Arnold Displacement port (remember to disable ' Opaque' for the cloud object).
- Increase the Emission Weight to around 0.25. This will determine how bright the clouds appear.
- Now we need to repeat the steps for the Cloud object that we did for the Earth object for the Displacement of the clouds so that they look like they are floating over the Earth's surface. Select the Cloud geometry and right click on it to create an Arnold tag - C4DtoA Tags > Arnold Parameters. Under the Subdivision tab, change the type to catclark and increase the iterations to 4. Under the Displacement tab, increase the height to around 1.5 cm.
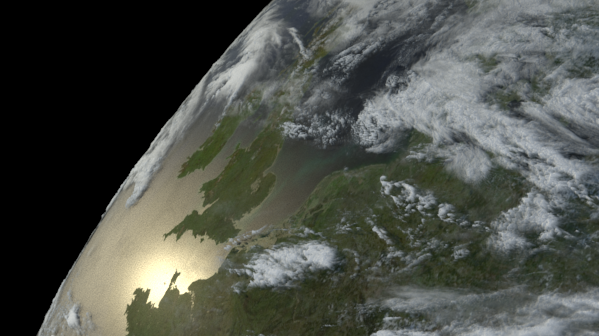
Displacement, opacity, and emission of clouds driven by Clouds texture map
Atmosphere Volume
Finally, we will create some atmosphere, visible on the horizon, using a volume.
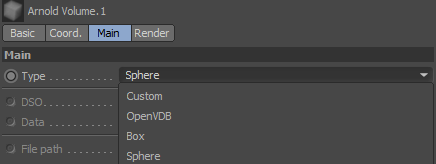
Create an Arnold Volume - Plugins> C4DtoA> Arnold Volume and change the type to sphere.
Scale the volume so that it covers the Earth object.
Create a standard_volume shader and assign it to the volume.
Change the scatter_color to a light blue color. Increase the transparent_depth to fine-tune the effect.
That concludes this tutorial on how to realistically shade a globe. Finally, why not try keyframing the rotation of the cloud and Earth to create a fake time-lapse effect or animate an astronaut plummeting to their death?