
Issue:
How to create a data shortcut in Civil 3D for Civil 3D objects? Also, you want to use that shortcut in a new drawing as a Data Reference.Environment:
This article applies to the operating systems listed. If your operating system is not shown, it may be because it is not supported or because support information is not yet available. For details on operating systems no longer supported by the vendor, see Product Support Lifecycle.Solution:
To create a Data Shortcut that you need a source or design drawing that contains the Civil 3D object (such as Surface, Alignment, Pipe network, Corridor, etc.) The Data Shortcut will be referenced into a new drawing, becoming a read-only reference of the source object.
The following instructions to create and use Data Shortcuts assumes that the Civil 3D object has already been created:
Creating the Data Shortcut in the Source Drawing
- Open up source drawing containing the Civil 3D object.
- Set the Working Folder.
- Select the Data Shortcuts in the Prospector tab.
- Right-click.
- Select Set Working folder.
- Alternatively, In the Manage tab > Data shortcuts panel > Set working folder.
- Select the location for the working folder.
- Press OK.
- Create a New Shortcuts Folder: Manage tab > Data Shortcuts panel > New Project Data Shortcuts Folder.
- Name the Project Data Shortcuts folder; note, that the project name is displayed next to the drawing name on the Civil 3D program title bar to indicate that the DWG is associated with the project.
- Create Data Shortcuts: Manage tab > Data Shortcuts panel > Create Data Shortcuts.
- Associate the current drawing to the Data Shortcut Project: Toolspace > Prospector > Right-click the Data Shortcut node > select Associate Current Drawing (the Project name should display in the Civil 3D program title bar)
- Select the Civil 3D object (surface, alignment, pipe network, etc.) you wish to create a shortcut folder.
- Press OK.
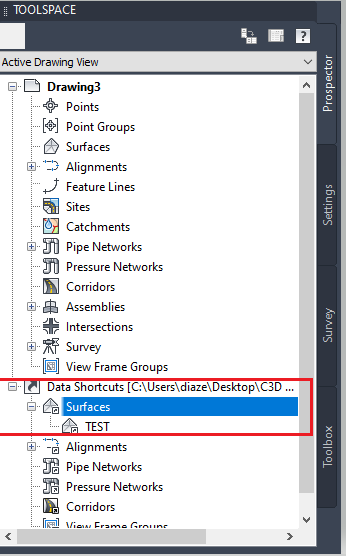
- Check that the shortcut was created by expanding the Data Shortcuts node in the Toolspace > Prospector tab.
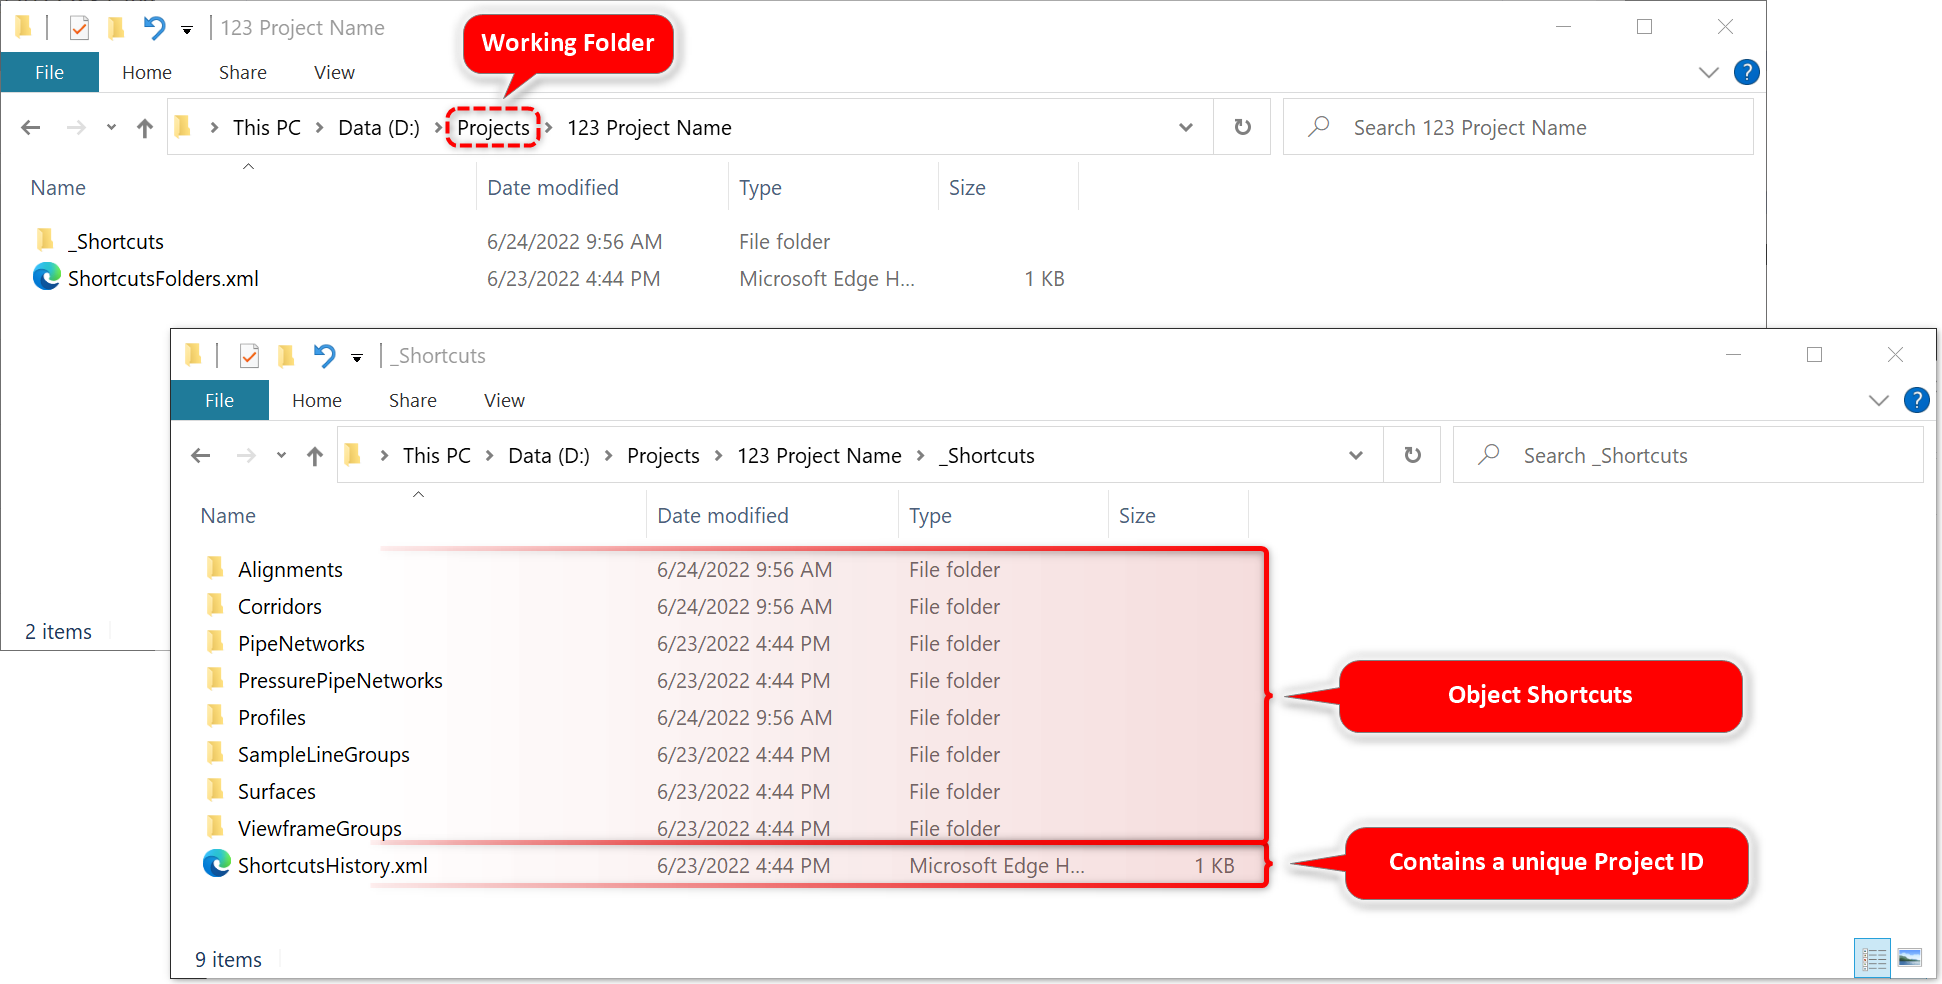
In Windows File Explorer, a Project Data Shortcut Folder should be created by Civil 3D with the following structure:
To use the Data Shortcut as Data Reference in a new Drawing:
The shortcut created can be Data Referenced in a new drawing (for this example, we are bringing in a surface called "Test" into a new drawing.- Create a drawing.
Note: To avoid creating an mms file for large surfaces in the new drawing, turn off the "Store Reference Surface" option in the Drawing per: To Work With Surface References.
- Check that the shortcuts folder is pointing to the same Working Folder. See step 1 from the previous section.
- Associate the drawing to the current Data Shortcut Project folder (verify that the project name is displayed in the Civil 3D program title bar)
- Expand the Surfaces shortcuts data node.
- Select the "Test" surface.
- Right click.
- Select Create Reference.
- If desired, edit the style, layer, name, description, or render material.
- Press OK.
For more information see the following Tutorial: Using Data Shortcuts. This tutorial goes over similar workflow.
- The example files are located here: C:\Program Files\Autodesk\AutoCAD 20XX\C3D\Help\Civil Tutorials\Drawings.