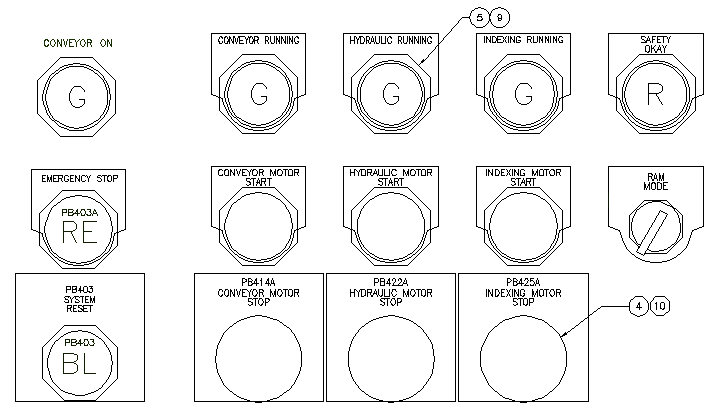
Add nameplates to the panel layout and link them to existing component footprints.
Nameplates can be inserted from the main panel icon menu or from a vendor menu.
Insert an automotive type nameplate
- Click
 . Find
- In the Insert Footprint: Panel Layout Symbols dialog box, click Nameplates.

- In the Panel: Nameplates dialog box, click Nameplate, Catalog Lookup.
- In the Nameplate dialog box, Choice A section, click Catalog Lookup.
- On the Catalog Browser dialog box, enter the search string AB 800T Automotive.
- Click
 .
.
- Change the catalog assignment to 800T-X701 Red Blank Name Plate and click OK.
- In the Nameplate dialog box, Choice A section, verify:
Manufacturer: AB
Catalog: 800T-X701
Click OK.
- Respond to the prompts as follows:
Select objects: Select PB403 (1), right-click to the place the nameplate
As you select each footprint to insert, the nameplate block inserts. The Panel Layout - Nameplate Insert/Edit dialog box displays where you can annotate the nameplate and assign a BOM item number if needed.
- In the Panel Layout - Nameplate Insert/Edit dialog box, click OK.
Insert a half round nameplate
- Click
. Find
- In the Insert Footprint: Panel Layout Symbols dialog box, click Nameplates.
- In the Panel: Nameplates dialog box, click Nameplate, Catalog Lookup.
- In the Nameplate dialog box, Choice A section, click Catalog Lookup.
- On the Catalog Browser dialog box, enter the search string AB 800T.
- Click
.
- Change the catalog assignment to 800T-X59E Gray Custom Text Name Plate and click OK.
- In the Nameplate dialog box, Choice A section, verify:
Manufacturer: AB
Catalog: 800T-X59E
Click OK.
- Respond to the prompts as follows:
Select objects: Select PB403A (2), right-click to place the nameplate
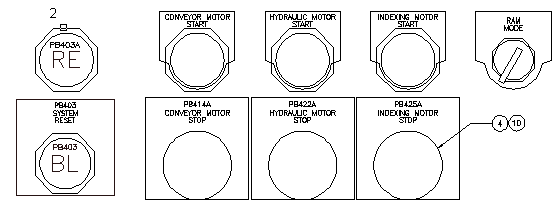
- In the Panel Layout - Nameplate Insert/Edit dialog box, click OK.
The nameplate is inserted.