
Display the Customize User Interface (CUI) Editor
- Click
 .
Find
.
Find
Create a Flyout Toolbar from Scratch
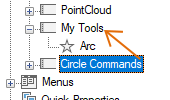
- In the Customize tab, Customizations In <file name> pane, click the plus sign (+) next to the Toolbars node to expand it.
- Right-click the toolbar to which you want to add a flyout toolbar. Click New Flyout.
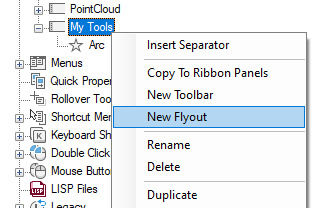
A new toolbar (named Toolbar1) is created and a new flyout that references the toolbar is placed at the bottom of the toolbar you selected.
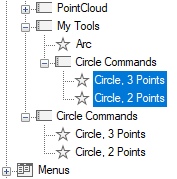
- Right-click the toolbar named Toolbar1, not the flyout. Click Rename and enter a new name.
 Note: Renaming the toolbar will not change the name of the flyout. You must select and rename the flyout independently if you want them to both have the same name.
 - In the Command List pane, drag the command you want to add to the toolbar flyout in the Customizations In
<file name> pane.
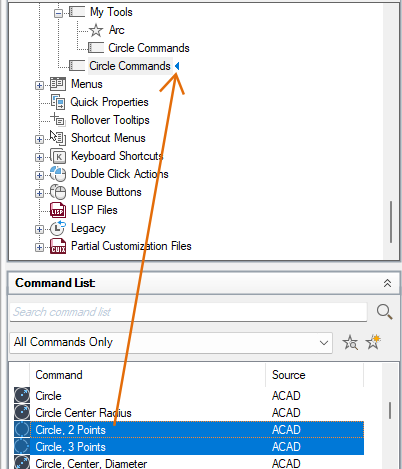
- Click Apply.
Create a Flyout from Another Toolbar
- In the Customize tab, Customizations In <file name> pane, click the plus sign (+) next to the Toolbars node to expand it.
- Click the plus sign (+) next to the toolbar to which you want to add a flyout toolbar.
- Locate the toolbar you want to use as a flyout. Drag the toolbar that you want to create a flyout from and drop it onto the toolbar where you want to place the flyout.
- Click Apply.
Create a Flyout from a Pull-down Menu
- In the Customize tab, Customizations In <file name> pane, click the plus sign (+) next to the Toolbars node to expand it.
- Click the plus sign (+) next to the toolbar to which you want to add a flyout toolbar.
- Click the plus sign (+) next to the Menus node to expand it.
- Drag the pull-down menu that you want to create a flyout from and drop it onto the toolbar where you want to place the flyout.
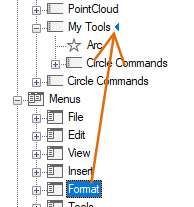
A new flyout on the toolbar is created and new toolbar is also created based on the pull-down menu that was used.
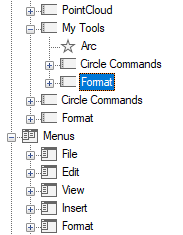
- Click Apply.