
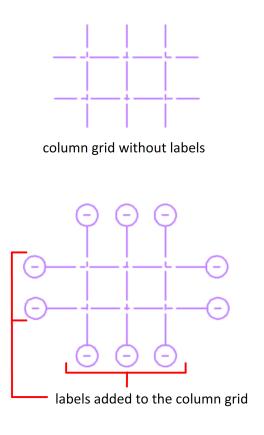
You can add, remove, and edit custom column grid labels.
Adding Labels
- Select the custom column grid.
- On the ribbon, click Column Grid contextual tab
 Label panel Add labels.
 - Enter 10 and press Enter for the label extension value.
When you add labels, the following characteristics are maintained:
- If there is no previous value assigned, labels are added to every end of the grid line with a default value as ‘-’. Otherwise, existing values are used.
- If there is a label on a grid line and you add another label, the existing label and its value is maintained. Duplicate labels are not generated on the grid ends.
Editing Labels
- Select the custom column grid.
- On the ribbon, click Column Grid contextual tab Label panel Edit labels.
- Click the first custom column grid line.
- Click the second column grid line.
- At the command prompt, enter a label value and press Enter.
When you edit labels, the following characteristics are maintained:
- You can select only one custom column grid line with a label at a time.
- The selection order determines the automatic labeling order which is generated after you enter an initial value.
- The label values of grid lines that are not selected are not affected.
- If the new value has more than one symbol (example: dash, underscore etc.), only the value of the last character or number is incremented. For example: A-1.4, A-1.5, A-1.6.
- The label value can be of any alphanumeric character. There is no limit on which character to enter.
Note: When you add a grid line to an existing custom column grid, labels with the default value as ‘-’ are automatically generated without the auto-labeling support. When you remove a grid line, automatic labeling is not supported.